In this 3DShoemaker tutorial, I’m going to get into how to 3D print orthotics (sometimes referred to as insoles) using standard desktop 3D printers.
A variety of techniques exist for manufacturing orthotics. For mass production, injection molding is usually used and the result is called an insole. Custom orthotics, on the other hand, are usually either vacuum formed or CNC milled. That being said, 3D printing of orthotics is definitely becoming more common. There are companies out there doing this with commercial 3D printers using technologies like selective laser sintering. Such technologies may be too expensive for small business and certainly for individuals. But orthotics can actually be 3D printed just fine on regular desktop 3D printers with common filaments.

3D Models for 3D printed orthotics
When looking to 3D print orthotics, the first thing you’ll need are 3D models. These can be found here on 3DShoemaker.com. The three options currently are full length, 3/4 length, and 3/4 length shell. You’ll see each can be ordered as a stock size if you have your own grading method. Or they can be ordered as a parametric model you can customize in the 3DShoemaker plugin for Rhino3D. Alternatively, you can choose the customizable option to get them customized based on your needs. If you choose this last option, the 3D models will be emailed to you after the lead time stated on the ordering form.
If you plan to order a shoe last model too, you can select the ‘Match to a Shoe Last’ in the ‘Sizing’ drop down to get the orthotic fit to that particular shoe last rather than just getting a standard size. Alternatively, you can choose to order the orthotic 3D model within the shoe last ordering form itself, though fewer customizing options are available there.
The ordering form also allows you to choose your level of customization ranging from basic to advanced to bespoke. Basic allows you to just select from four arch heights, whereas advanced lets you set such options as orthotic thickness and bespoke actually allows you to submit a 3D model of your foot.
Materials for 3D Printing Orthotics
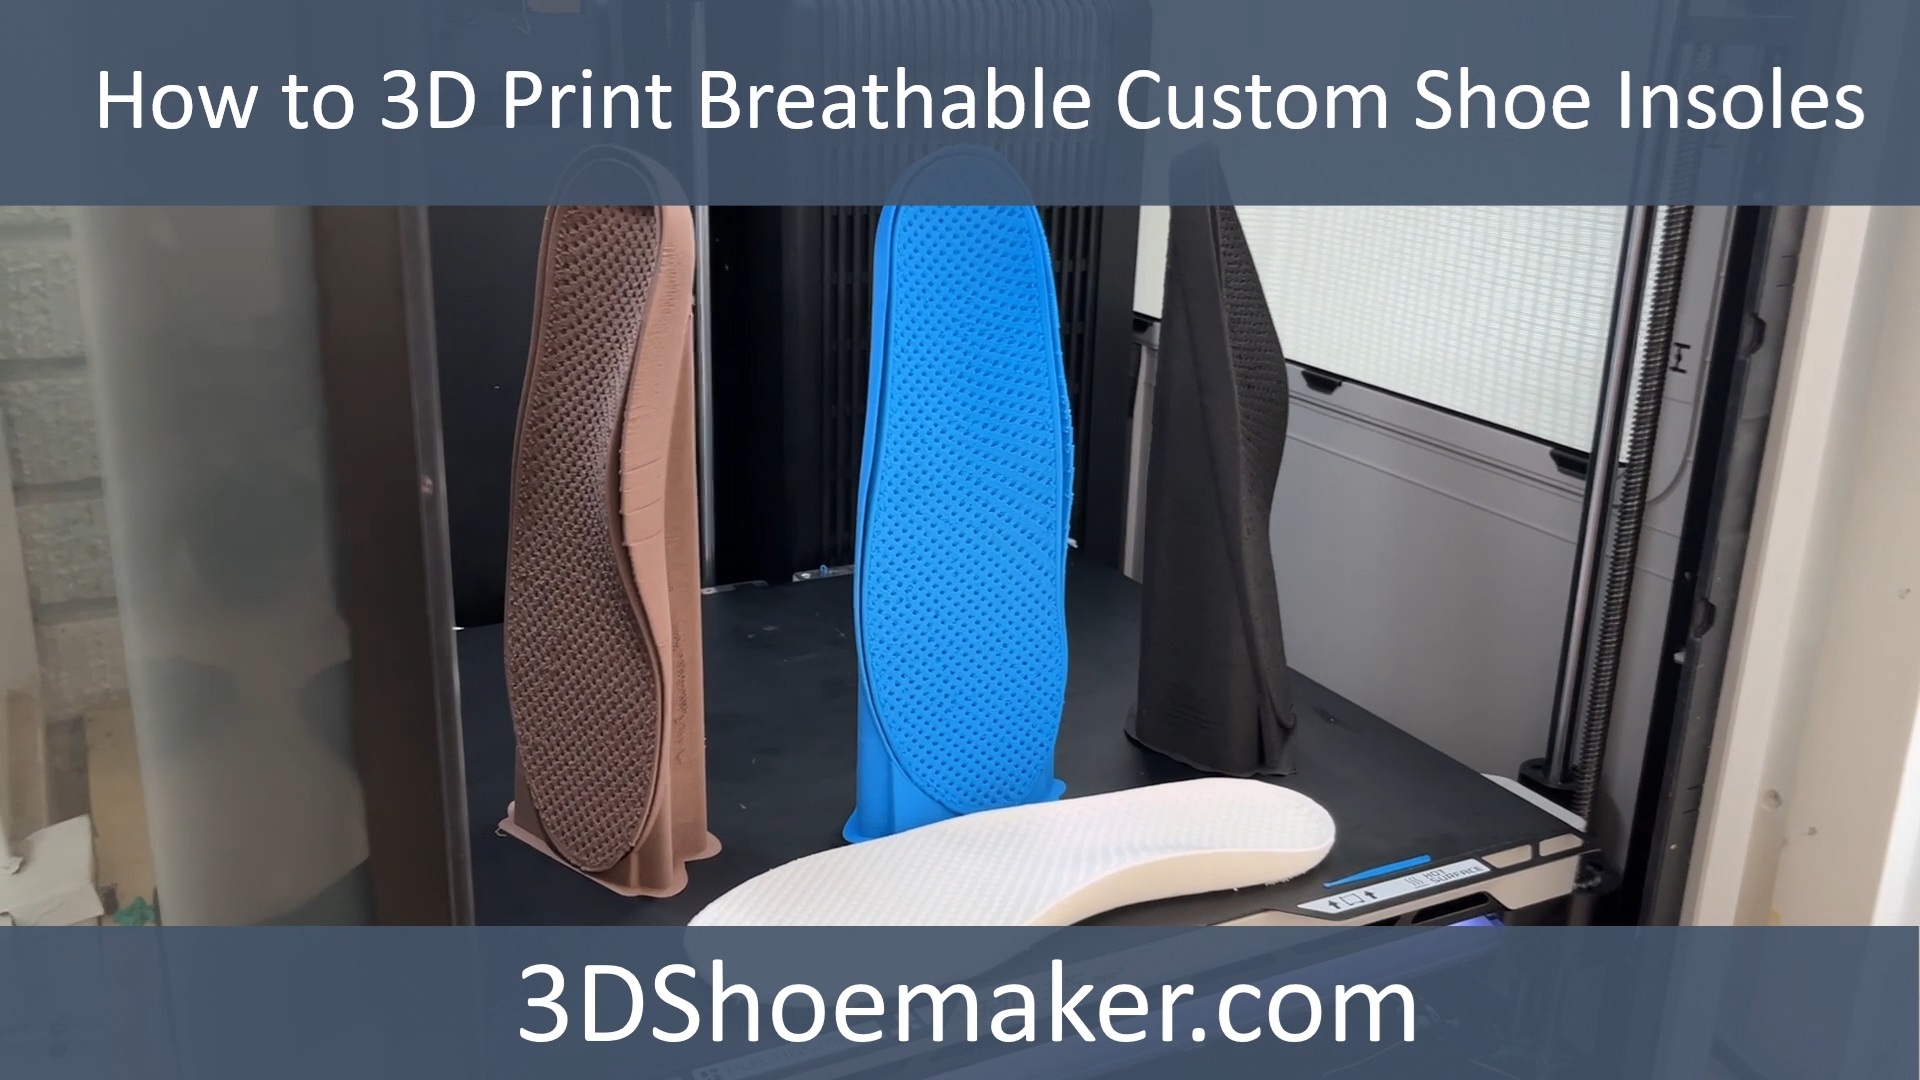
If you are 3D printing a 3/4 shell orthotic, you’ll want a stiff but not brittle material. PETG might be a bit to flexible and not strong enough unless the shell thickness is at least 3mm thick. PLA is likely too brittle. One possible better alternatives would be something infused with carbon fiber.
For 3/4 and full length orthotics with full bodies rather than shells, a flexible material like TPU or TPE is ideal. There are many different hardnesses available for these materials. 95A is perhaps the most common, but might be a bit too stiff. That being said, a lesser infill can compensate for this. Note that harder materials are easier to 3D print, so it might be worth it to figure out how to compensate with lower infill. As far as infill pattern, gyroid is a great option for achieving uniform properties. Other things to consider with flexible filaments are speed and temperature. A slow speed is crucial as the printer is essentially pushing a limp noodle. And you want to get the temperature just right to avoid stringing, which I find to be maybe 10 degrees cooler than manufacturer specs. The filament should also be as dry as possible.
If you want a softer top layer, whether 3/4 or full length, you can always attach a sheet of leather, poron, or something similar. If the orthotic will be in direct contact with skin, you’ll definitely want to do this.
There are a lot of interesting experimental filaments coming out which could be used to 3D print orthotics and for other footwear applications too. I plan on testing many of these out. Be sure to subscribe to 3DShoemaker to learn about these.
Support Material for 3D Printed Orthotics
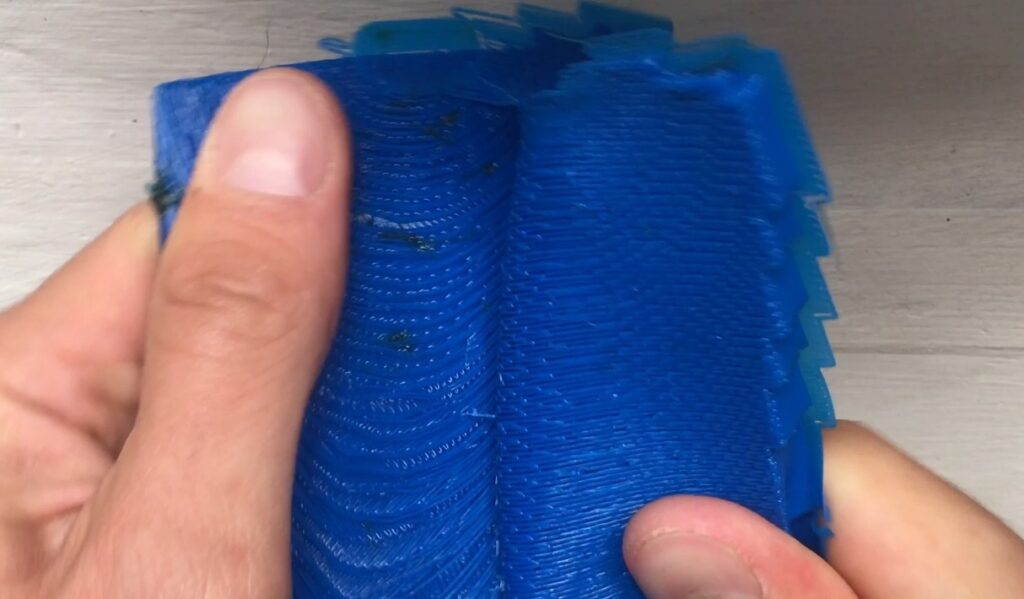
The trickiest part about 3D printing orthotics is that you likely need some form of support material, and this can be hard to remove. I’ve found the most critical support material setting is ‘Top Contact Z Distance’. It’s the vertical gap between the top of the support material and the actual part. If it is too small, your part gets fused to the support material. If it is to large, the the bottom layer of your part ends up sagging. I find the right amount is about the same value as the layer height used for the print. As you will see shortly, with the right settings TPU support peels away quite nicely.
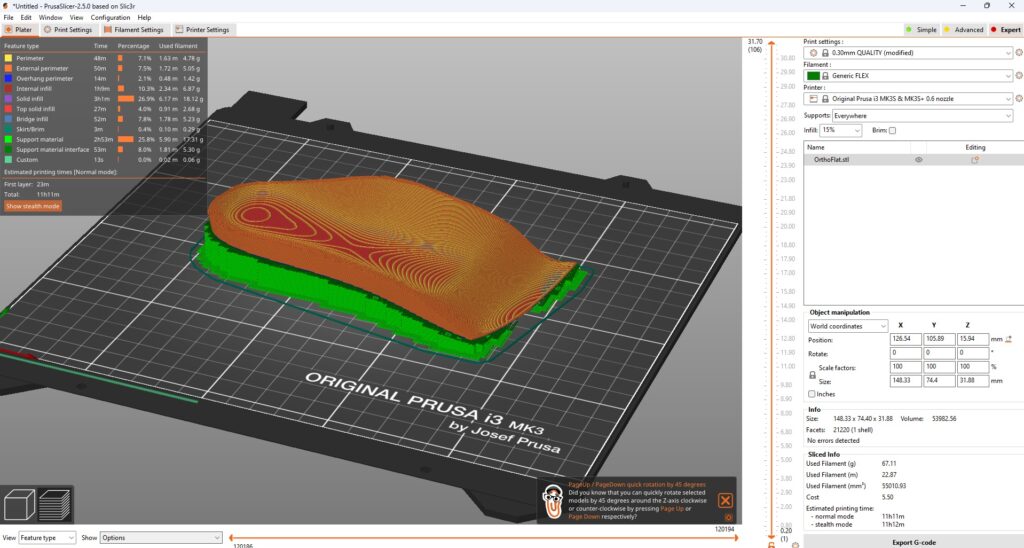
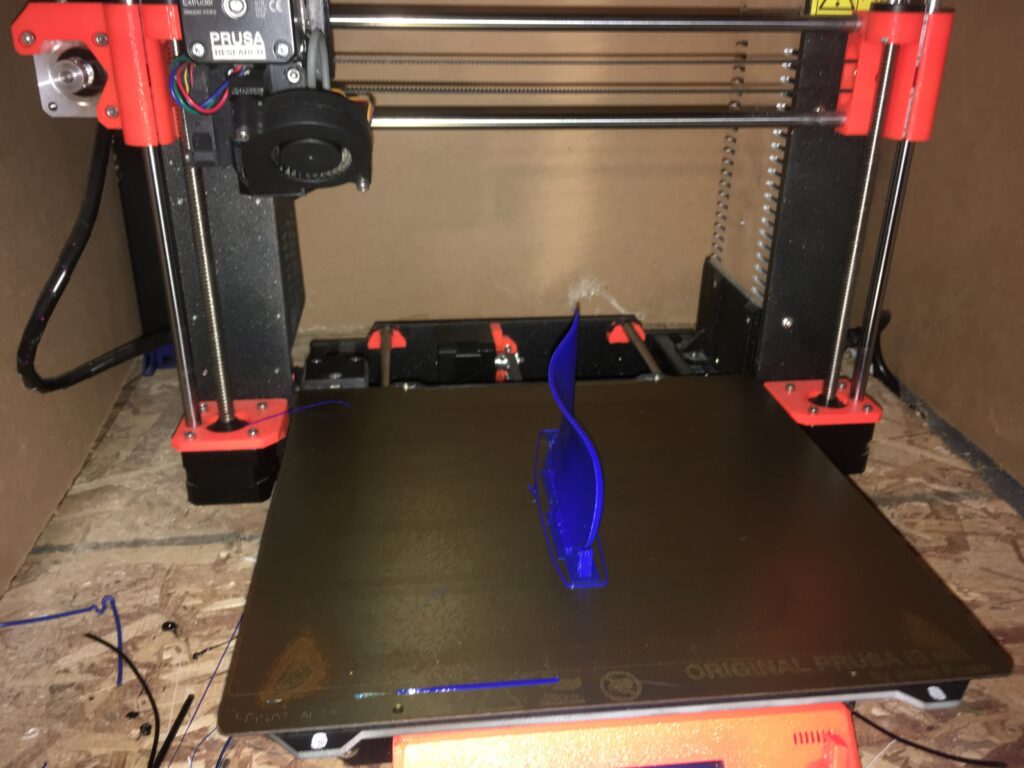
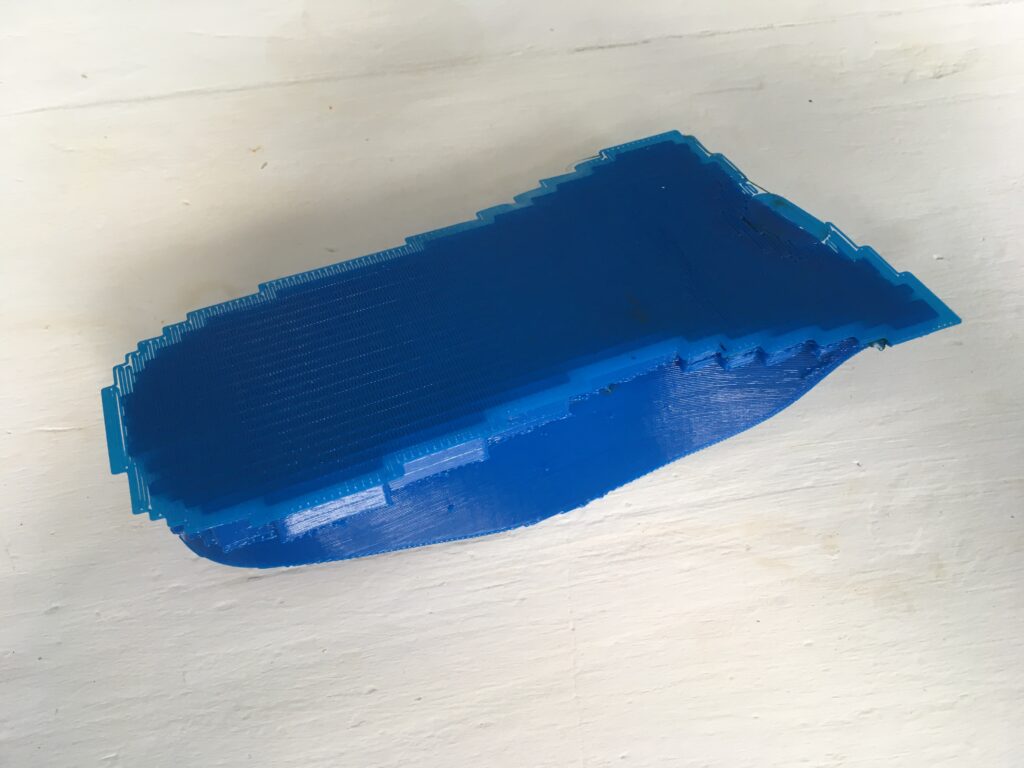
Support material for PETG, on the other hand, can be trickeries to remove as it doesn’t peel away like a flexible filament. For this reason, 3/4 shell orthotics printed with a stiff material should probably be printed on their front edge in a vertical orientation with a few layers of support that are just enough to keep it vertical. If you have a bed slinger 3D printer like the Prusas, it’s good to orient the orthtic such that the width is being slung, as it’s less likely to fall over.
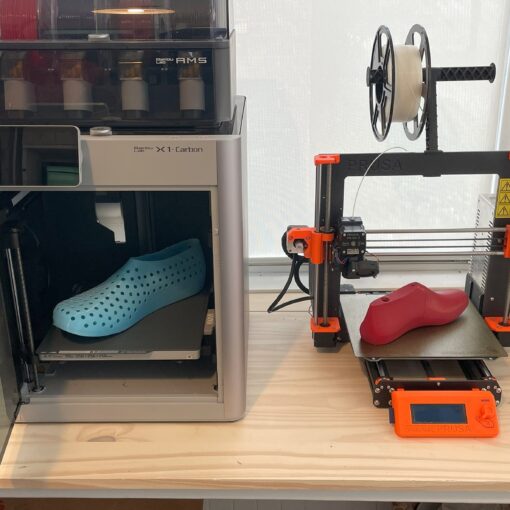
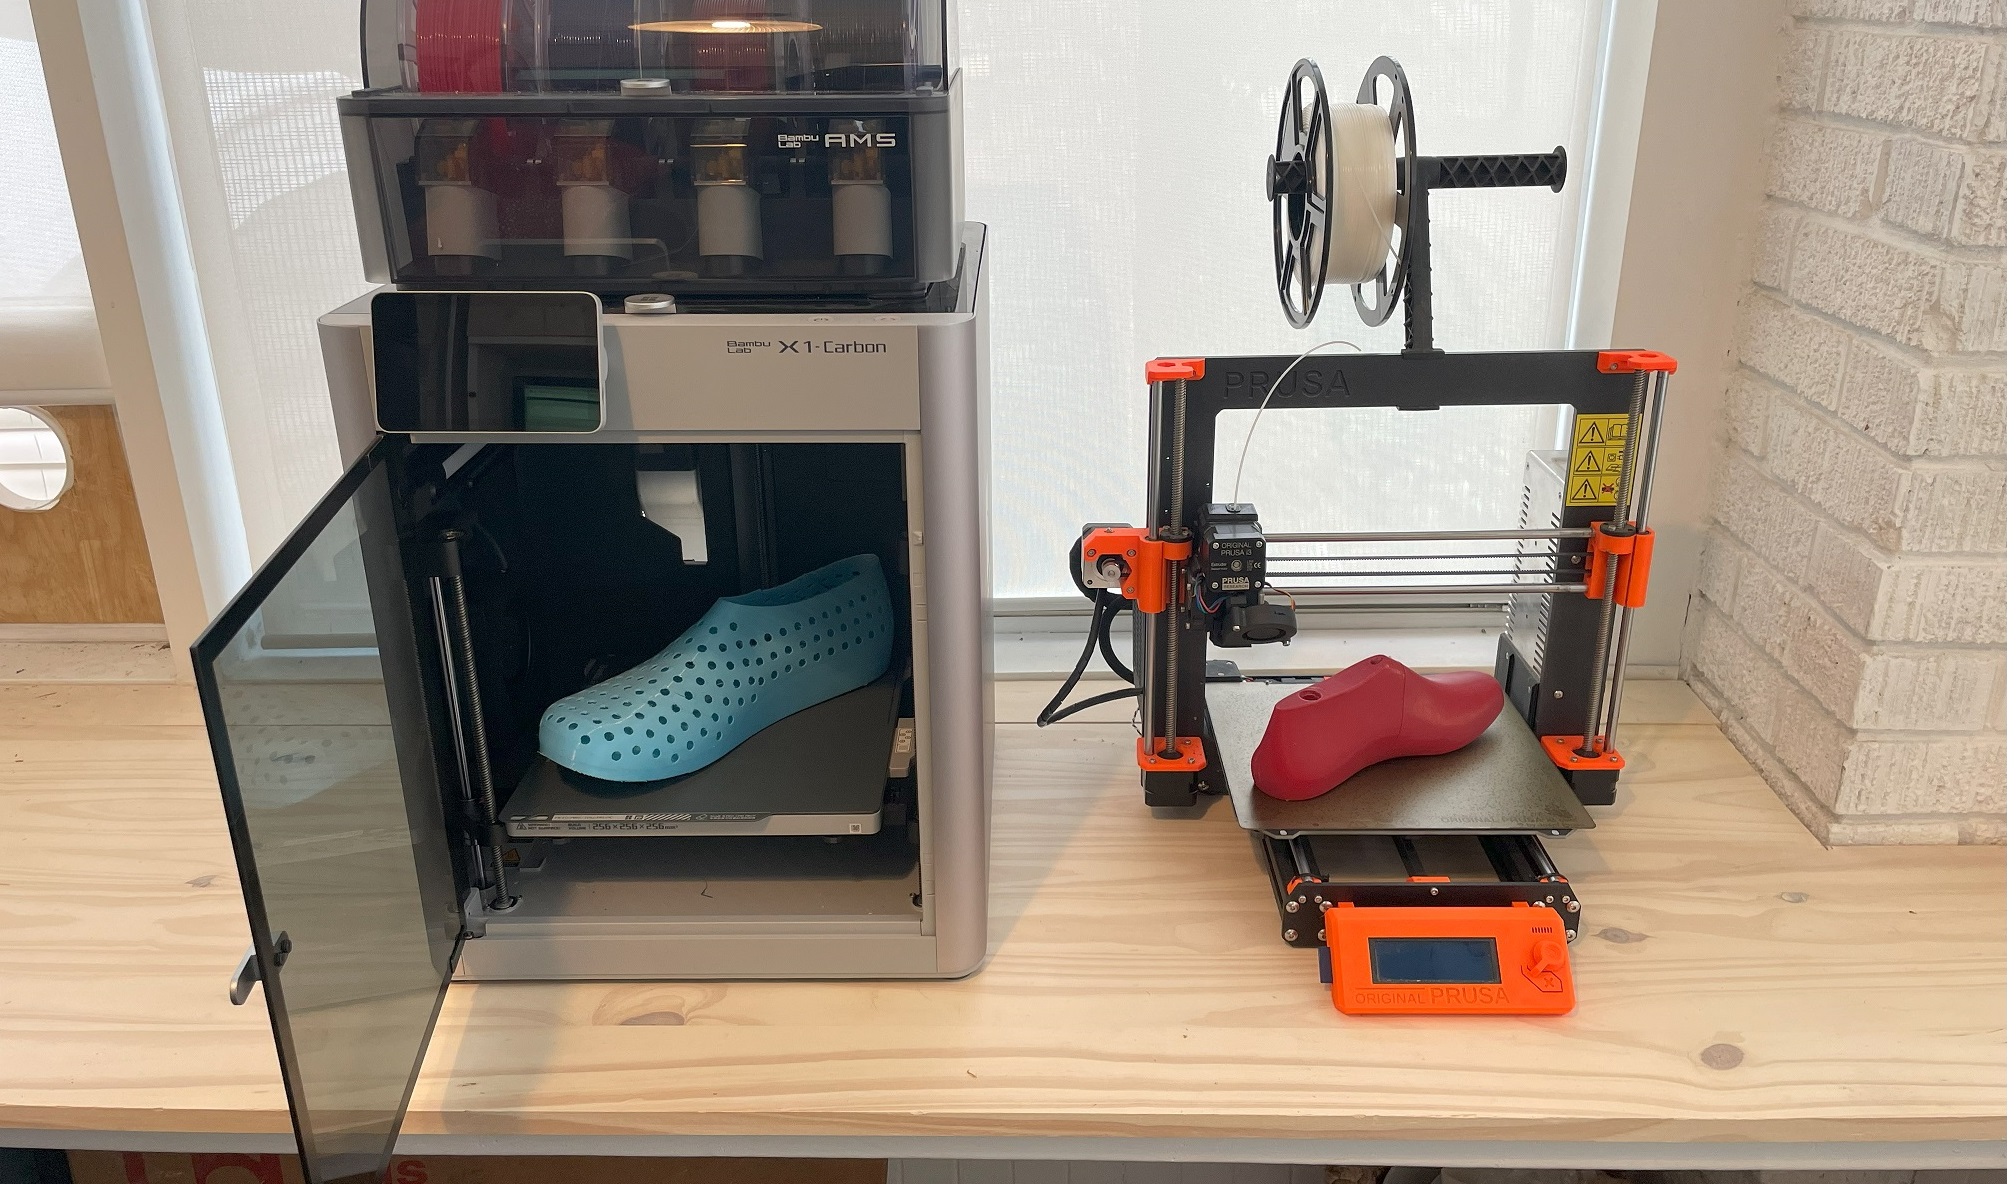
3D Printers for Printing Orthotics
As I mentioned at the beginning of this tutorial, larger companies are 3D printing orthotics with expensive 3D printers using technologies like selective laser sintering. But all you really need is a desktop printer like the Prusa i3 MK3/4, which is what I’m using in the time-lapse video. A key feature of the Prusa printers is the direct drive extruder, which works better for flexible filaments than bowden. It’s like you are trying to push a limp noodle after all, so you want to do the pushing as close to the nozzle as possible.
One disadvantage of 3D printing orthotics on desktop printers is that prints can take a long time. But time isn’t much of an issue for individuals looking to 3D print their own orthotics. And small businesses can have a small 3D print farm running for quite cheap to get the production volume they require.
The final step is to peel away the support material, which can be quite satisfying if the right slicer settings were used. That’s all for this 3DShoemaker tutorial. If you found it helpful, please subscribe to the channel for more updates. Thanks for watching.


2 thoughts on “How to 3D Print Orthotics”
Hi. What scanner and software do you use for the scanning of the foot? Im using AmFit now for milling orthotics but I’m looking to try out 3d printing for custom footbed/orthotics. Thanks.
You could try this foot scanner I’ve heard works well for a decent price. You could also just use an iphone true depth (I’ll be doing a tutorial on this soon. For orthotic design software, I suggest my Rhino Plugin, 3DShoemaker.