In this 3DShoemaker post, I’m going to show you a new way to 3D print flexible orthotics on FDM 3D printers. The orientation used allows for even large sizes to be printed on average size 3D printers and even multiple pairs may be possible. The approach relies on more intelligently designed support material than you get from a conventional slicer.
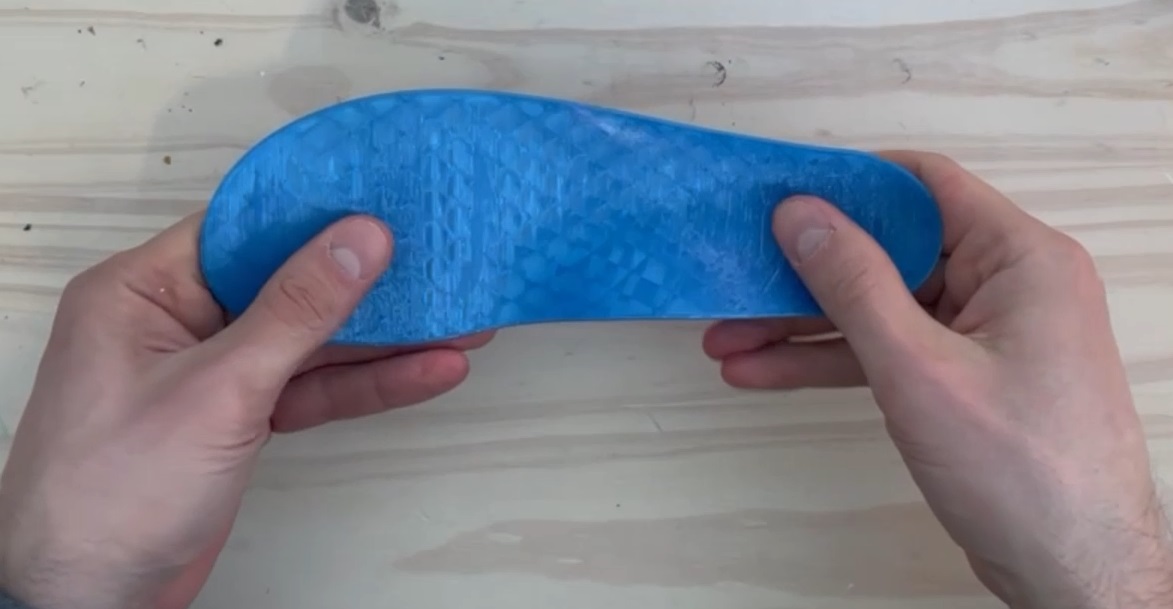
3D printing flexible orthotics and insoles, usually with TPU filament on FDM 3D printers, is becoming somewhat common place. The typical approach is to simply print the orthotics in a horizontal position and the design is flat on the bottom such that support material isn’t required. But the bottom of a shoe last is not flat. For instance, there is often some heel height, toe spring, and some roll in the heel and ball joint areas. This mismatch between the orthotic bottom surface and the shoe last bottom surface will affect fit, likely adversely.
That is why I’ve tried to print with support material, as I explained in this previous 3DShoemoaker post. But conventional support material is wasteful and a pain to remove. And if you are lucky enough to have a competent multi-material printer where the part material can be TPU (my Bambu Lab X1C falls short here), you could use a different support material. But it is still time consuming and costly.
And there are a couple other issues with 3D printing orthotics in a flat position. First, this orientation takes up a lot of space in one dimension and thus full length orthotics for even average shoe sizes wont fit on average size 3D printers, let alone multiple pairs. Second, layer striations are clearly visible, detracting from the aesthetics of the 3D printed orthotic.
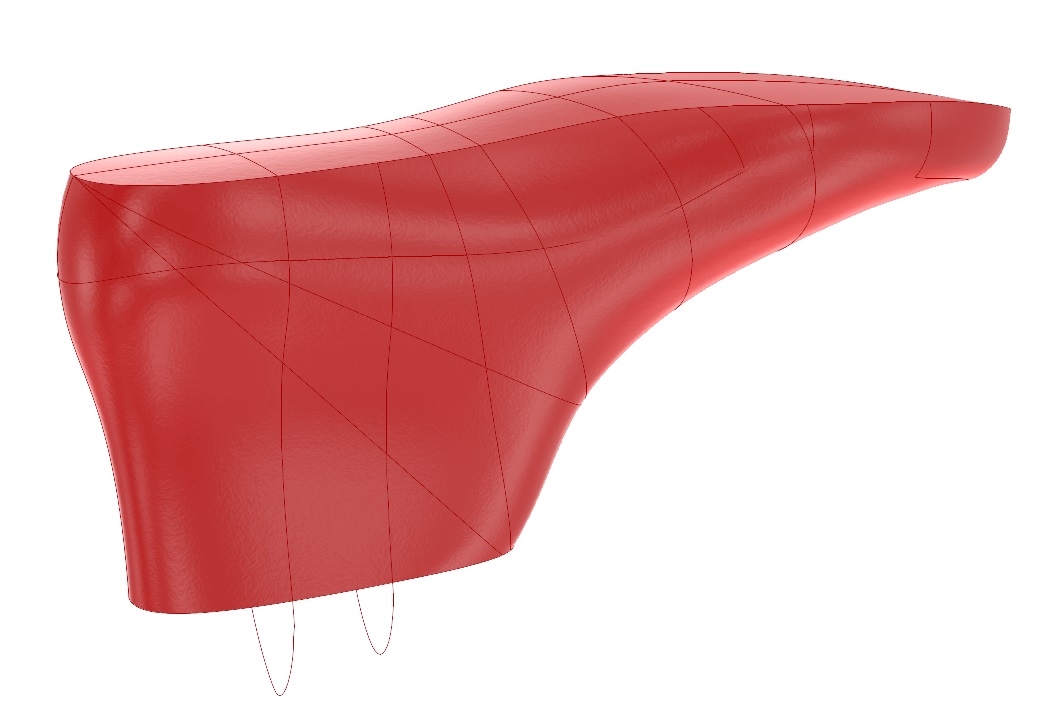
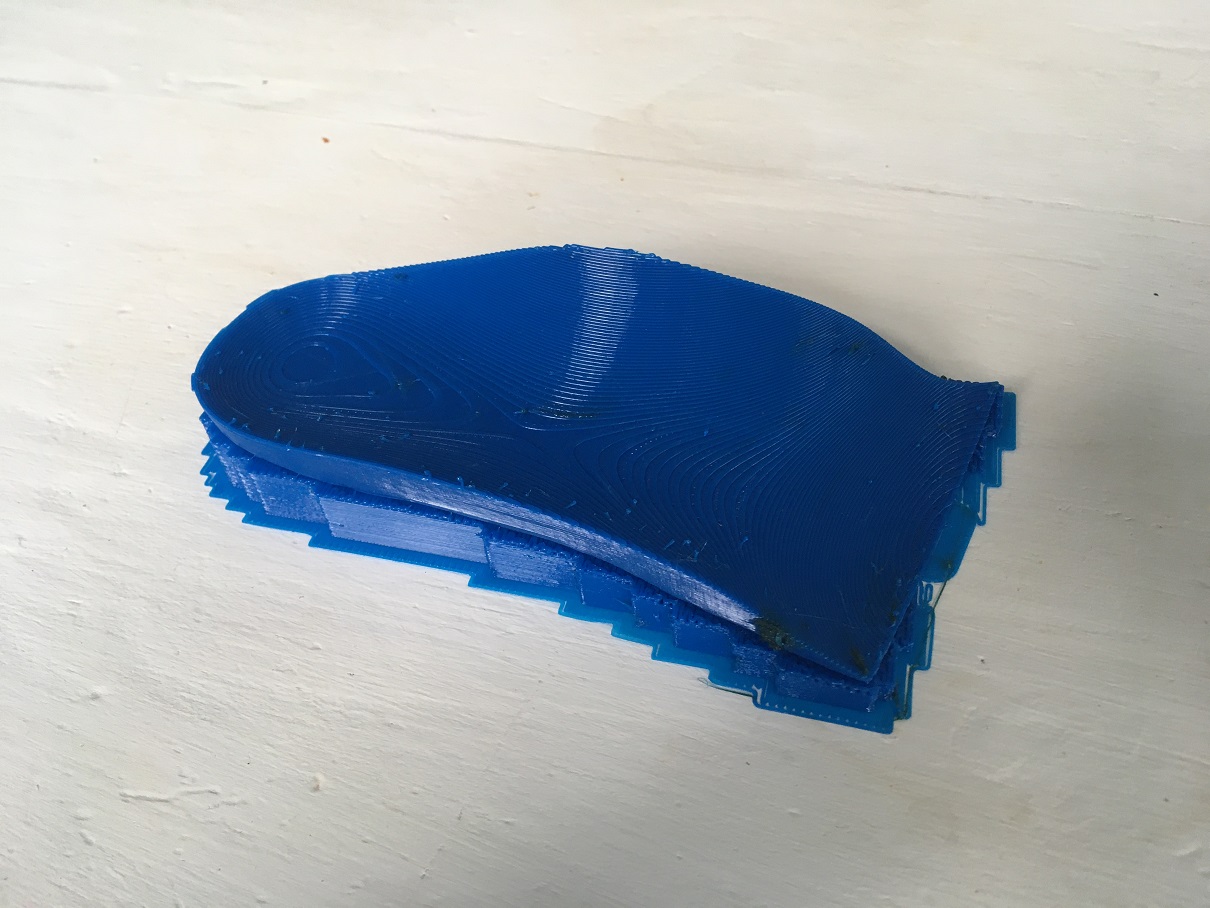
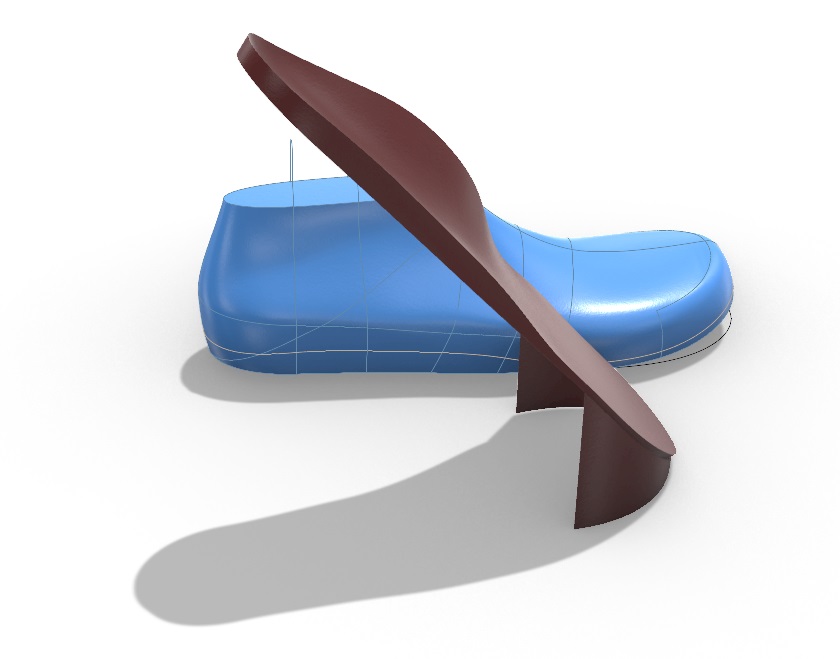
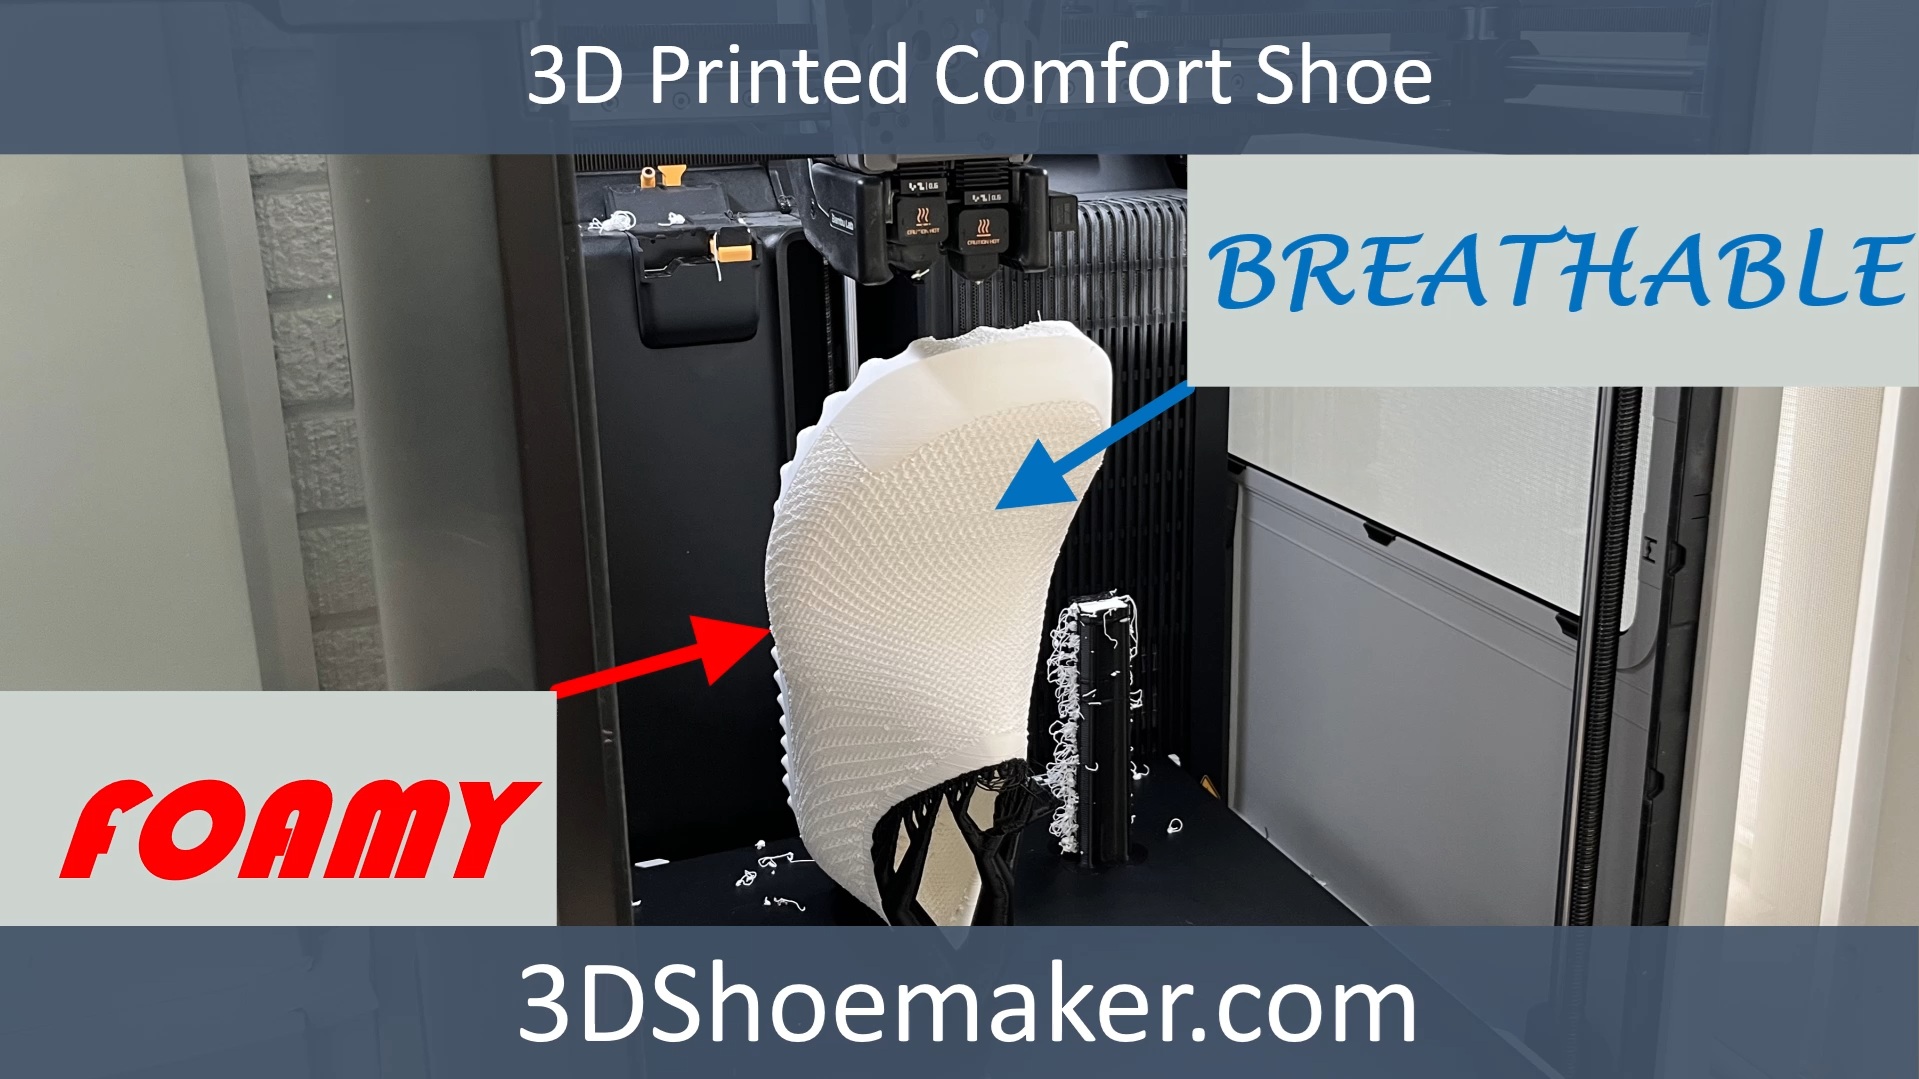
The orientation that solves these issues is where the orthotic is tilted to approximately 45 degrees. At this angle, support material for overhangs is not required. The only need for support material is to stop the part from falling over. So instead of 3D printing a whole lot of unnecessary support material, all that is needed is a smart support taking the form of something like a skirt or fin. And this smart support can be easily torn away after the print is done.
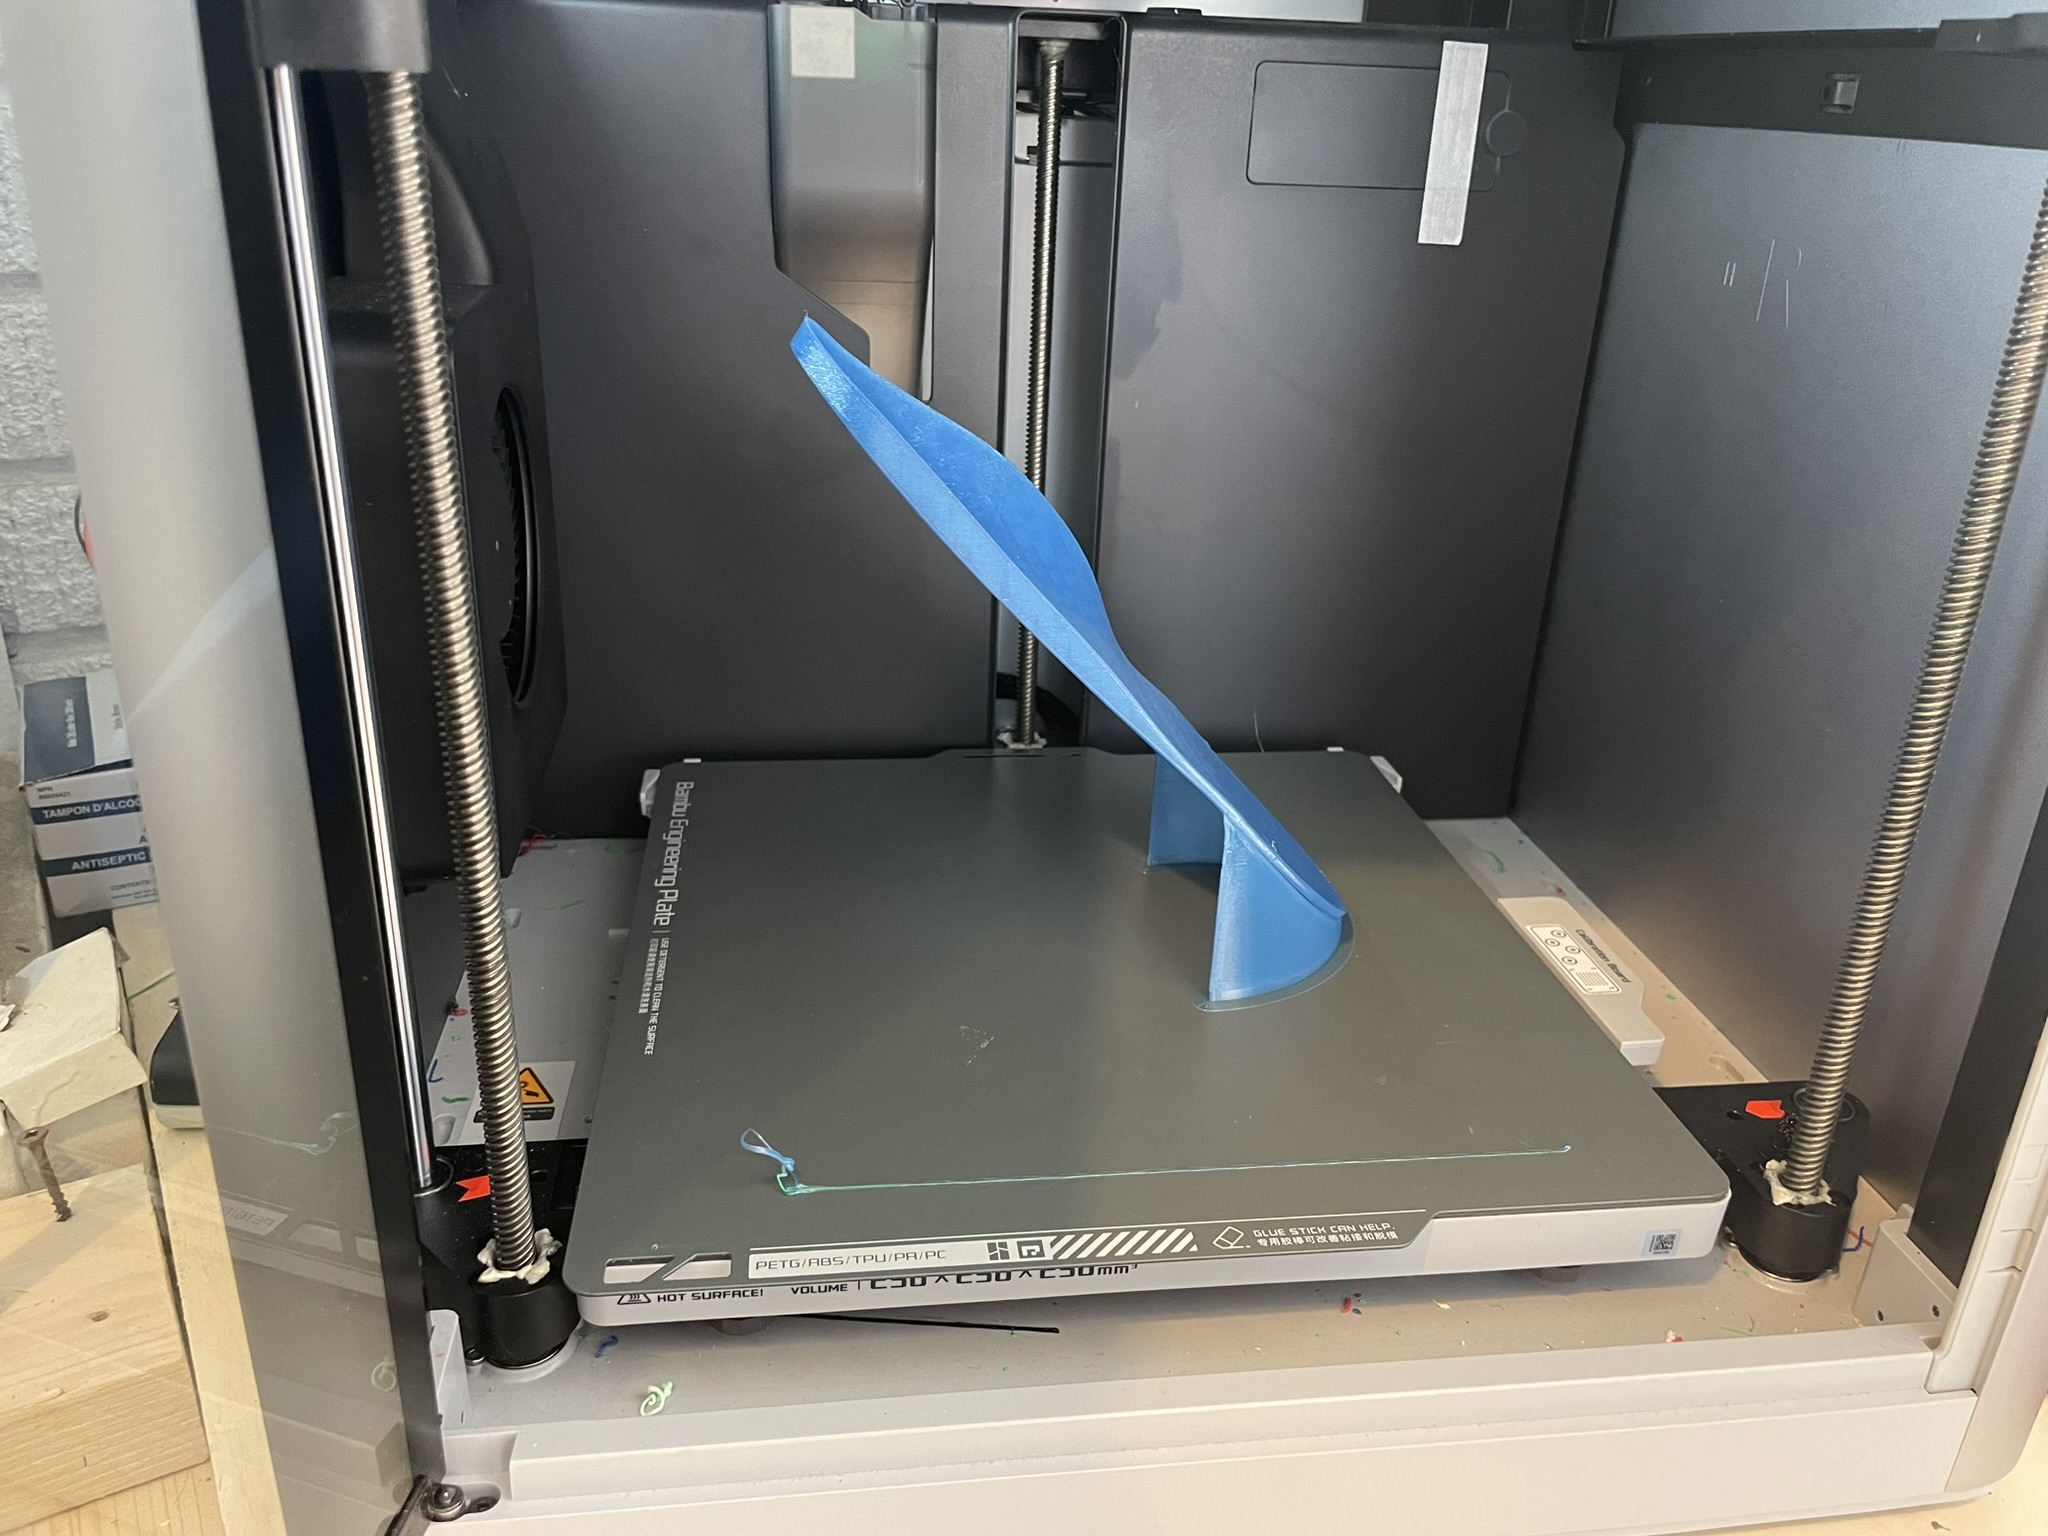
If it is only a 3/4 length orthotic that you are 3D printing, then an average size 3D printer can fit it vertically at 90 degrees to the bed. And in this fully vertical orientation, multiple pairs can fit on a single print bed, allowing for batch production.
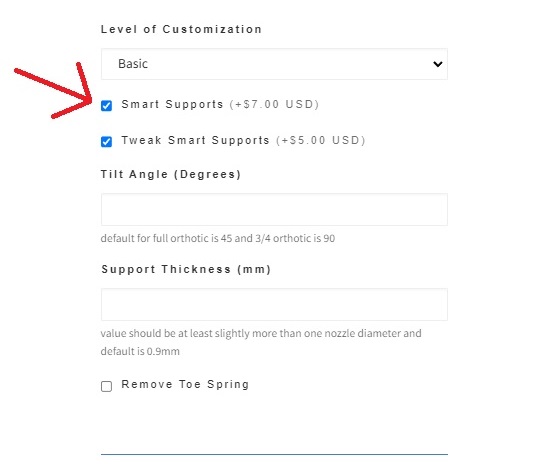
At this point you might be wondering how to go about getting orthotic 3D models with these kinds of smart supports. That’s where 3DShoemaker comes in. You can either purchase 3D models of orthotics and specify smart supports, or you can design them yourself using the 3DShoemaker plugin for Rhino. For the former, simply choose an orthotic design and in the ordering form make sure to specify ‘Smart Supports’. For a bit extra, the support settings can be tweaked as follows:
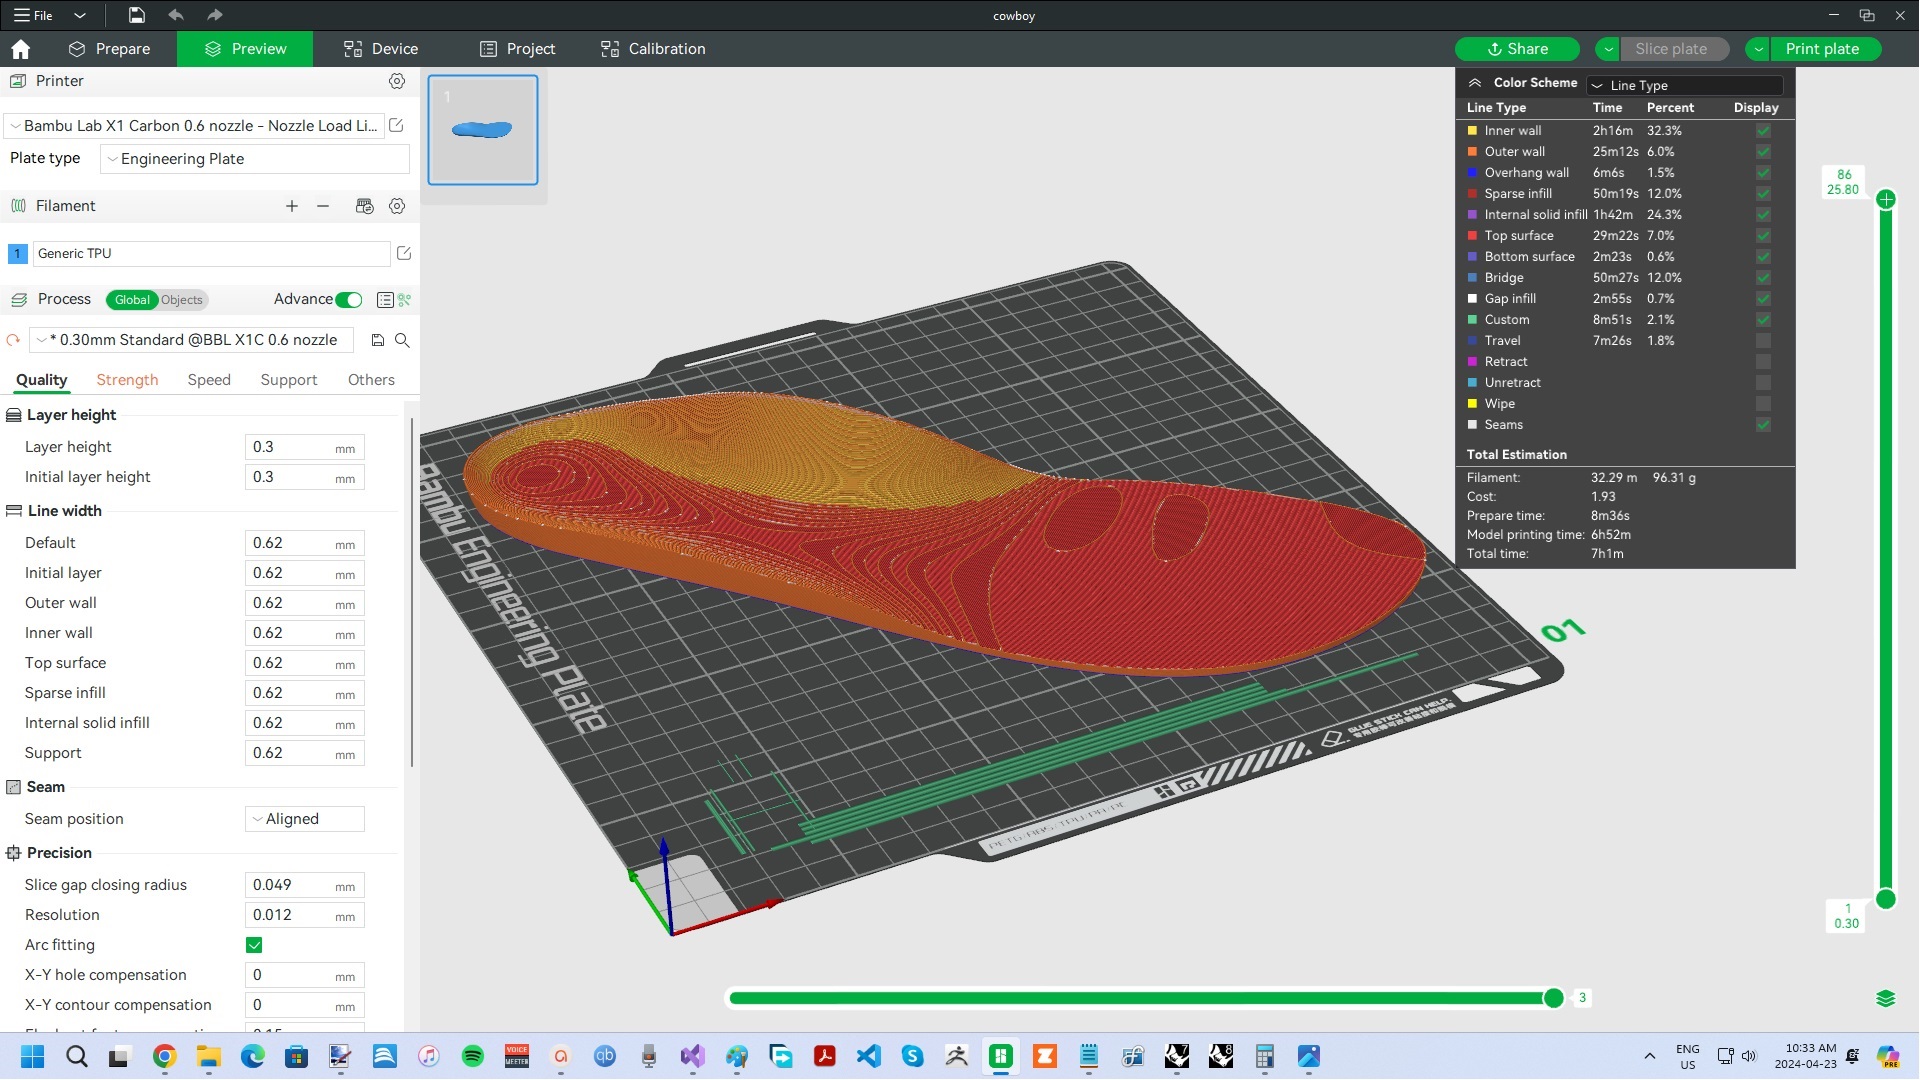
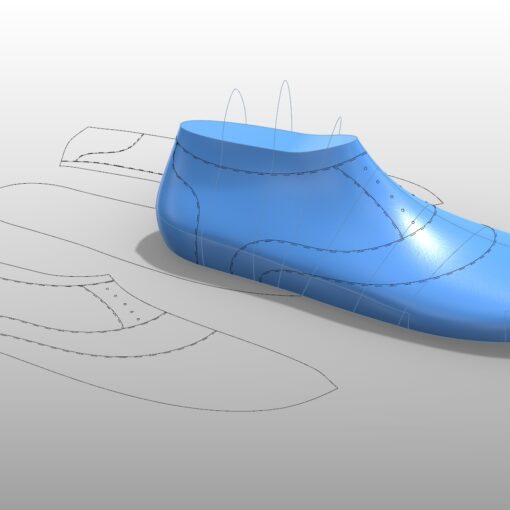
If you want to design smart supports yourself in the 3DShoemaker plugin, then this can be done via the Print button on the side panel. Simply choose the angle you want, the thickness of the support, the base height, and whether you want the toe spring removed and press the ‘Go’ button. The orthotics and smart supports are generated and can then be exported to the slicer of your choice and 3D printed. Note that I recommend printing with a brim.
That’s all for this 3DShoemaker post, thank you for reading.
