Update: Hardware for the alpha joint can now be purchased here on 3DShoemaker.com. And a new tutorial shows the assembly process with the dowel pins. And assembly now works best if the elliptical spring is first inserted into the front of the shoe last.
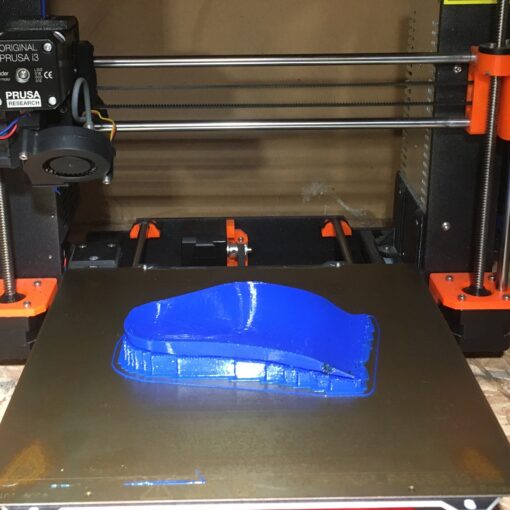
Have you ever wanted to 3D print your own shoe lasts, or at least get them printed locally? Did you want to do it with a working hinge? If so, read on, this 3DShoemaker tutorial is for you.
Choosing a 3D Printer
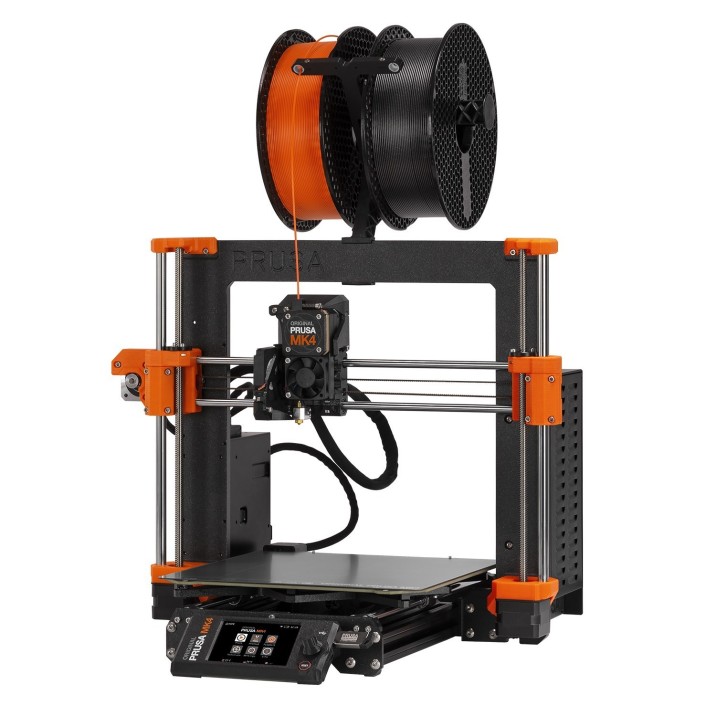
Assuming you want to do the 3D printing yourself and don’t yet have a 3D printer, you’ll need to decide on a 3D printer. Most modern desktop 3D printers can make shoe lasts. But the best option, in my opinion, is the Prusa i3 MK4. Here is what it has going for it:
– Highly proven with great community
– Reasonable price
– Good build volume that can fit a full pair of shoe lasts or at least one side for very large lasts
– Enclosure available (purchased or DIY) which is helpful for preventing warping from the build plate
– Heated build plate (most have them these days) which is essential for reducing warping
– Good slicer software included
– Is no more or less complicated than required (no unnecessary multi-material etc.)
If the MK4 doesn’t fit your needs for whatever reason, there are plenty of other 3D printers out there that could do the trick, and more. For instance, IDEX printers like the Raise3D E2 are an interesting option given they might be able to print left and right shoe last sides simultaneously to save time (depending on settings, printing a pair on an MK4 can take about a full day). They can also do support materials for interesting projects and come with built-in enclosures. But this isn’t a printer I’ve tried myself, so can’t really say for sure how it will work for shoe lasts. Another possible alternative is the Bambu X1C and P1P printers which are getting great reviews, but once again, I haven’t tried them.
On a side note, there are now reasonably priced resin 3D printers that could work, but from what I’ve seen the material costs aren’t competitive enough.
Choosing a Filament Material
A good filament material for 3D printing shoe lasts is PETG. It is much less brittle than PLA, and softer, making it much better for receiving nails during the lasting process. PETG is still harder than conventional high-density polyethylene though, so you want to make sure you use sharp skinny nails. Another option is TPU, but it is much harder to print and more expensive. Warping in particular is an issue.
I’ll get more into print settings later, but for now I’ll mention that you want to print enough perimeters to get about 5mm wall thickness so the nails aren’t just penetrating a thin shell. But if you aren’t planning on nailing nor applying much force, a thin wall PLA should do just fine. For the elliptical spring (explained later), it’s actually better to use PLA, given the higher stiffness.
Getting your 3D Models
By default, shoe lasts ordered on 3DShoemaker come as a single solid model. So if you are wanting a shoe last with a hinge, you’ll need to specify this in the design adjustments section as shown below. Or if you are using the 3DShoemaker plugin and want to get a hinge inserted into your design for 3D printing, you can request that service here: Shoe Last Joint/Hinge Design.
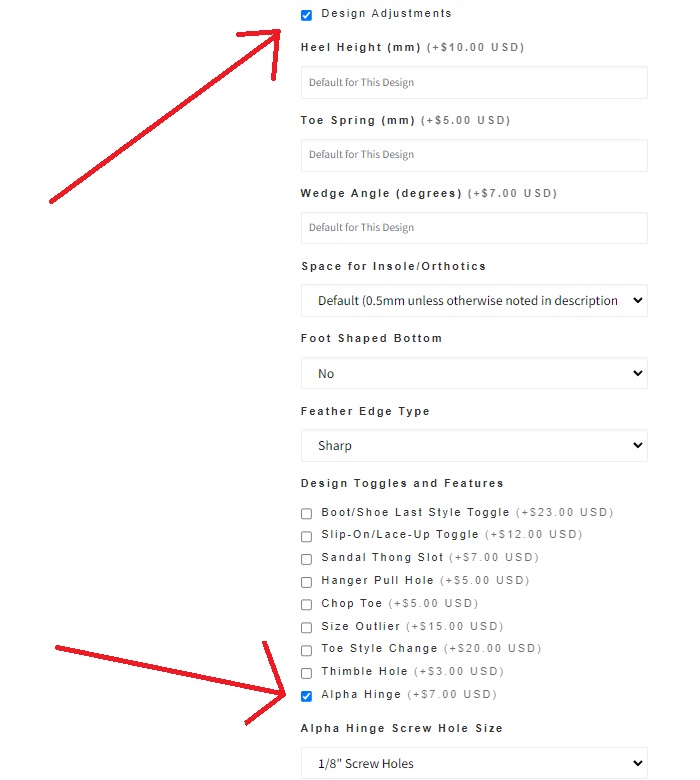
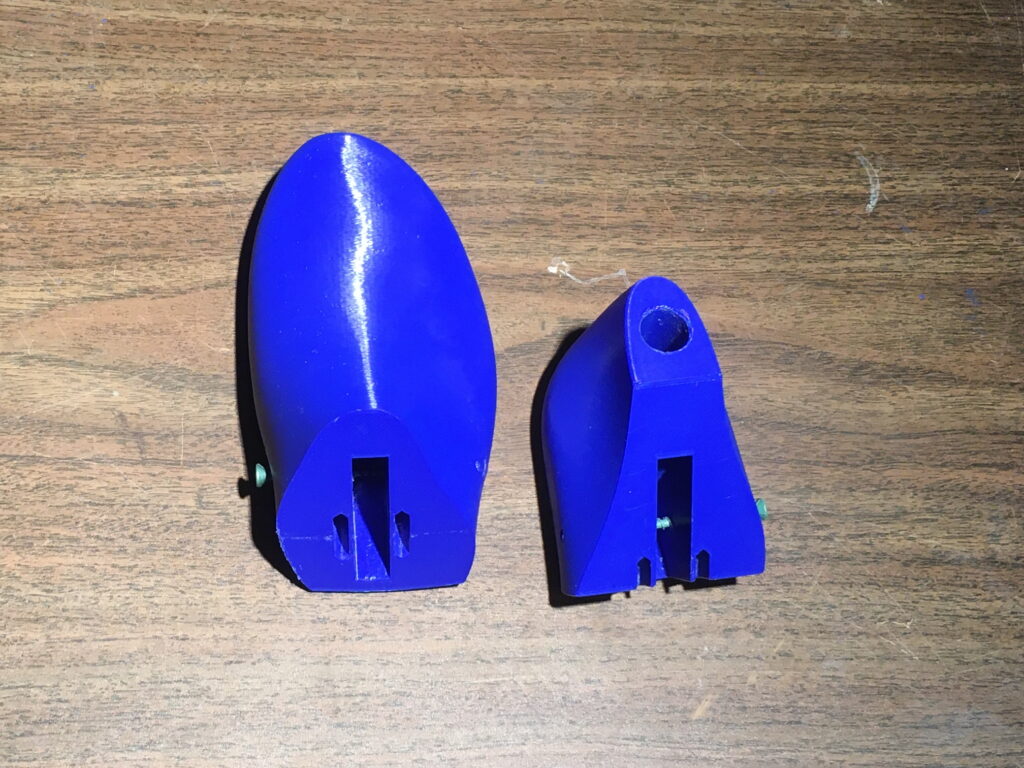
Once your order is processed, you’ll receive the files by email. Note that only files for the front and back parts of one side of the shoe last (unless there are differences between left and right sides) are sent. The other side can just be mirrored in slicing software. The elliptical spring and discs for creating the alpha hinge will also be provided.
Below is a link for a sample shoe last design with alpha hinge you can test print before purchasing other designs. It has a chopped off toe so it can be printed quickly as a test.
Sample Shoe Last Design with Alpha Hinge for 3D Printing
3D Printing Settings
There is a ton of information out there to help you learn 3D printing. So I wont go into much detail here, except for a few specific settings that can help when 3D printing your own shoe lasts.
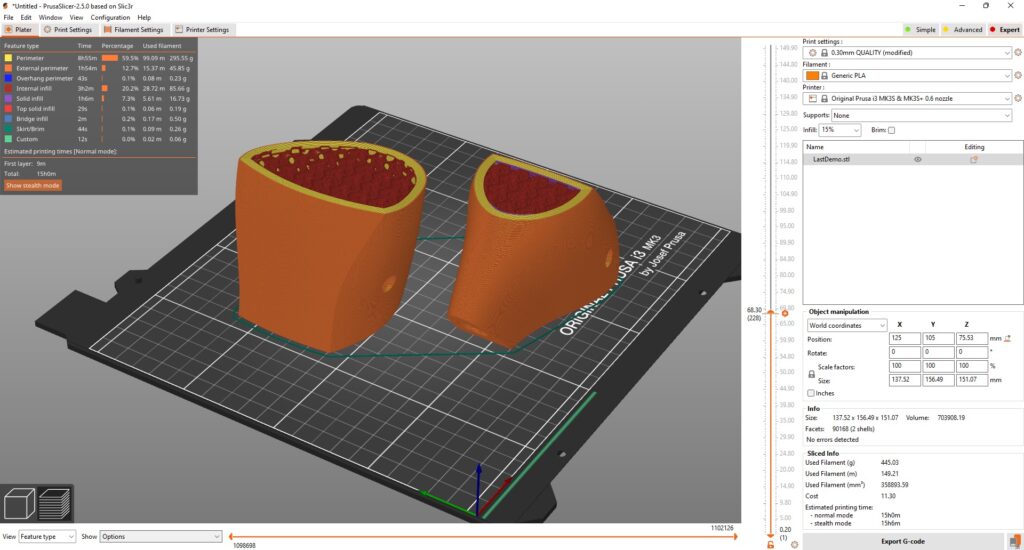
Most of the default settings will get you up and running. I recommend using a 0.6mm nozzle and printing hot thin layers for stronger layer adhesion. As mentioned above, you should use enough perimeters to get 5mm wall thickness if you plan on nailing. A slightly more advanced setting you might want to play with is Max Volumetric Speed. Increasing this will allow you to print faster, up to a point. And if you use a high flow nozzle like a CHT, you can increase this number even more.
If you are just printing a shoe last without a hinge, there are some new settings in Prusa Slicer 2.6 that allow you to split the shoe last in two parts for easier printing without supports. It even includes the dowel pins to reconnect the shoe last after printing (with glue supposedly).
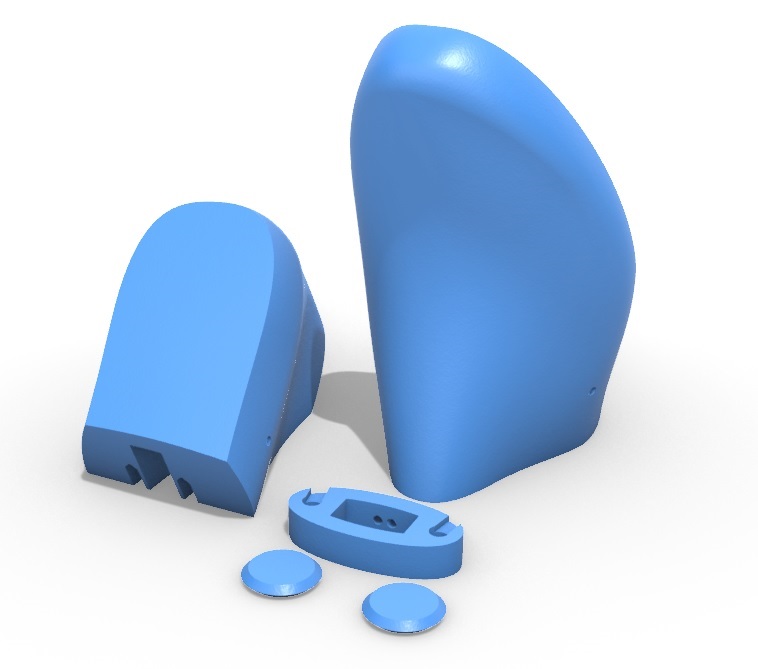
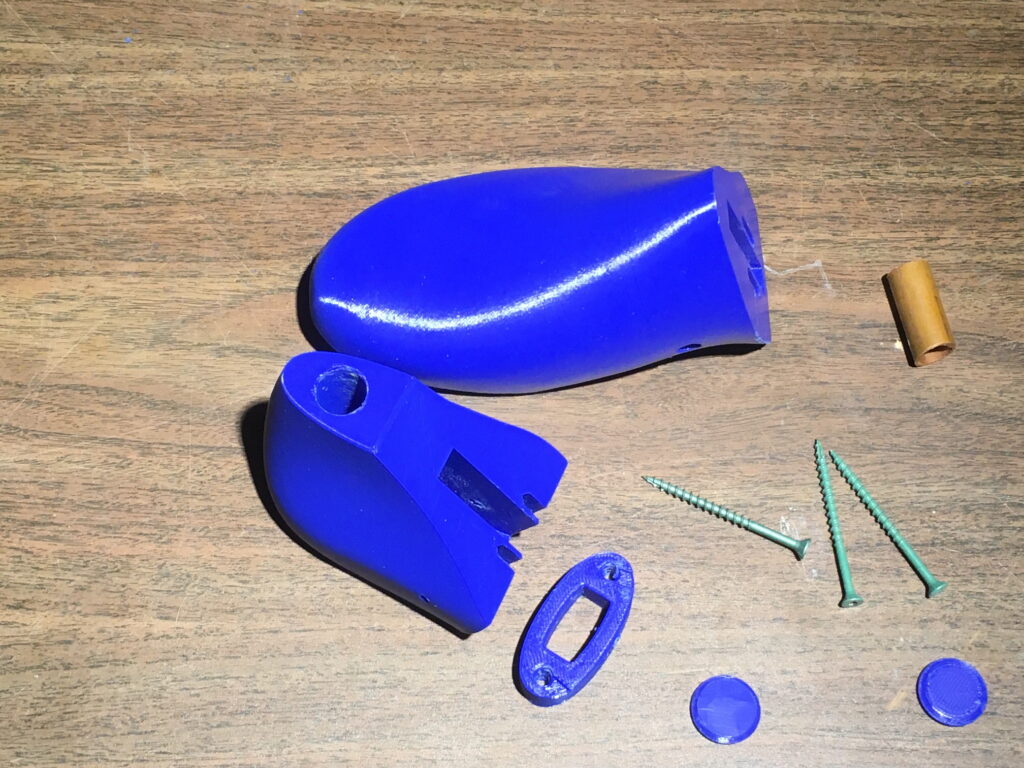
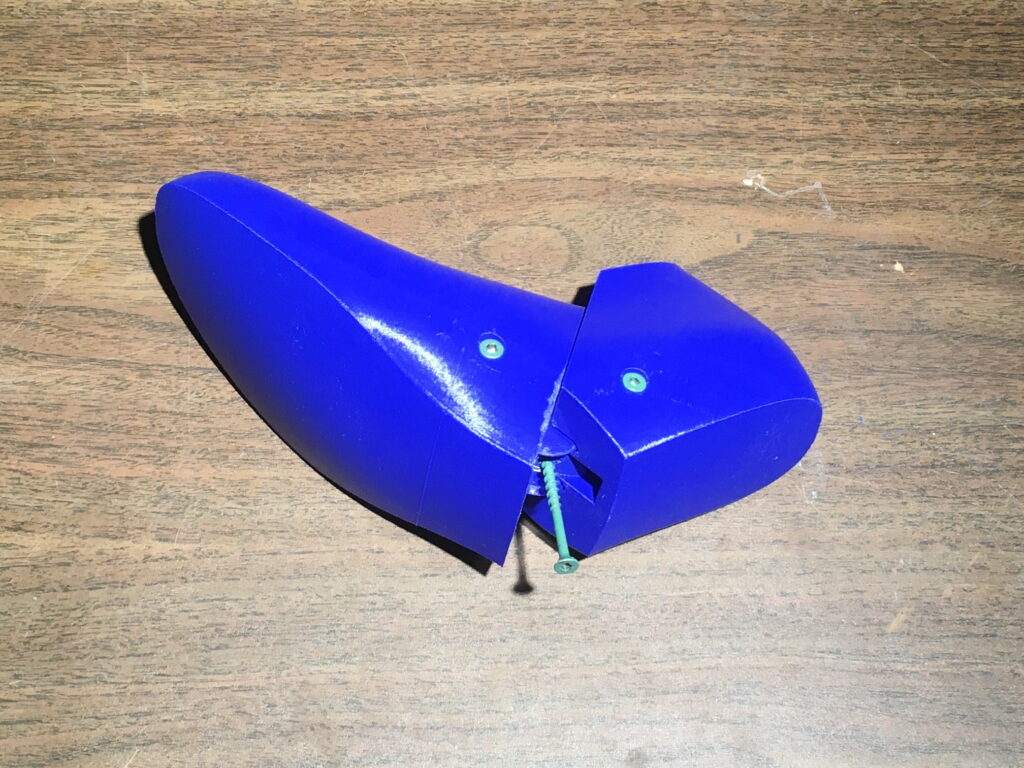
Shoe Last Alpha Hinge Hardware
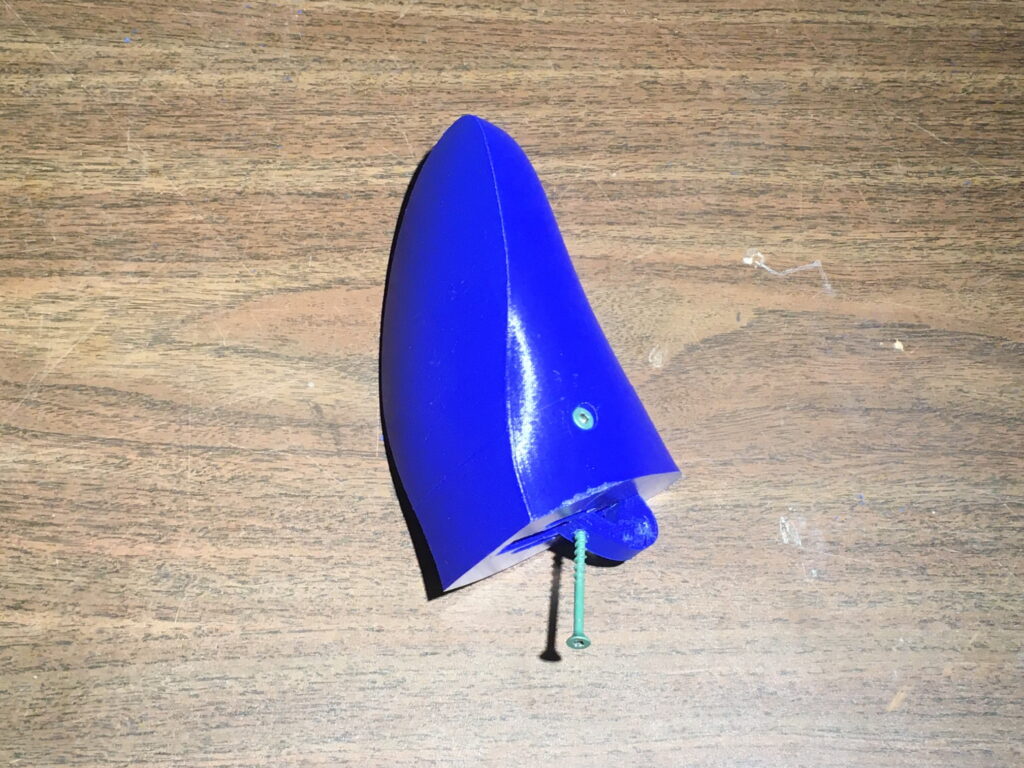
The only required hardware for the alpha hinge is some common wood screws (#8, which is a standard deck screw). You’ll want the right length such that they go most of the way through the shoe last but don’t protrude out the other side.
Alternatively, 1/8″ or 1/4″ dowel pins approximately 2″ in length can result in a tighter alpha hinge (dowel pin size can be specified in the ordering form).
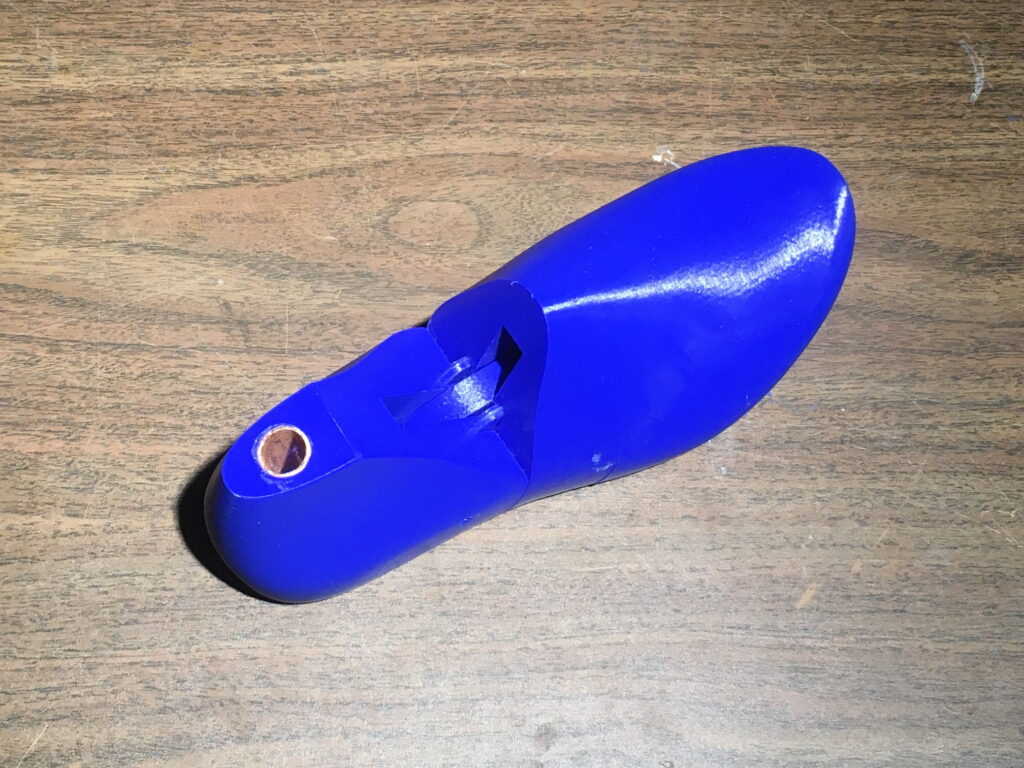
Optionally, you can pick up some 1/2″ copper pipe and cut it to the right length such that it can be used as an insert for the thimble hole. This is important if you want to work on the shoe last on a lasting pin as otherwise the plastic can break.
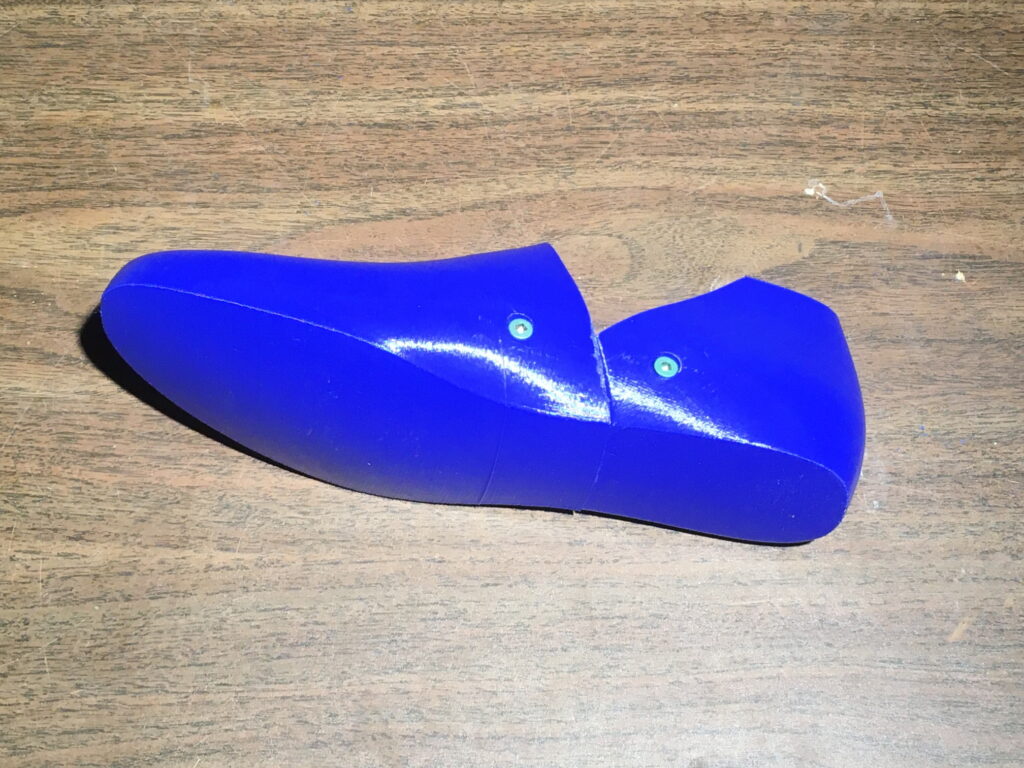
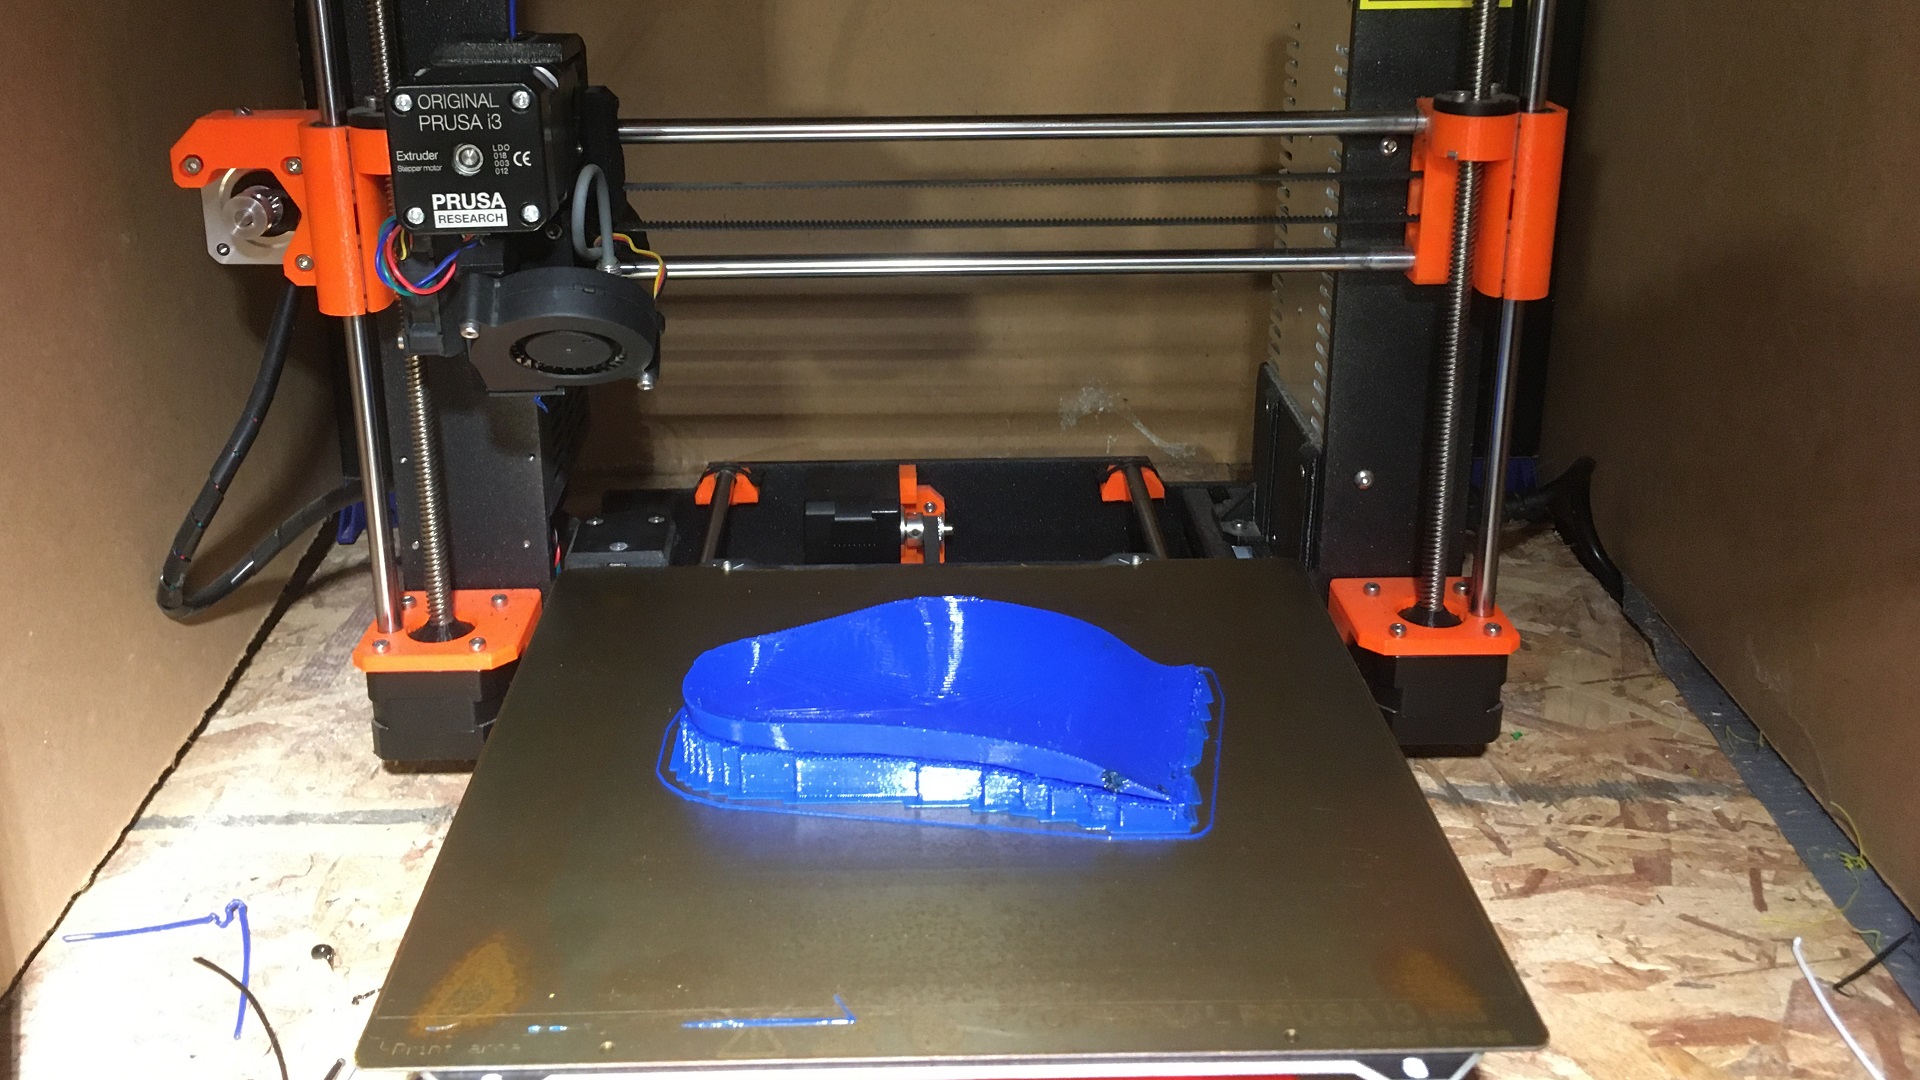
3D Printed Shoe Last Assembly
Once you have your shoe last parts printed, the following steps will guide you through the assembly.
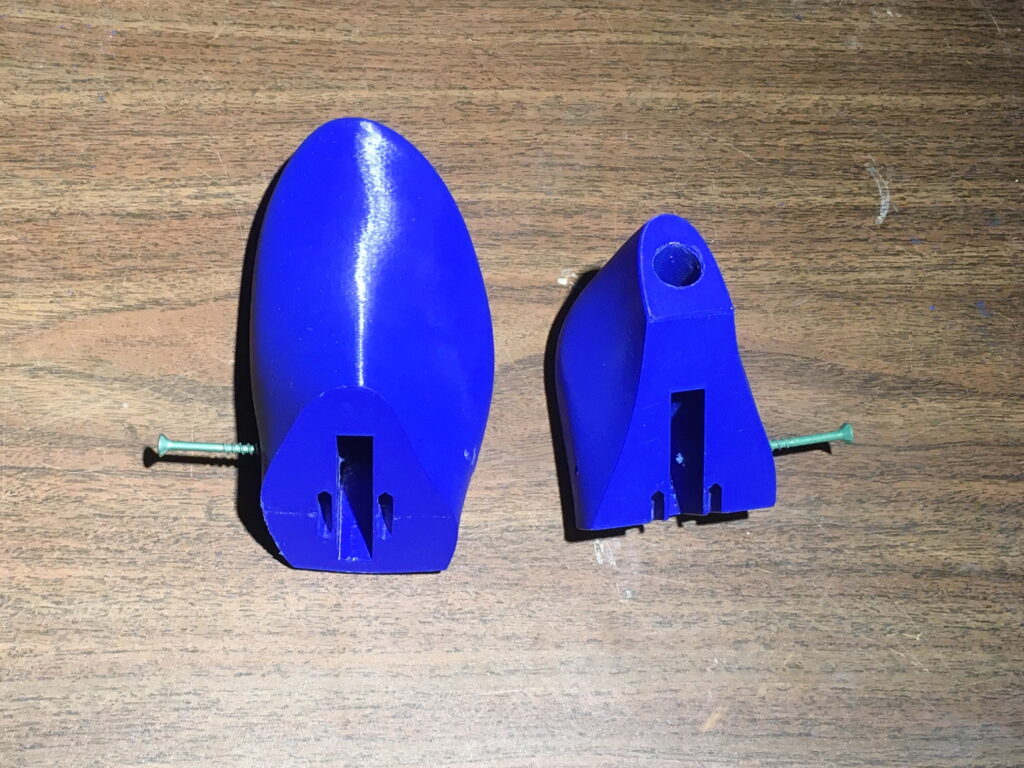
- Screw the screws all the way into the holes in the front and back parts of the shoe last to make sure they properly pass through the holes exiting the spring channel.
- Back off both screws so that just about 1mm is protruding into the hinge spring cavity.
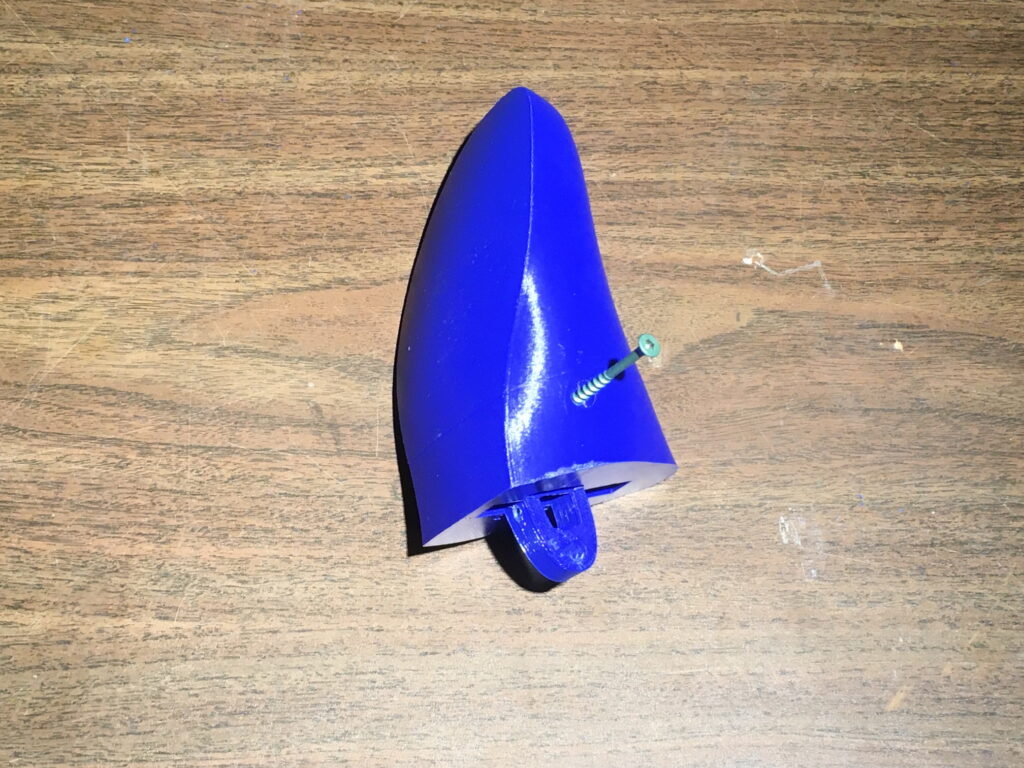
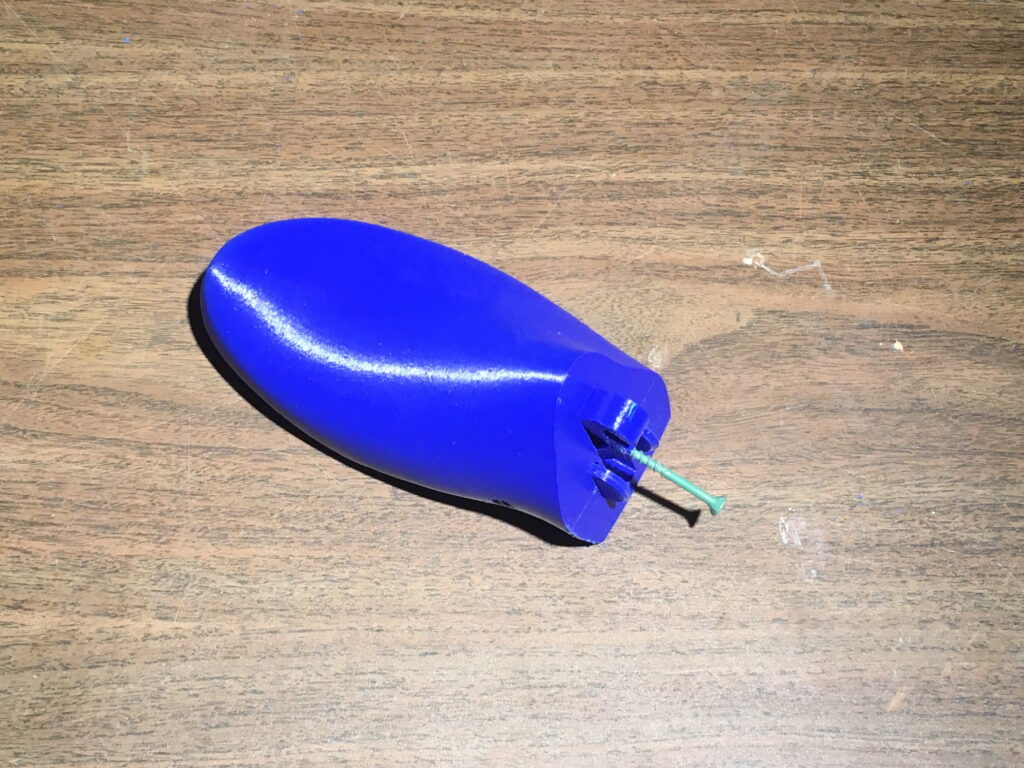
- Guide the elliptical spring onto the protruding screw tip for the front part of the shoe last via the slot on the elliptical spring.
- Insert the front screw the rest of the way in.
- Insert a handling screw into the elliptical spring, choosing the hole that is furthest out from the joint face.
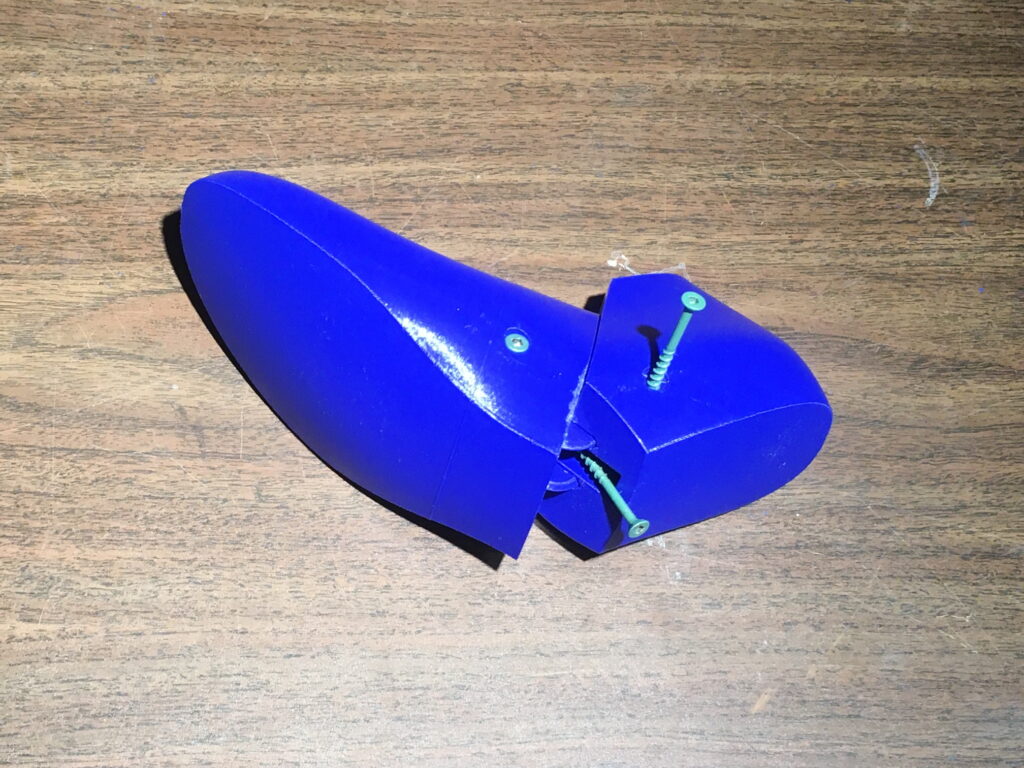
- Move the elliptical spring into the fully up position and insert the pivot discs into the front part of the shoe last.
- Place the back part of the shoe last on the front part such that the pivot discs and elliptical spring are contained and the alpha hinge is in the open position.
- Use the handling screw to pull the elliptical spring’s remaining slot over the back protruding screw tip.
- Insert the back screw the remainder of the way.
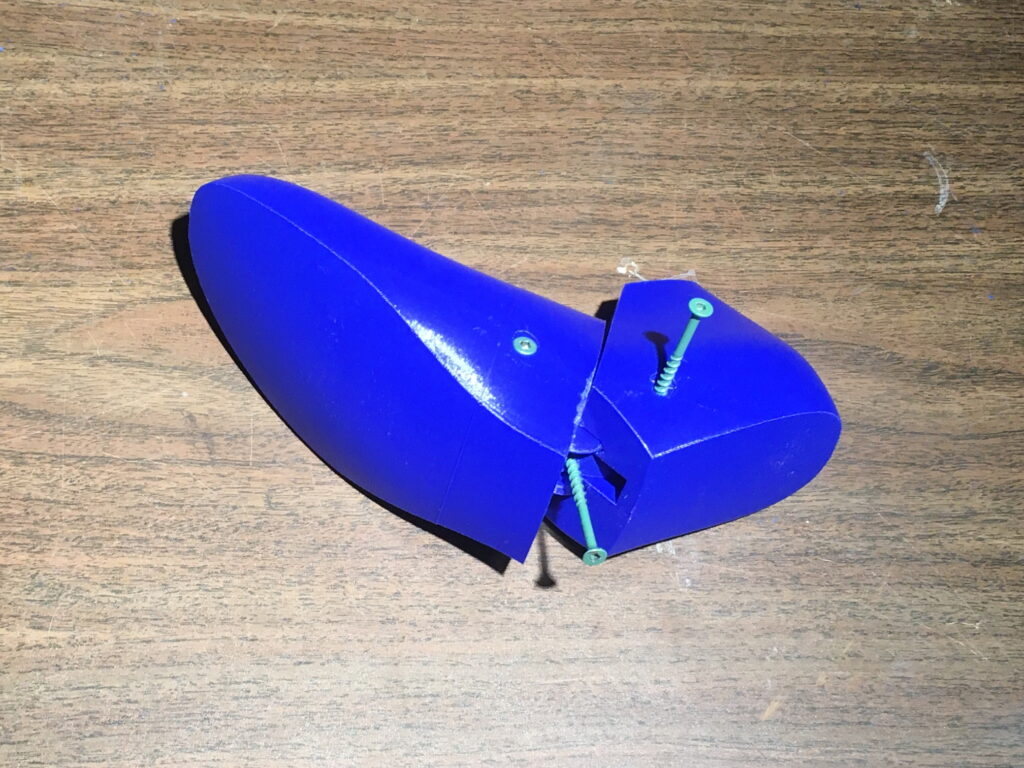
- Remove the handling screw and close the shoe last.
- Optionally, hammer in the copper pipe section into the thimble hole.

As mentioned in the previous section, dowel pins can be used instead of screws and can result in a tighter alpha hinge.
I’m excited to see shoemakers get in on 3D printing shoe lasts. It truly is mesmerizing to see a shoe last gradually form layer by layer seemingly from thin air. And the result is a perfectly functional shoe last. Let me know if you have any questions!
2 thoughts on “How to 3D Print your own Shoe Lasts with Working Hinges”
When printing, based on the settings you have outlined, how much filament is needed to print a men’s shoe last? Or is this something you could include a FAQ on relating to model and size?
I’d say very roughly a kg.