Patterns are an important aspect of shoemaking. They also require considerable skill and time to create using traditional methods. But, as you are probably aware, with modern tech, digital designs can be sent to XY plotters to be cut out automatically. In previous tutorials, I’ve explained how the 3DShoemaker plugin for Rhino can be used to flatten patterns and morph them from one shoe last to another. In this tutorial, I’m going to show you how a 3D printer can be used to make patterns so that you can skip the cost, space, and learning curve of owning an XY plotter.
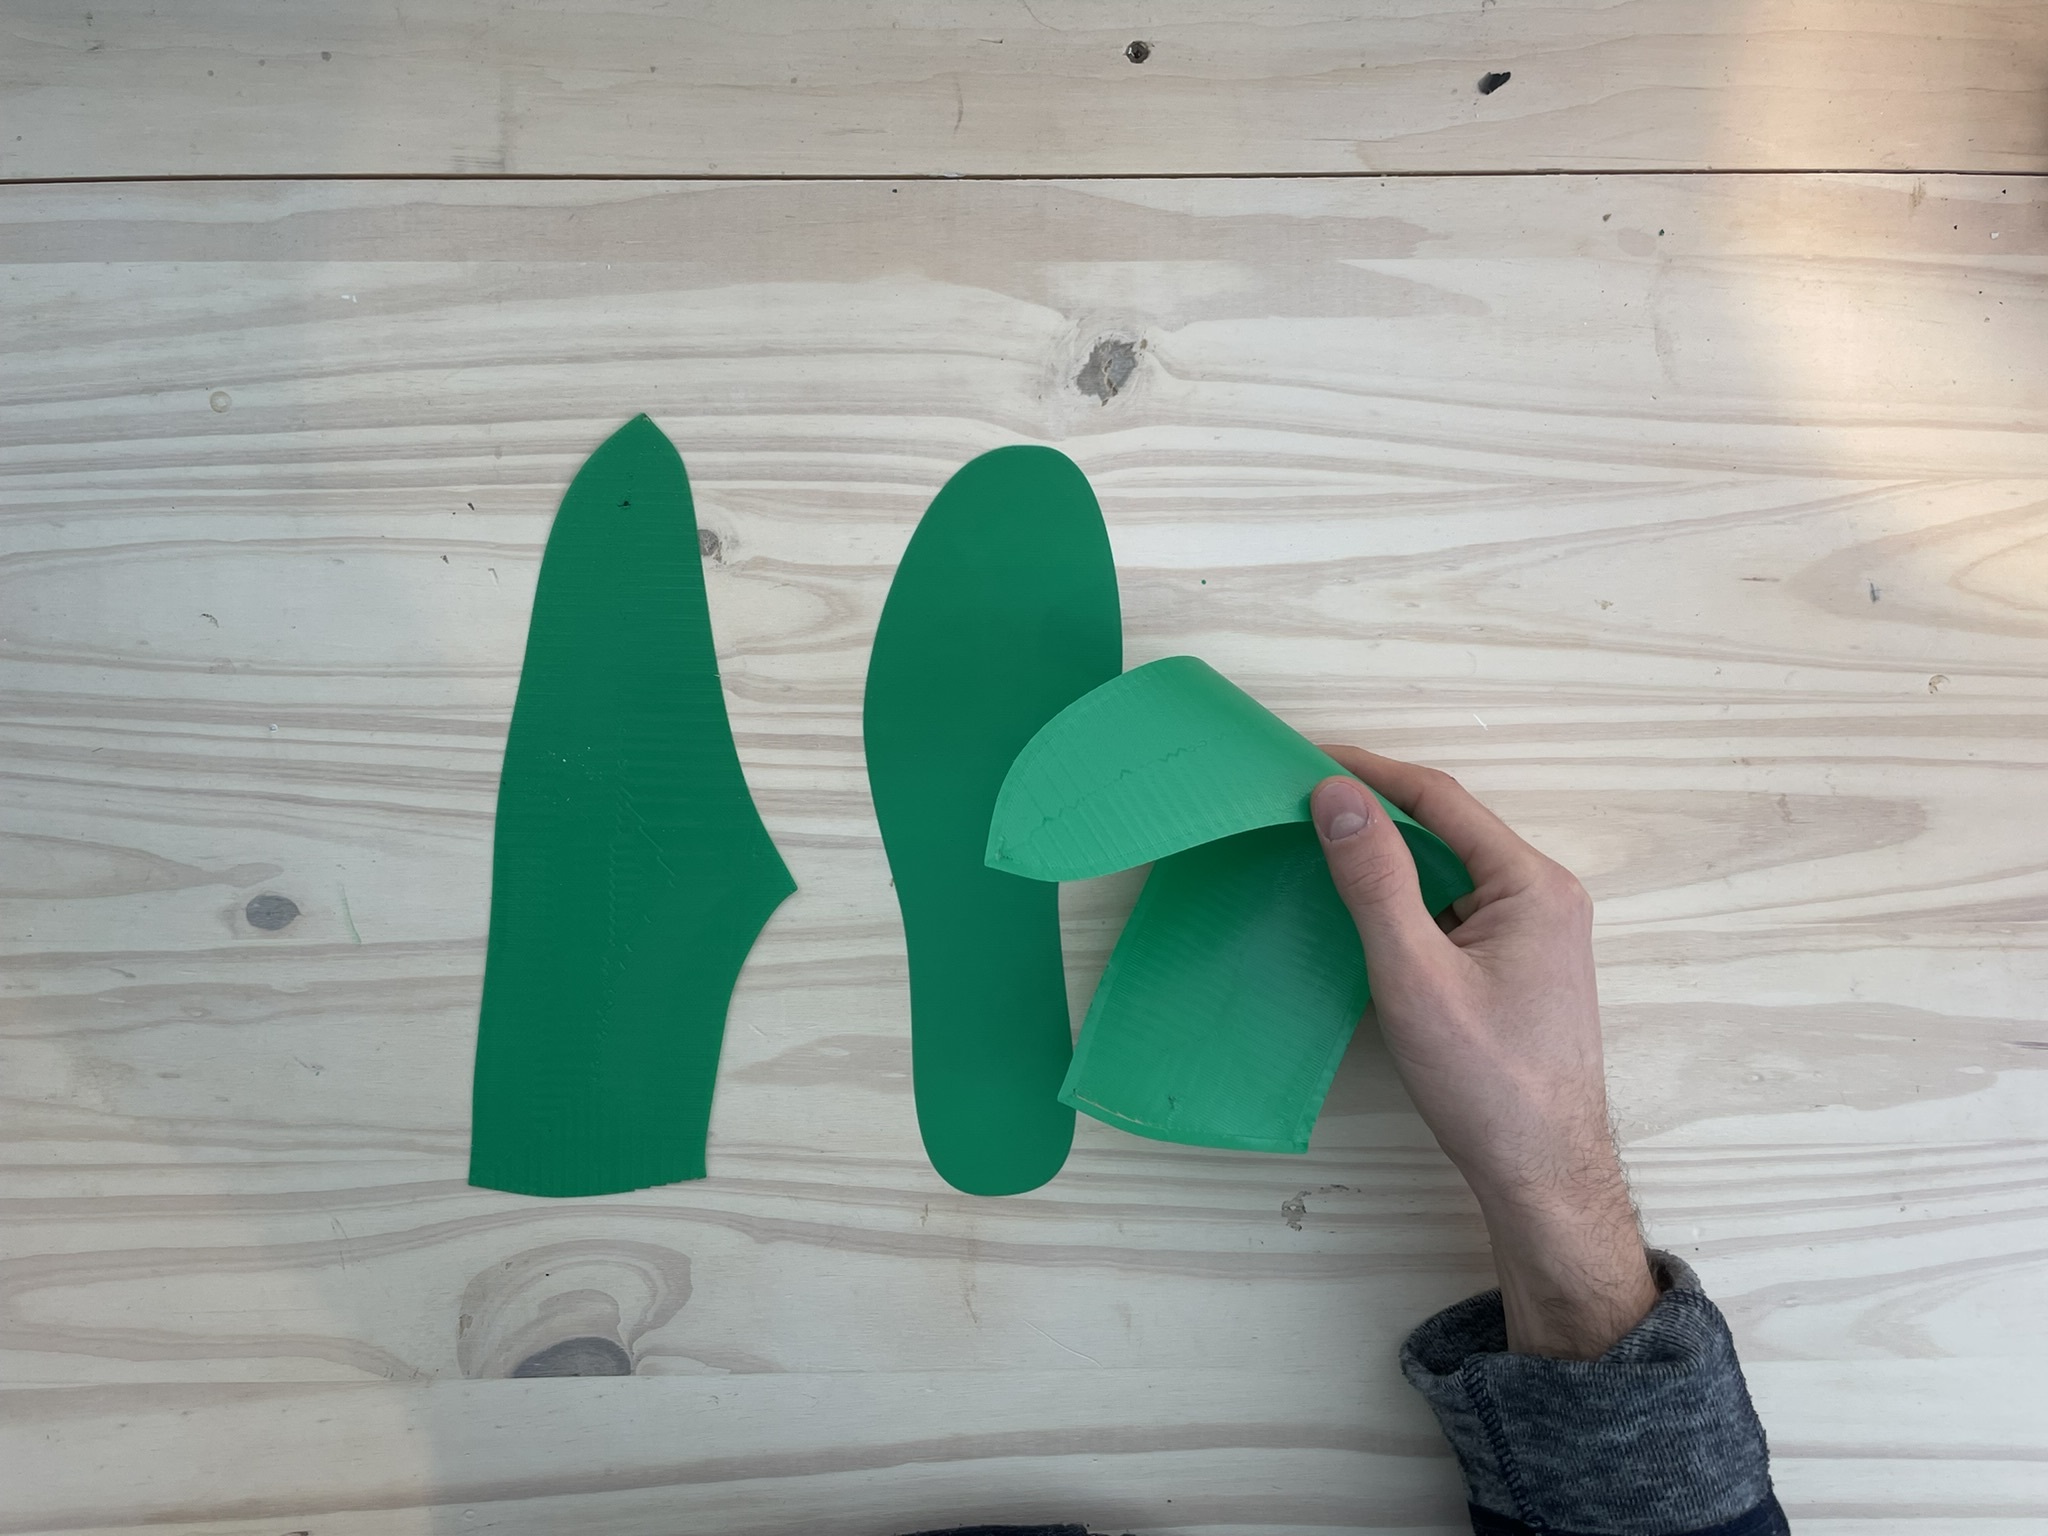
Note that when I say shoemaking patterns, I’m referring to the patterns used to create the shoe materials, and not the shoe materials themselves (though there are some attempts to 3D print these too). And I should also add that the term shoemaking patterns really covers two types of patterns. The first type includes flattened insole patterns. This is just the bottom of the shoe last flattened. There are no artistic details drawn on the pattern as it is just the functional outline of the insole. Similarly, the medial and lateral flattened patterns are just the medial and lateral sides of the shoe last flattened. The second type of patterns includes the details for determining how the upper will be constructed. For instance, there could be multiple pieces forming the upper and the patterns might even include stitch lines. In this tutorial, I’m only showing how to 3D print the first type, the insole and medial and lateral flattened patterns. The second type I’ll eventually cover in another tutorial.
3D printed stuff usually takes a very long time to print and ends up being quite rigid, neither of which we want for shoemaking patterns. But given how thin a pattern can be, the plastic ends up being quite flexible and doesn’t take long to print at all, perhaps just ten minutes for your average sized insole pattern on a fast printer. This of course is much slower than an XY plotter, but not at all unacceptable for small scale shoemakers. Really, it’s the manual effort of getting a job going that matters more so than achieving the fastest possible results.
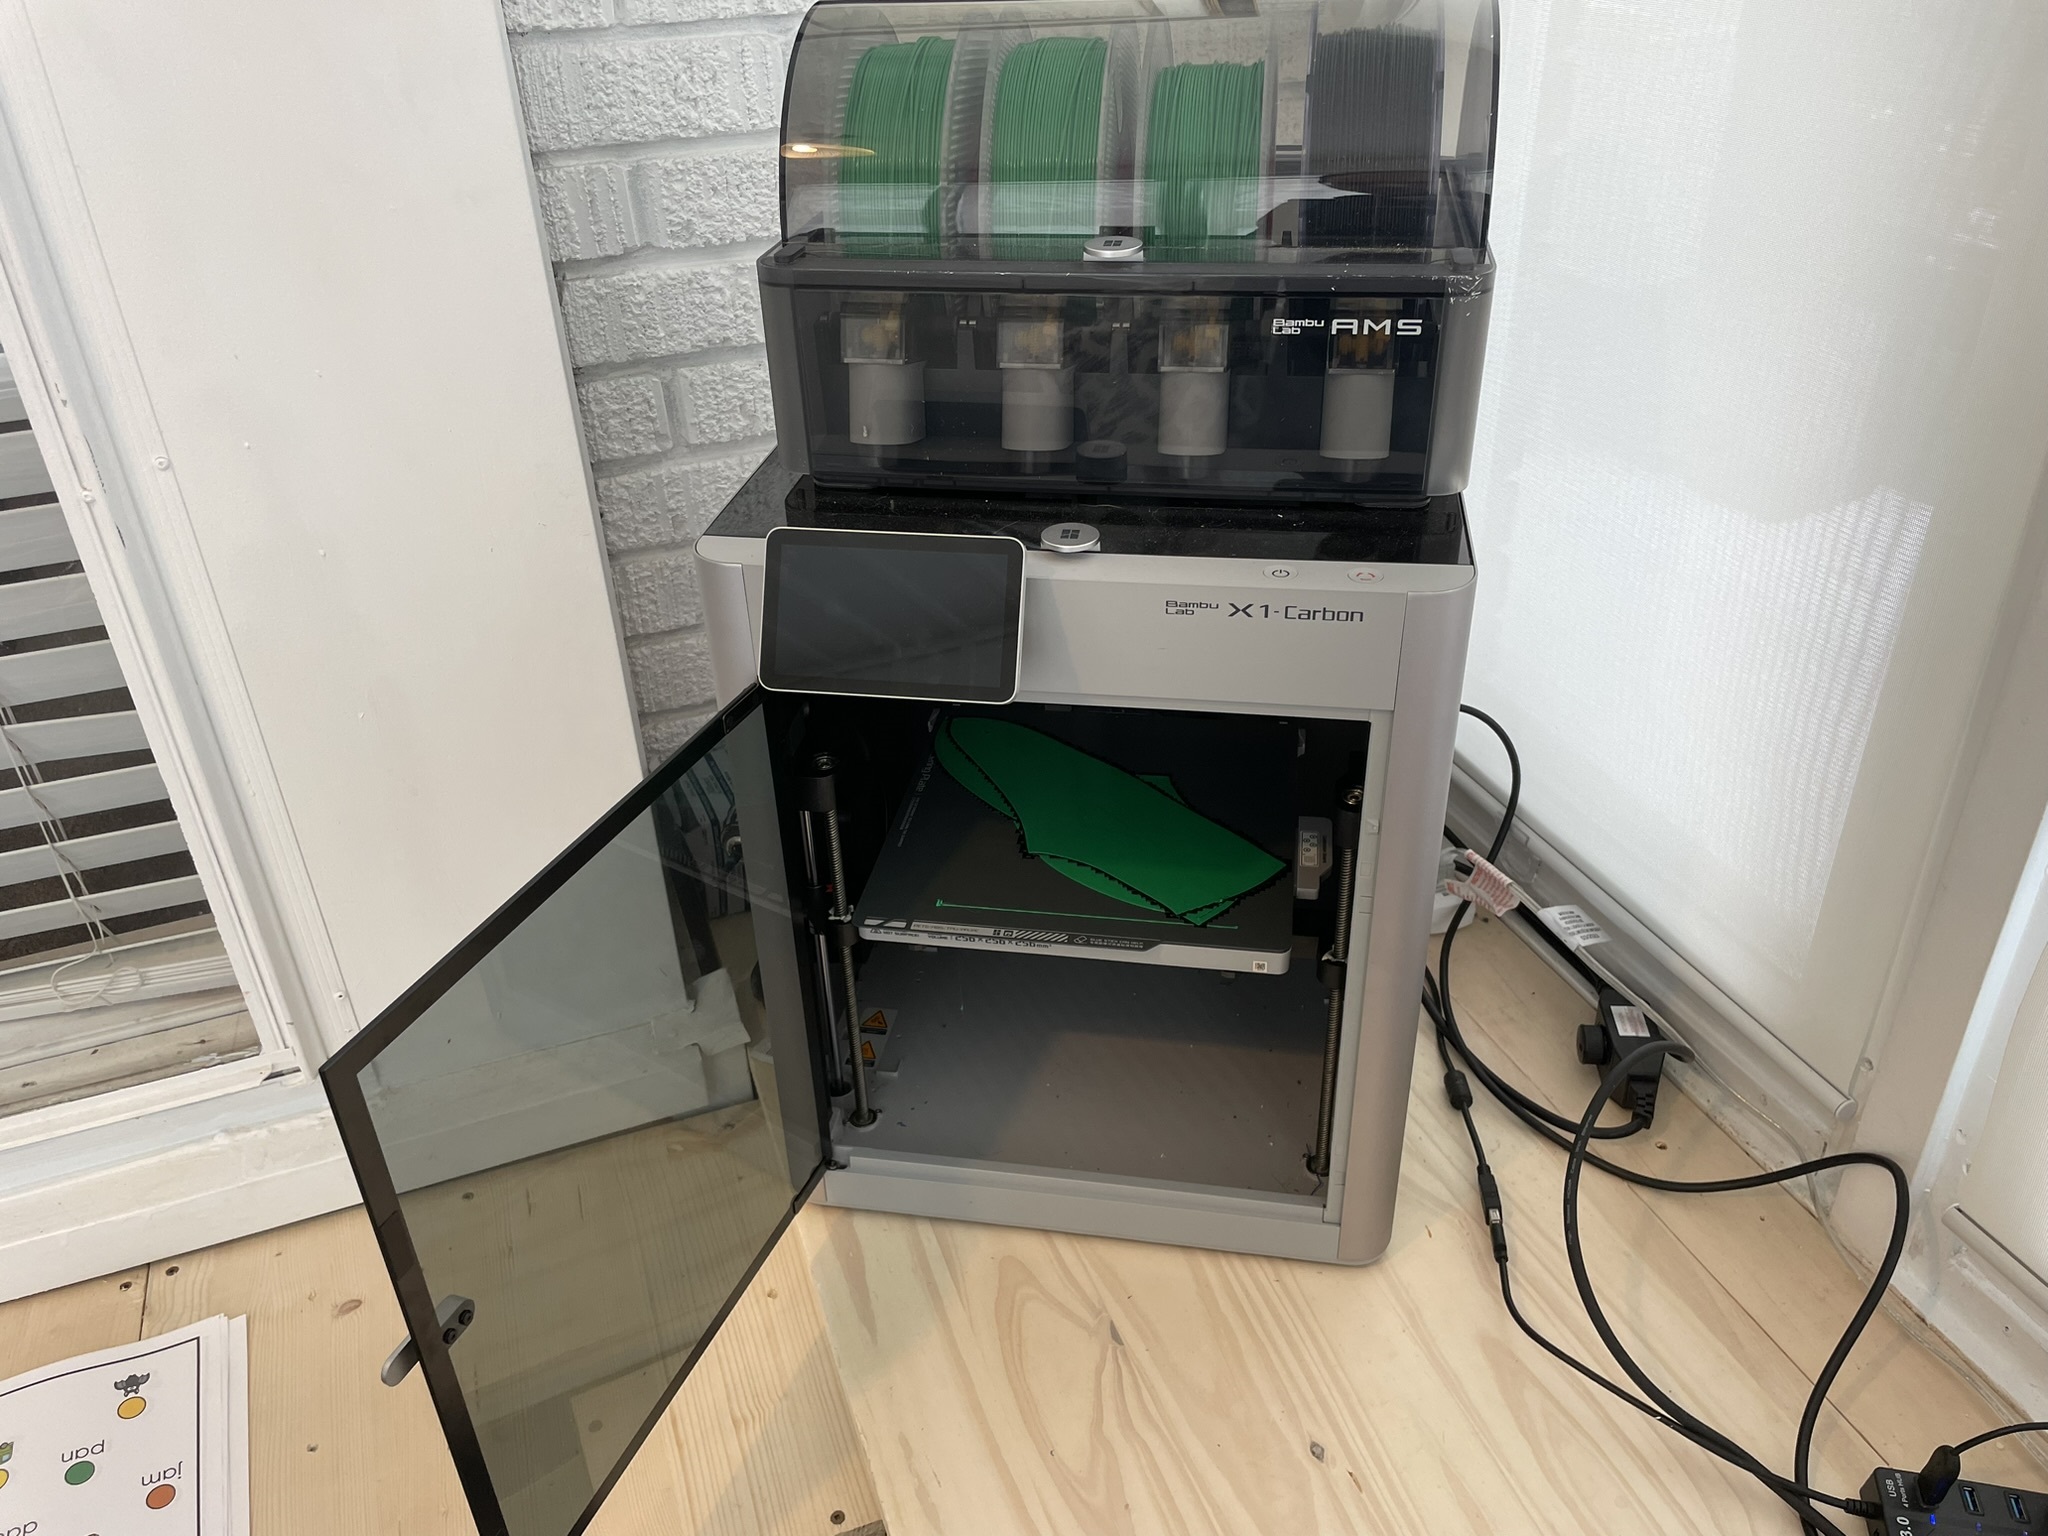
As far as what materials to use, just about anything will work. You don’t need a flexible filament like TPU given how thin patterns are. Either PLA or PETG are inexpensive (a set of patterns might cost around a dollar) and can be recycled by some filament suppliers. And as far as what 3D printer to use, the main thing you want to ensure is that you have a large enough build volume. I’m using a Bambu Lab X1C which has a 256mm cubed build volume. When oriented diagonally, I can print up to a men’s US size 10 depending on the shoe shape. This obviously isn’t great, and that’s one reason I’m eagerly awaiting Bambu’s eventual XL printer.
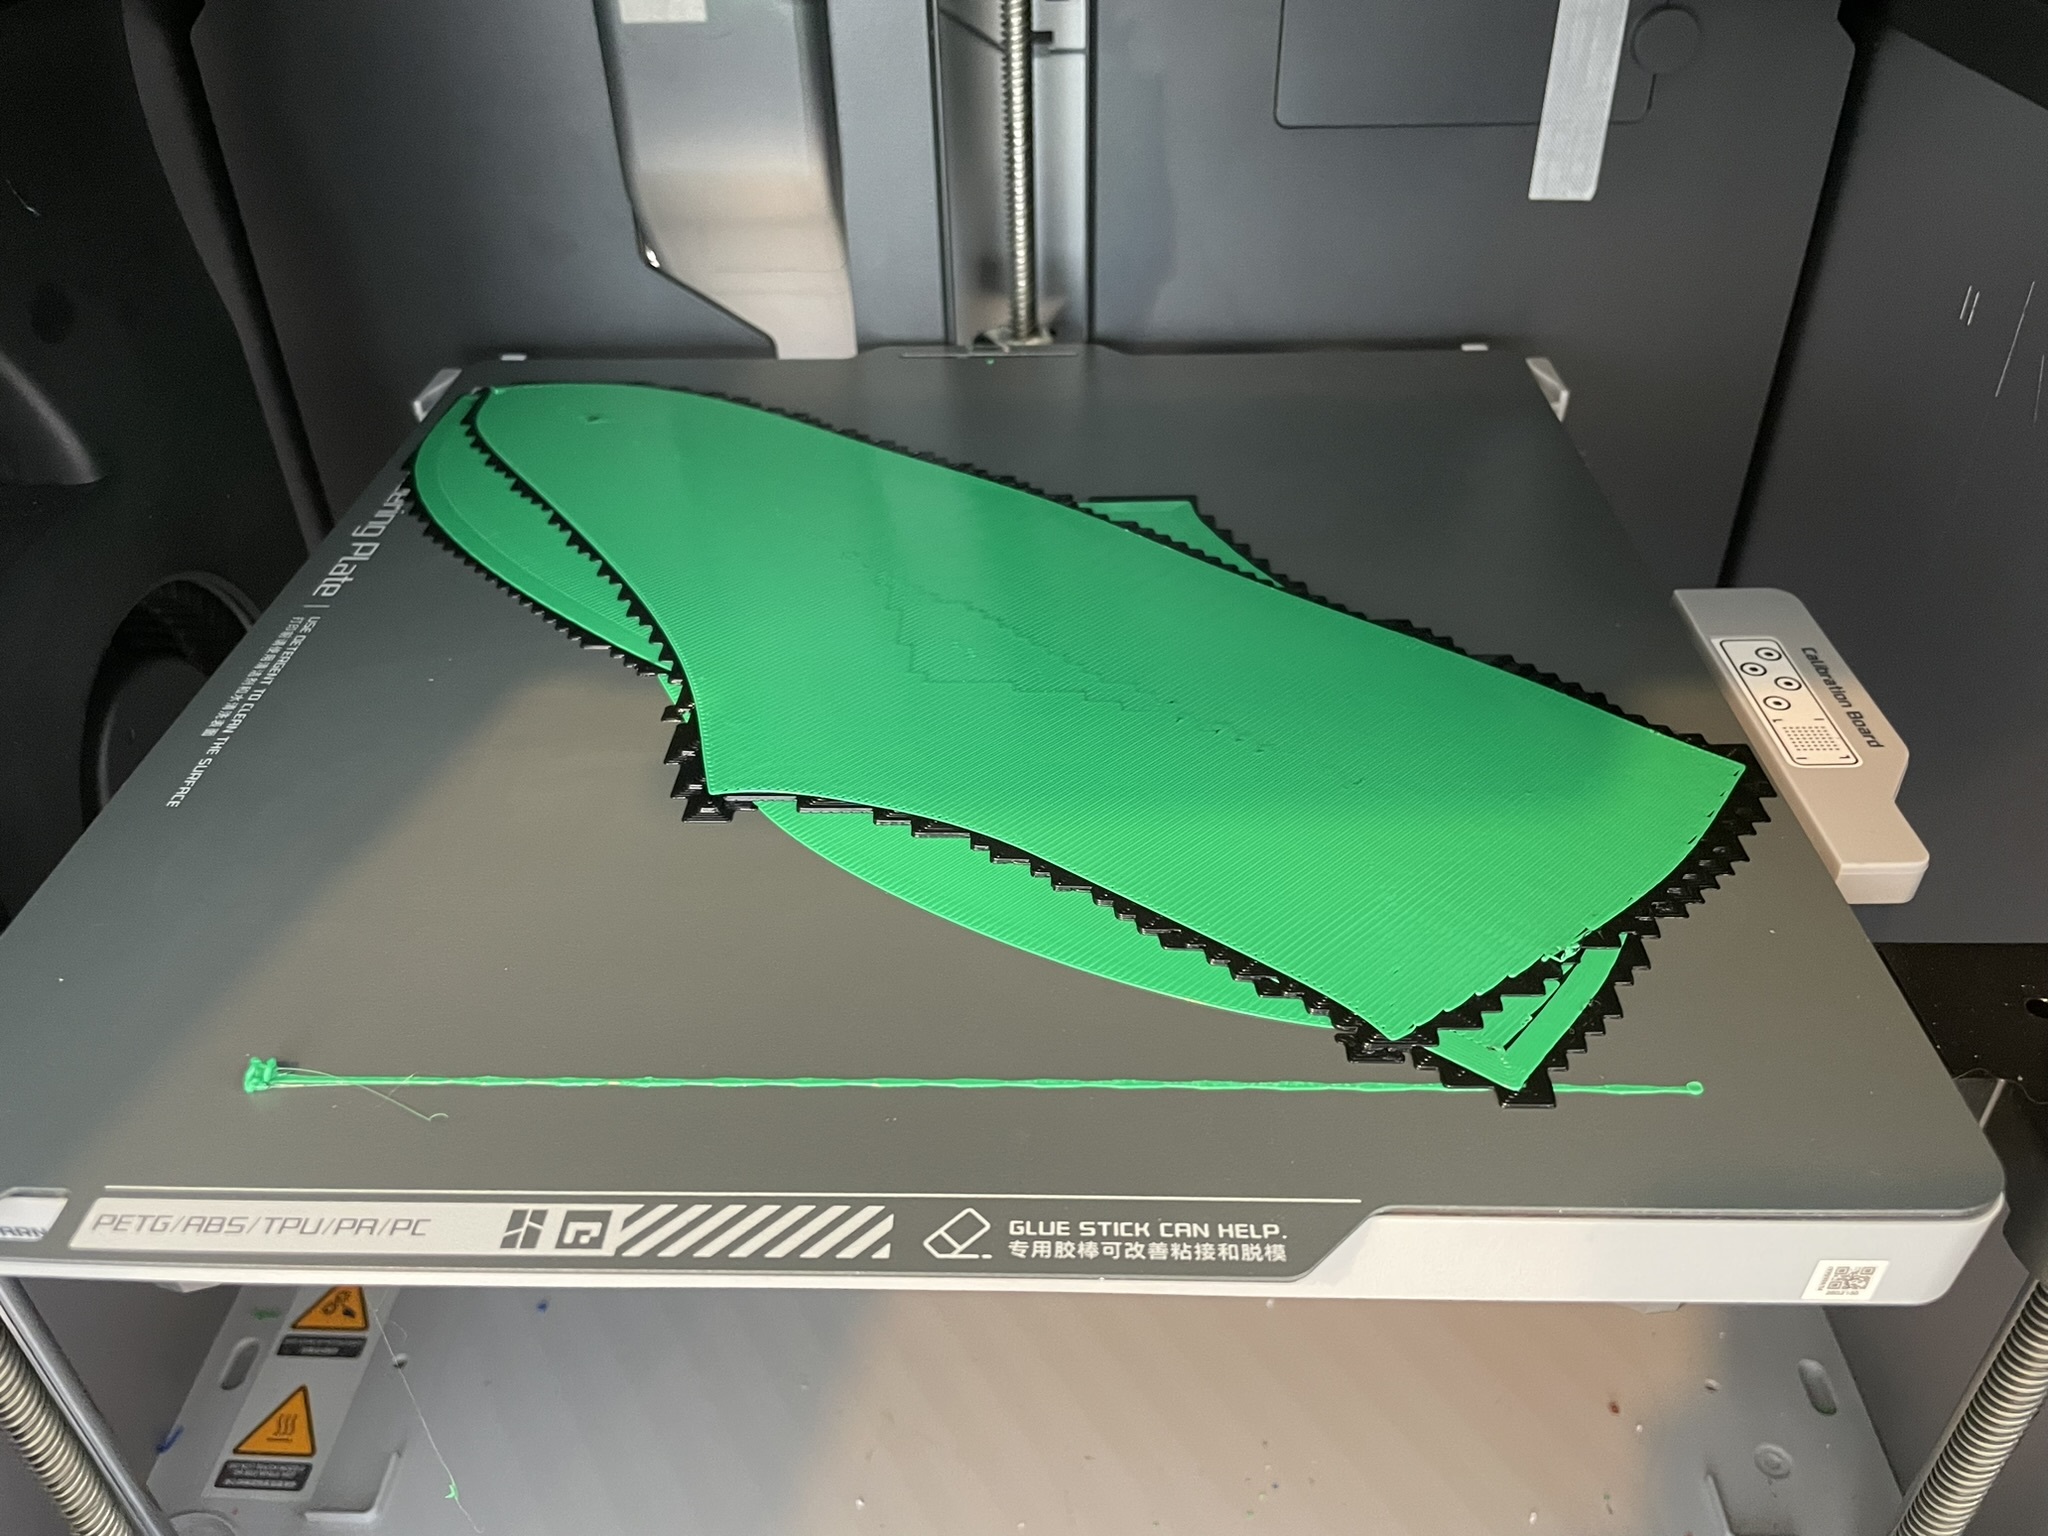
A clever idea I came up with recently was to stack 3D printing patterns on top of one another like a sandwich so that only a single job needs to be queued up, saving manual work. This is of course only possible if your 3D printer can do multiple materials such that dedicated support material can separate the layers of patterns. This is a great use of Bambu Lab’s AMS. As far as what support material to use, I typically print parts in PETG and support with PLA as I demonstrated in my previous tutorial on 3D printing shoe components. Given these materials don’t adhere, they break away nicely. You do start to run into problems though when you have more than two layers of patterns as the middle ones start to get encased by the PLA. Perhaps this could be solved geometrically. But a simpler alternative would be to instead print the patterns with PLA and support with a soluble material like Polymaker’s Polydissolve S1, albeit at somewhat more expense. With this approach you could in theory print hundreds of patterns vertically in a single job.
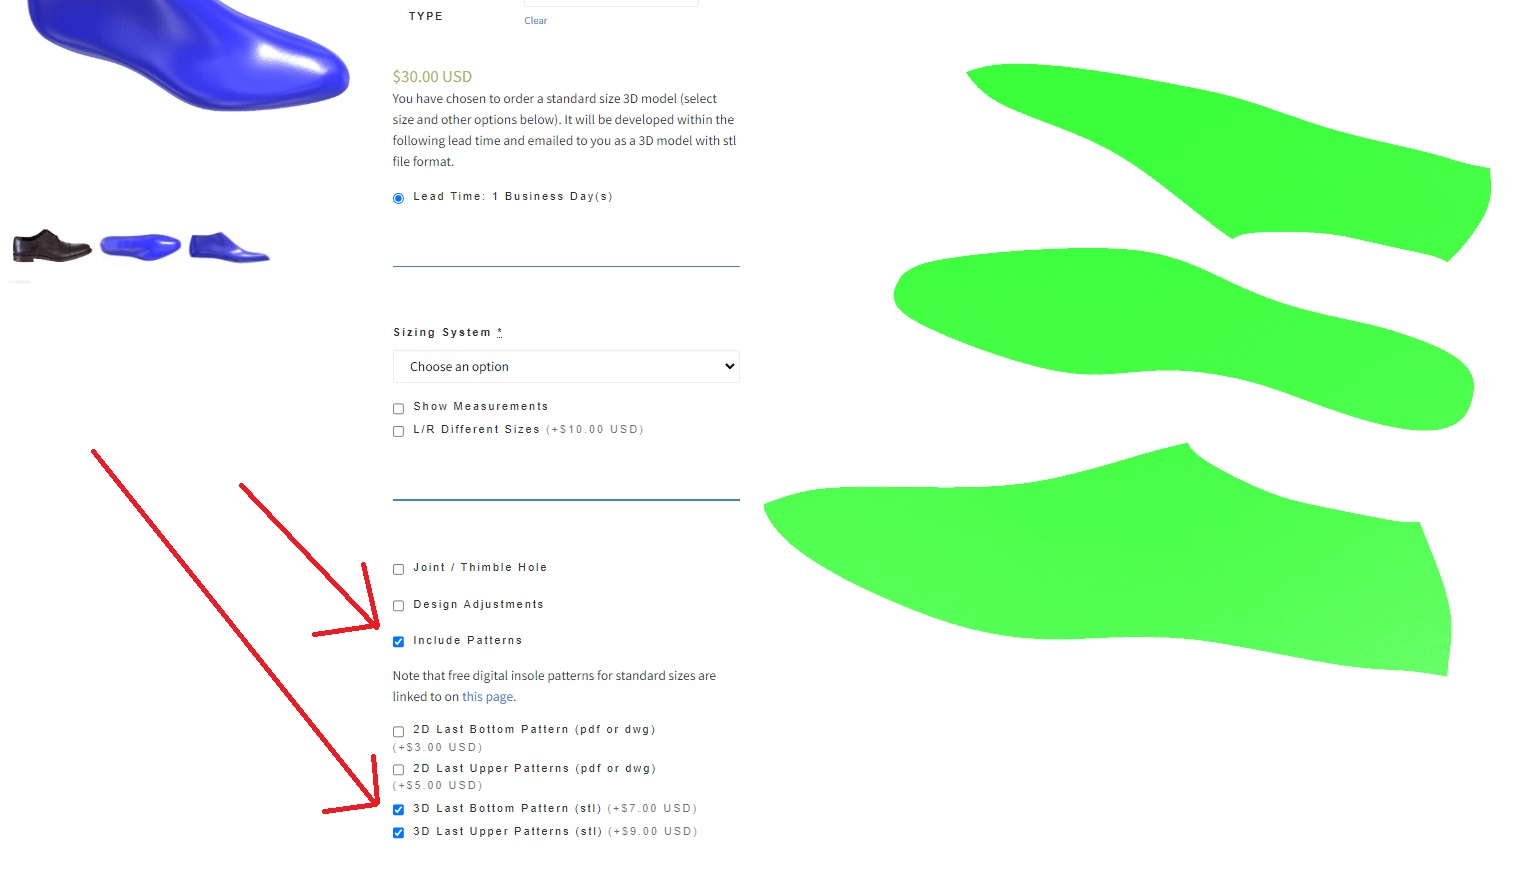
The question you might be asking now is where do you get 3D models of shoemaking patterns to do this with? Well, here on 3DShoemaker of course. You can now specify on the ordering form that you want 3D models for your patterns rather than or in addition to 2D pdf or dwg files. A quick tip if you are using a Bambu printer with an AMS and want to stack patterns vertically: After adding one pattern to Bambu Studio, rather than simply adding another, instead right click the first pattern and add to that so that you can have vertical control over the second pattern rather than it getting snapped down to the build plate.
In a future post I’ll show how to create shoemaking patterns for 3D printing in the 3DShoemaker plugin for Rhino, and I’ll also get into the second type of shoemaking pattern, the ones with specific style attributes.
That’s all for this 3DShoemaker tutorial. Thanks for reading.

