The following is an explanation on how to update 3DShoemaker.
Updating 3DShoemaker
Uninstalling 3DShoemaker
That’s it for installing, updating, and uninstalling 3DShoemaker. Next you may want to check out FAQ below and the guide to getting started in 3DShoemaker.
3DShoemaker Rhino3D Plugin FAQ
- Is 3DShoemaker available on Mac and other languages besides English? What about as a plugin for other software besides Rhino?
3DShoemaker is only available for Rhino on Windows and only in English. There currently are no plans to change this.
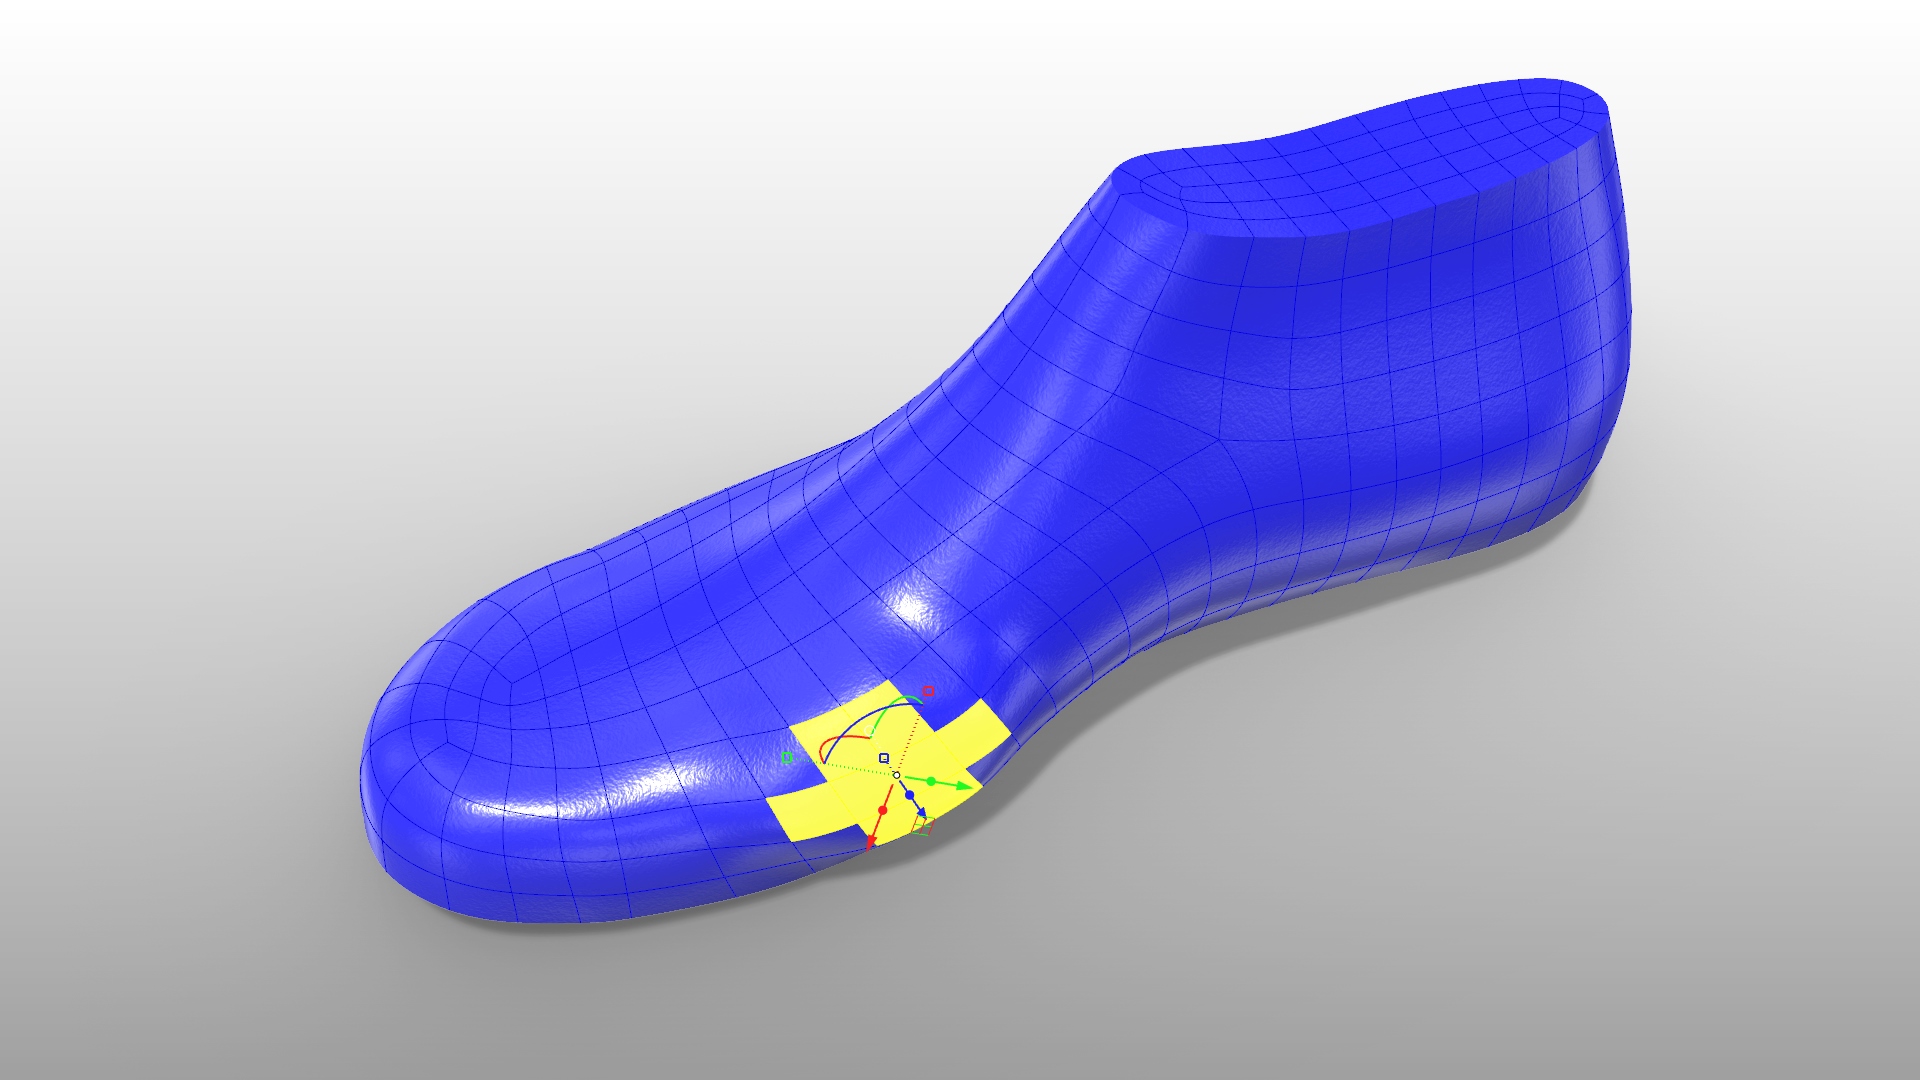
- Can I import shoe lasts I have 3D models for?
You can’t import external shoe last CAD models exactly. What you can do is put them on a temporary layer and then adjust a 3DShoemaker template until it is a reasonable match. This is a time consuming process. But once you have a template you like, creating a coherent library of templates is more straightforward than with other shoe last software programs.
- I'm encountering issues getting 3DShoemaker installed and building my first model, what should I do?
General Things to Solve Issues:
- Try running Rhino in English language mode. While the goal is for 3DShoemaker to work for all languages, there are still some issues when in non-English mode. In some cases, a re-install of Rhino has proven necessary to get it fully running in English mode.
- Use the Rhino command SetDotNetFramework and make sure you are running .NETFramework and not NETCore.
- 3DShoemaker requires that your computer is set to treat periods as decimal points. If it is set to commas, this will cause issues. To switch to periods, go to Regions/Additional Settings on your windows computer and set it here. This will should the error of wrong units or scale.
- Avoid zeros for the various parameters. Zero values essentially tell 3DShoemaker that you are working with a template that was developed in an older version of the plugin that did not have that parameter. The workaround is to use a number close to zero, like 0.1 for instance.
- Set Microsoft Windows including keyboard settings to English. This may not always be necessary, but if you are encountering issues, it could be due to language settings.
- Reinstall 3DShoemaker. If you are encountering issues with the installation, it’s a good idea to try reinstalling (uninstall the install) 3DShoemaker.
- When having trouble using templates, try first rebuilding and resaving the template. Sometimes software updates may change parameterization techniques and a rebuild is required.
- Review the YouTube videos. There is an extensive set of YouTube videos that, if you follow along closely, may solve your problem.
- Can you explain how to do something teach me something about using the software?
The support included with the plugin license purchase only encompasses support installing and building a first shoe last. Beyond that, training/consulting services are available on a paid hourly basis. There is also an extensive array of YouTube tutorials on how to use the software.
- Models are getting stuck where I can't edit parameters, what should I do?
First try to rebuild the model. You may need to press the pause button. In some cases, you might be able to undo some parameter changes via Control-Z and then rebuild. If this doesn’t work, then one recovery technique is to build a new shoe last using the failed last as a template for the new build, making sure to set the primary measurements to the desired values.
Another thing to check is the viewport name. The perspective view gets renamed to the view currently being edited, and some errors might prevent this from returning to perspective. If this happens, try manually renaming the view back to perspective (right click the view name and set view to perspective).
In general, it is important to save regularly, possibly using the incremental save feature in Rhino. Also, it is important that the model is working well before saving. This can be ensured by doing a Rebuild before saving.
- The side panel buttons have become greyed out, what should I do?
If ever you run into the situation where the buttons on the side panel are stuck in a disabled state, press the Pause button to re-enable them and then possibly the Rebuild button to get things going again.
- How do I report a bug?
The best way to report a bug is to provide a copy of the 3DM file (should not be saved in editing mode) prior to the bug occurring and then make a video of the steps taken that cause the bug to happen. This will allow for replication of the bug so that it can be fixed. Frequent saving will provide an opportunity to provide this kind of bug reporting. The easiest way to create a screen recording video in Windows is by pressing the Windows key, the Shift key, and the R key.
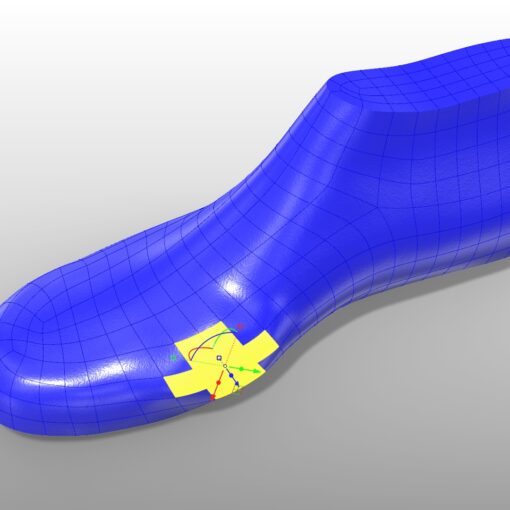
- When editing the last is so tiny I can't see it or the dimensions appear to big, what should I do?
In options/annotation styles change the model scale space to 1. When creating new documents, always choose the No Template option. Or if that doesn’t work, choose scale small and units mm.
- Plugin data is being lost when I reopen my file, including the foot model disappearing.
Use the Rhino command SetDotNetRuntime and make sure you are running .NETFramework and not NETCore.