3DShoemaker is a plugin for the commercial CAD software Rhino3D. The following is a guide to getting started using 3DShoemaker. If you’re new to Rhino, you might watch this interface tutorial first, and try out their free trial. If you are trying to figure out how to install 3DShoemaker, see this page.
3DShoemaker Panel
3DShoemaker is best operated via the panel. To open the panel, type the command “Open3DShoemakerPanel” (without quotes) in the Rhino3D command prompt. The panel will appear and you can dock it in various locations. The recommended location is on the right side as shown in the screenshot below. Below the screenshot are summaries of what the various controls do.
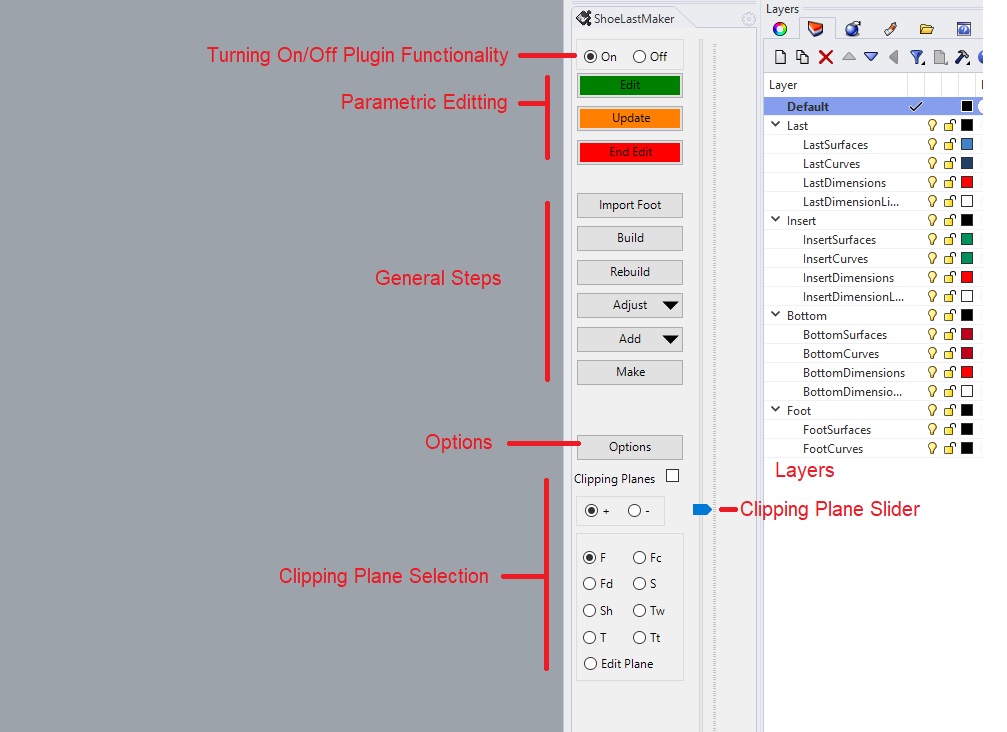
Pause Button (Previously On/Off)
The pause button temporarily disables the plugin routines of writing to saved Rhino files. Note that the plugin is paused by default until it is used so as not to interfere with other work in Rhino. Pausing is useful when you want to copy and paste something for reference while working with 3DShoemaker, as it prevents the reading and writing the plugin ordinarily does.
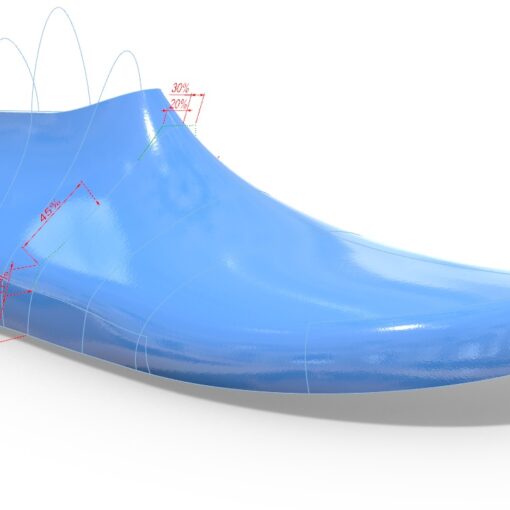
Parametric Editing Buttons
These buttons are used when parametrically editing shoe last or component. To start editing, select an editable curve and click the edit button, or vice versa. Dimensions that can be altered are then shown. To change one, click it and a form comes up where a new value can be entered. Simply type in a new number (no need for percent or degree symbols) and press enter (escape key cancels). After changing one or more dimension values, the Update button can be pressed to see the effects of the changes. Once satisfactory changes have been made, the End button will apply the changes and return to standard viewing mode.
General Steps Buttons
These are buttons for carrying out the general workflow of the plugin:
refers you to a manufacturer that can use the 3DShoemaker CAD files to produce physical shoe lasts and components.
Options Button
This button brings up a form with various options. A particularly useful option is “In Plane Editing”, which reorients the model to provide a planar view of the curve being edited (only possible when only one curve is being edited). Another useful option is “Show Surfaces When Updating”. This slows things down quite a bit given surfaces have to be redesigned on each update, but it does help to see the full impact of parameter changes. This option is best used with “In Plane Editing” turned off.
Clipping Plane Selection and Slider
When designing a shoe last, it helps to be able to check various cross sections for smoothness. To do this, enable the clipping plane via the check box, choose which view you would like to look at (hover for the full plane name), and then move the slider to position the clipping plane.
Build Form
As explained above, pressing the Build button in the panel brings up the build form used when creating a new shoe last. Below is a screenshot of the build form followed by an explanation of the various controls.
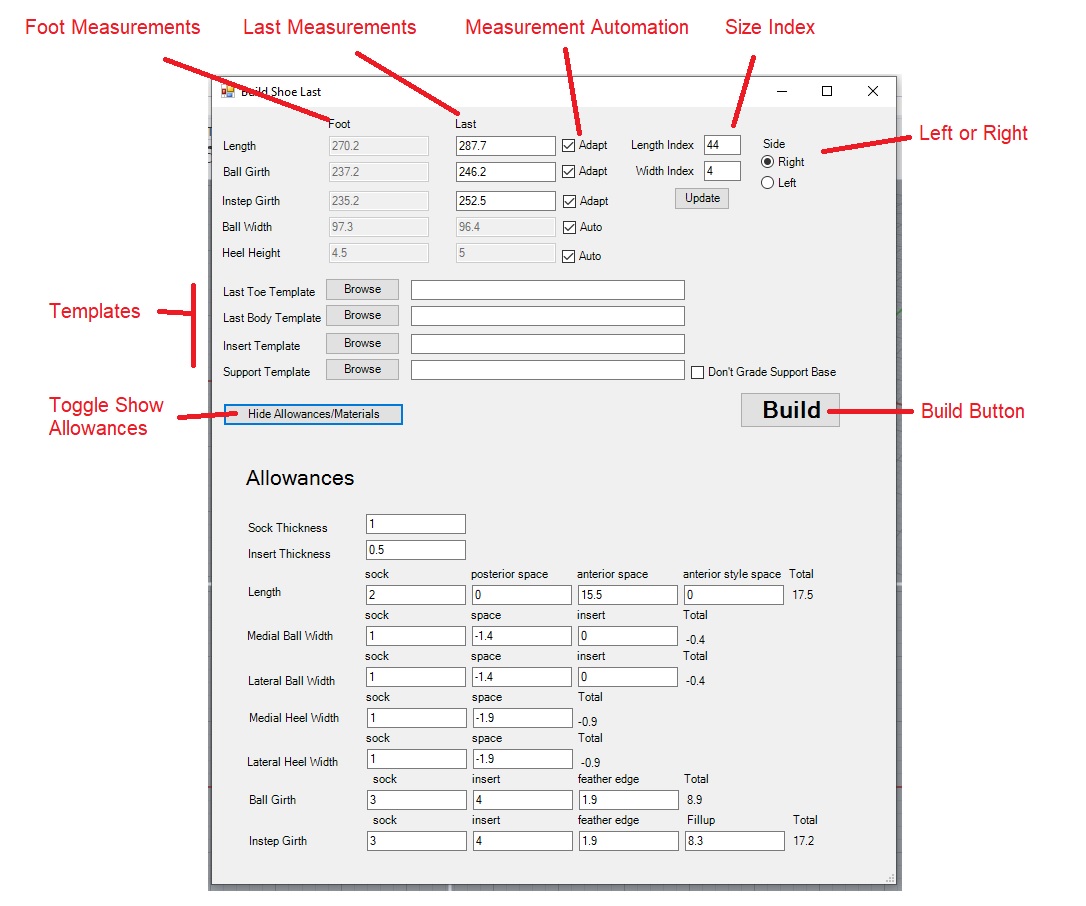
Working with Templates
When working with the built in template, modifications to it can be saved simply by saving the Rhino file (template parameters get appended to the 3DM file), resulting in a new template. And then the new template can be used in future builds by browsing for it from the build form for toe and or body style. Please make sure there is no space in the file or file location, as Rhino sees them as ‘return’ key presses.
Occasionally there may be updates to the plugin that affect design templates. If you notice any issues after updating to the latest plugin version, then it is best to open the template and rebuild and re-save it prior to using it as a template.
Specialty templates can also be purchased here on 3DShoemaker.com: Shoe Last Designs
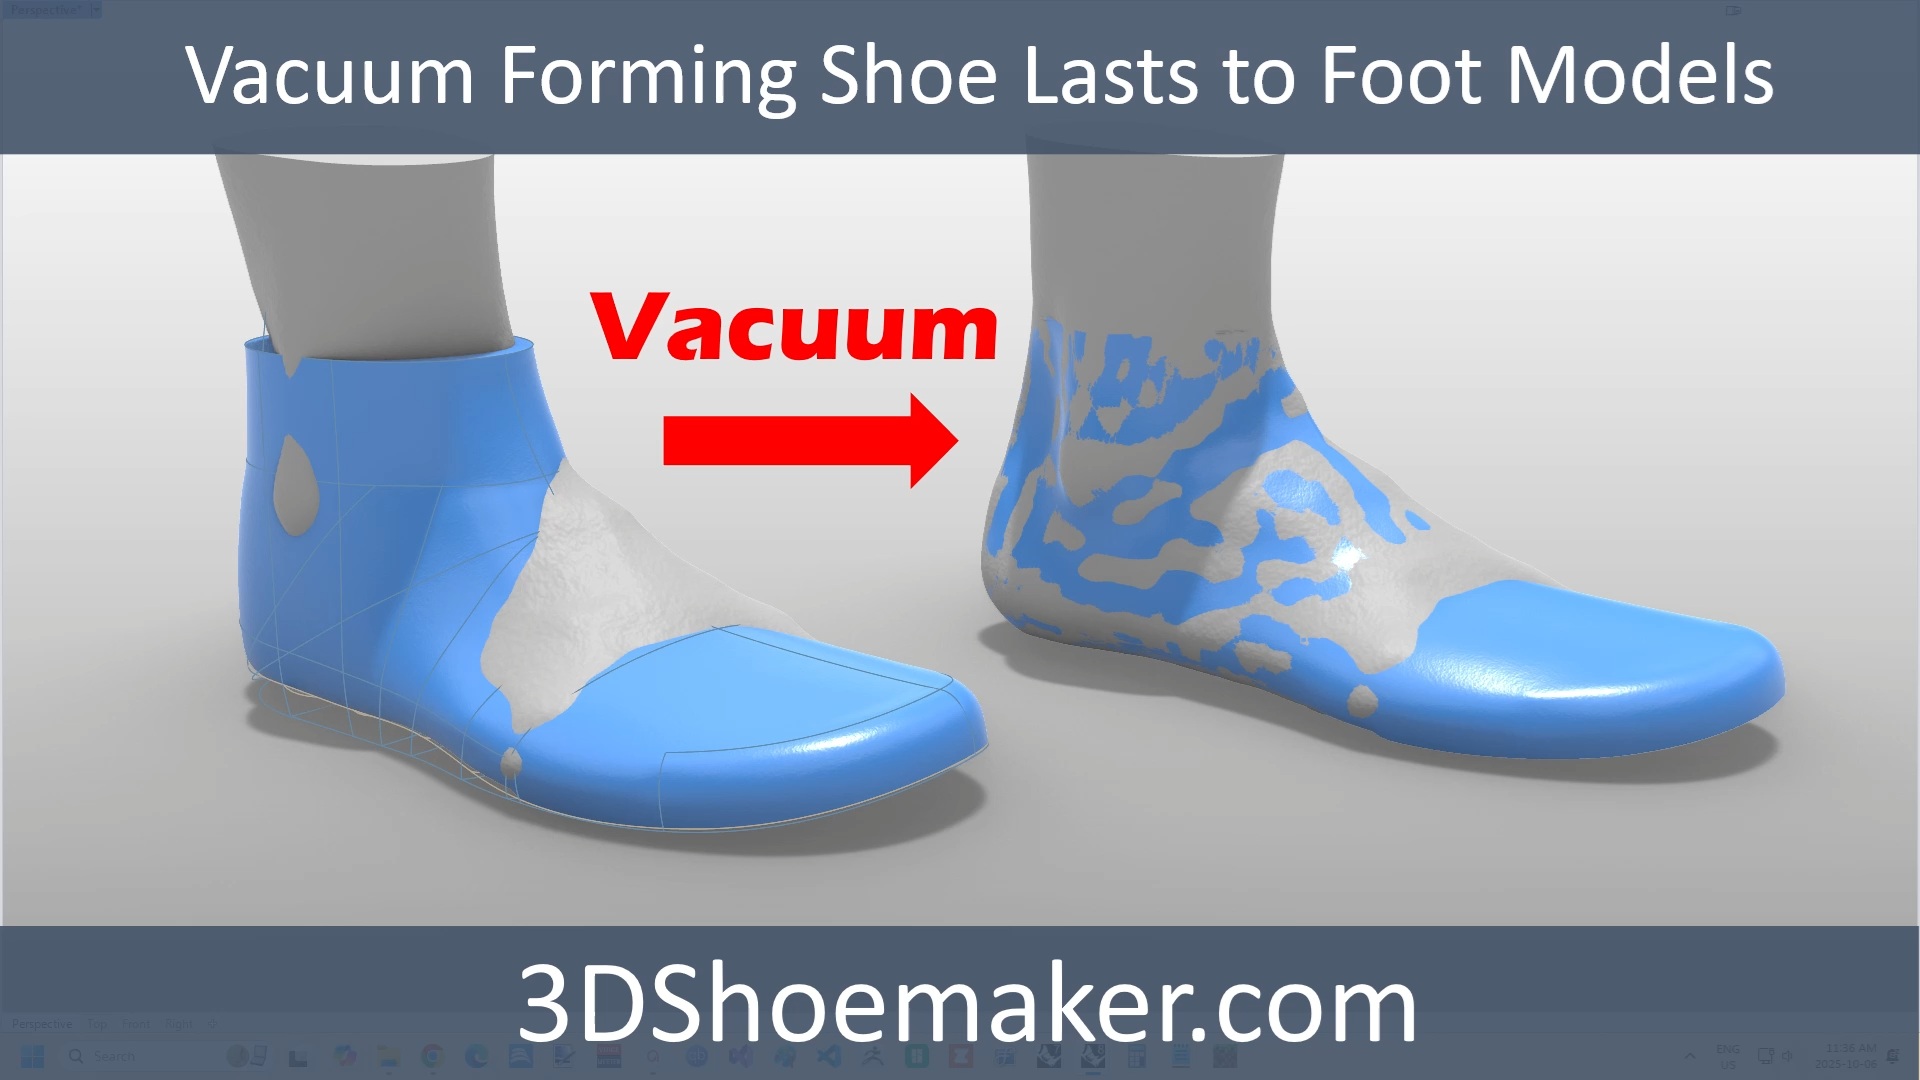
Working with Reference Data
When developing a shoe last in 3DShoemaker, it sometimes helps to have some reference data. Foot geometry can of course be managed by importing a foot. But other reference data such as 3D models of a shoe or just pictures or sketches can also be helpful. To manage such data, its best to create a new layer in Rhino and then lock it while you are editing the shoe last.
Troubleshooting Tips
The following are a few tips to help you avoid some of the more common issues encountered in 3DShoemaker:

7 thoughts on “Parametric Shoe Last Design Software: Introduction to 3DShoemaker”
Hello. Can you please make short video, how is possible to put my own shoelast into the plugin?
There is no quick way to import a shoe last from elsewhere. You have to put it on another layer and then adjust the parametric last to be similar.
Is it possible to use this plugin on a mac, please?
Not currently.
Hi. I’ve stumbled across 3DShoemaker for Rhino. The Ortho is being sold on here for $139, does this mean I additionally need to purchase Rhino? How easy is it to learn as a complete novice with no CAD design experience and no orthotic experience, just a member of the public who’s curious.
Hi Eleanor, I replied by email.
I have exactly this question.