Update: We recently posted about an alternative to tracing a foot by hand, which is to use a 2D flatbed desktop document scanner to scan the foot directly.
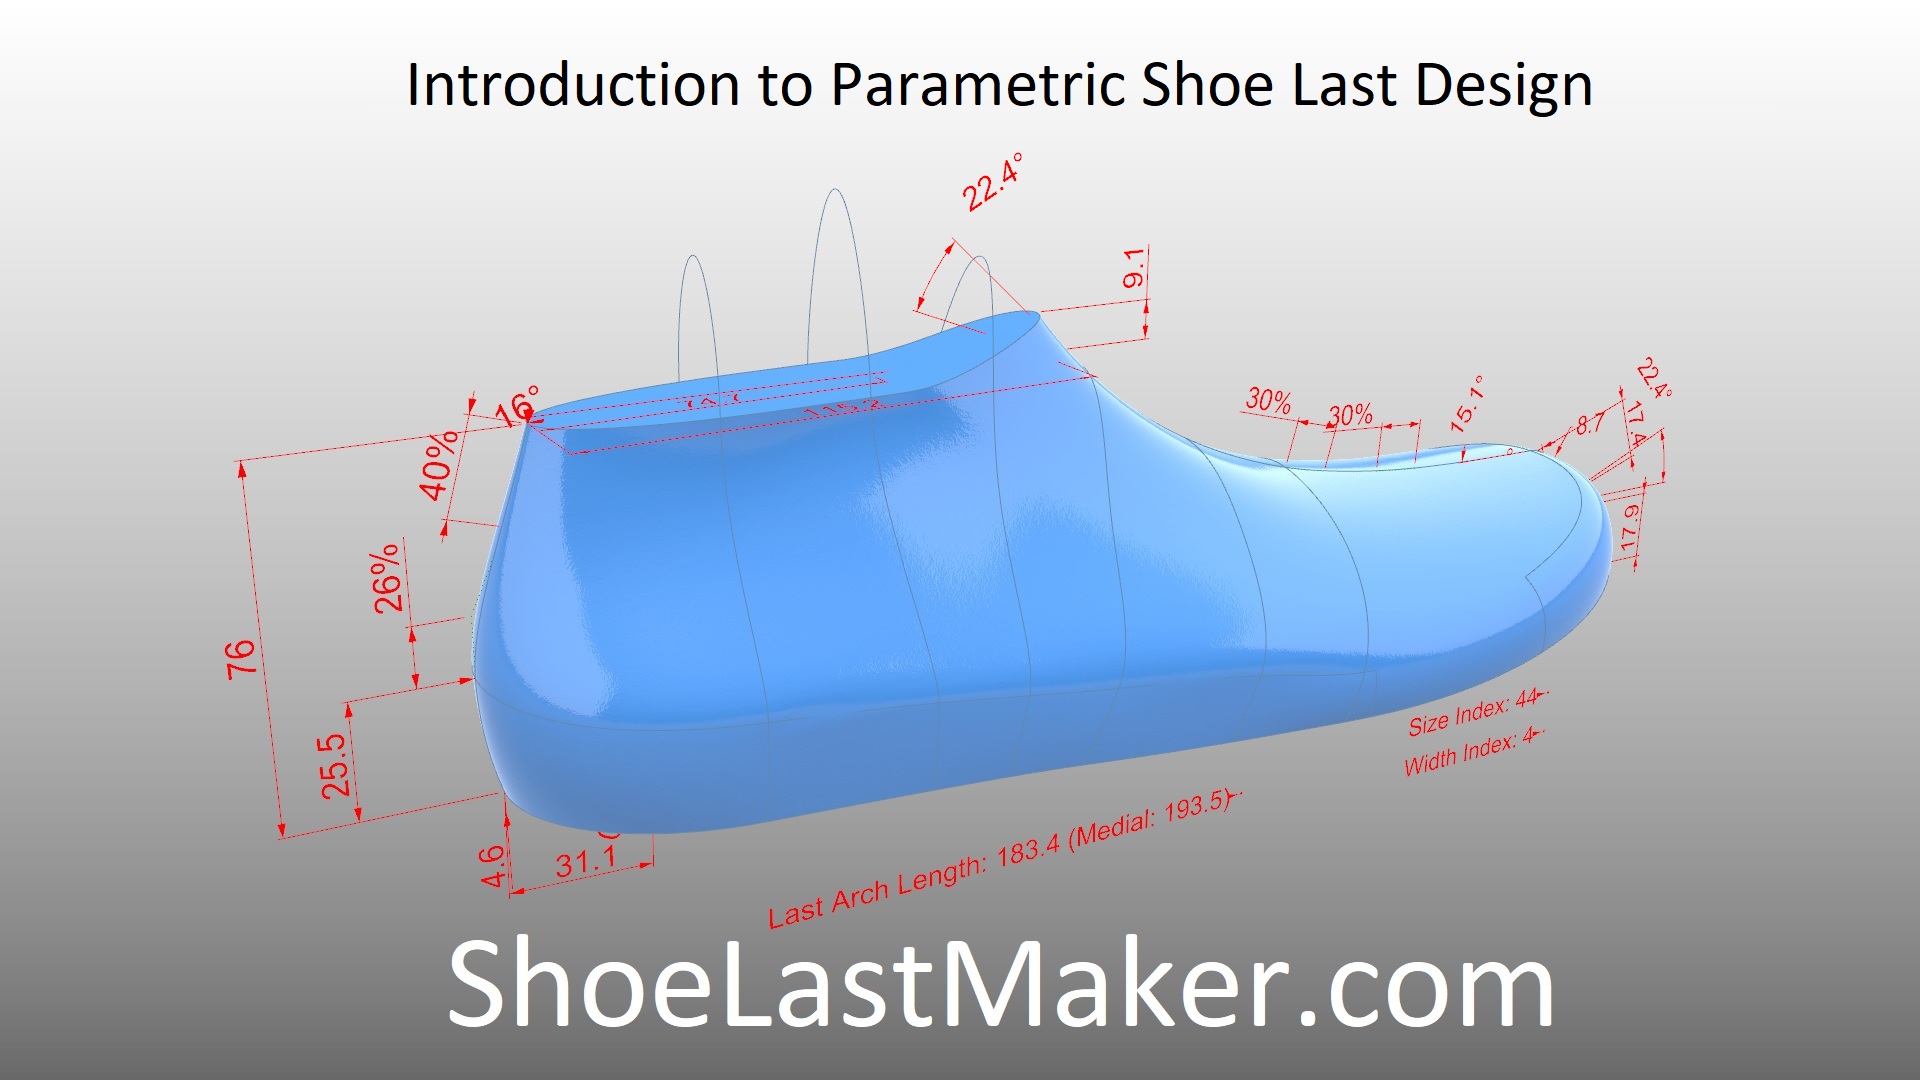
An outline of a foot is an essential input for creating bespoke and custom shoe lasts. On this page, we’ll show you how to create a foot outline via tracing.
We’ll refer to the person who the shoe last will be for as the ‘subject’. The subject should be standing during the tracing so as to capture the full length and width of the foot as it will be in the shoe. The subject should also be done barefoot (intended sock type is compensated for elsewhere).
It’s most common to use a pencil or other drawing instrument to do the tracing. This is fine, though make sure to write the diameter or thickness of the instrument somewhere on the tracing, as this affects measurements. For this reason, we actually prefer to use an instrument with a minimal thickness, such as a butter knife, to indent the tracing paper, and then go over this with a pen or pencil. It helps to put down multiple sheets of paper as this way indentation is more easily achieved. An alternative to standard paper is carbon paper, which is good for also marking the contact region of the foot.
Whatever tracing instrument you choose, trace around the foot while keeping the tracing instrument as vertical as possible all the way around. If you end up having multiple redundant curves around the foot, retrace the curve you believe is the most accurate, making it darker.
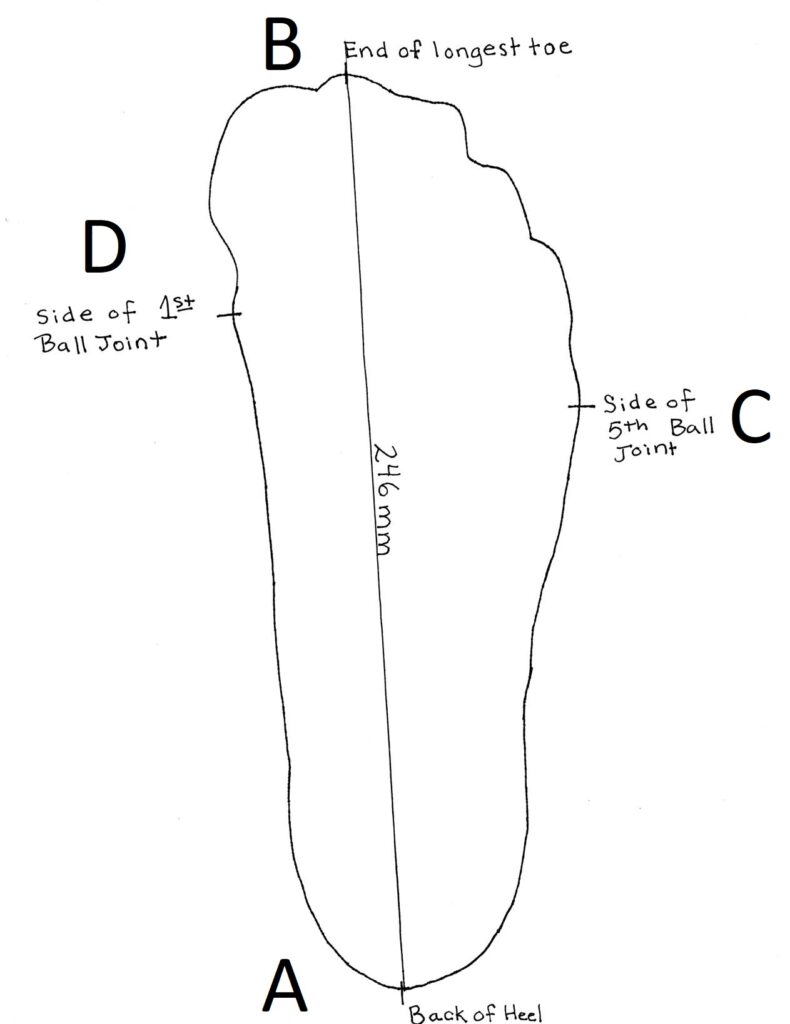
In addition to the foot outline, there are four key points you need to mark on the tracing:
The heel point can be somewhat difficult to mark because the furthest back point is often quite high up off the paper. A technique we’ve found quite accurate for marking this point is to use an object with a 90 degree corner, like a CD case, to butt up against the back of the foot and then mark the point. You can also use this technique for the other points if you feel it would be more accurate.
The final step is to draw a line from the back of the heel to the end of the furthest toe. Measure the length of this line in mm and write this length along the line. This is an approximation of foot length (actual foot length measurement passes through the ball line at a specific ratio, which is explained in our foot measurements guide).
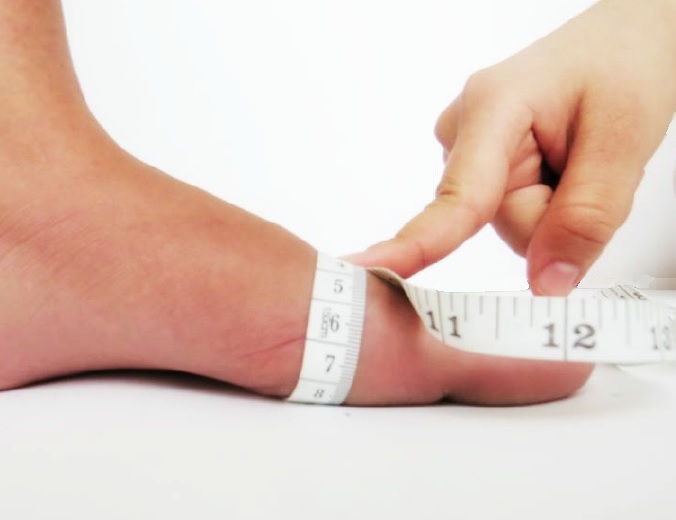
That’s basically it for how we do foot tracings. If you are ordering a bespoke shoe last, you’ll scan this tracing with a flatbed document scanner and upload it to the form (if you don’t have one, please use a scanning app like TurboScan that rectifies and scales images rather than just taking a regular picture). If you are ordering custom shoe lasts from us, you’ll need to analyze this tracing yourself to extract all necessary foot measurements. Either way though, the next step is to measure foot girths.
If you have any questions or suggestions, please let us know in the comments below, or contact us.
