In this 3DShoemaker video I’m going to introduce my latest 3D printed shoes. I’ve used the same foaming TPU I’ve used previously but have a new twist, which is a breathable upper. I’m printing on my recently acquired Bambulab H2D, making full use of the high build height and dual nozzle for dedicated support material. The resulting comfort shoe is leaps and bounds ahead of what I’ve done previously. But I’m also becoming much more discerning as my expectations are going up. You’ll see in this video that I won’t hold back when comparing these to more conventionally made shoes.
-
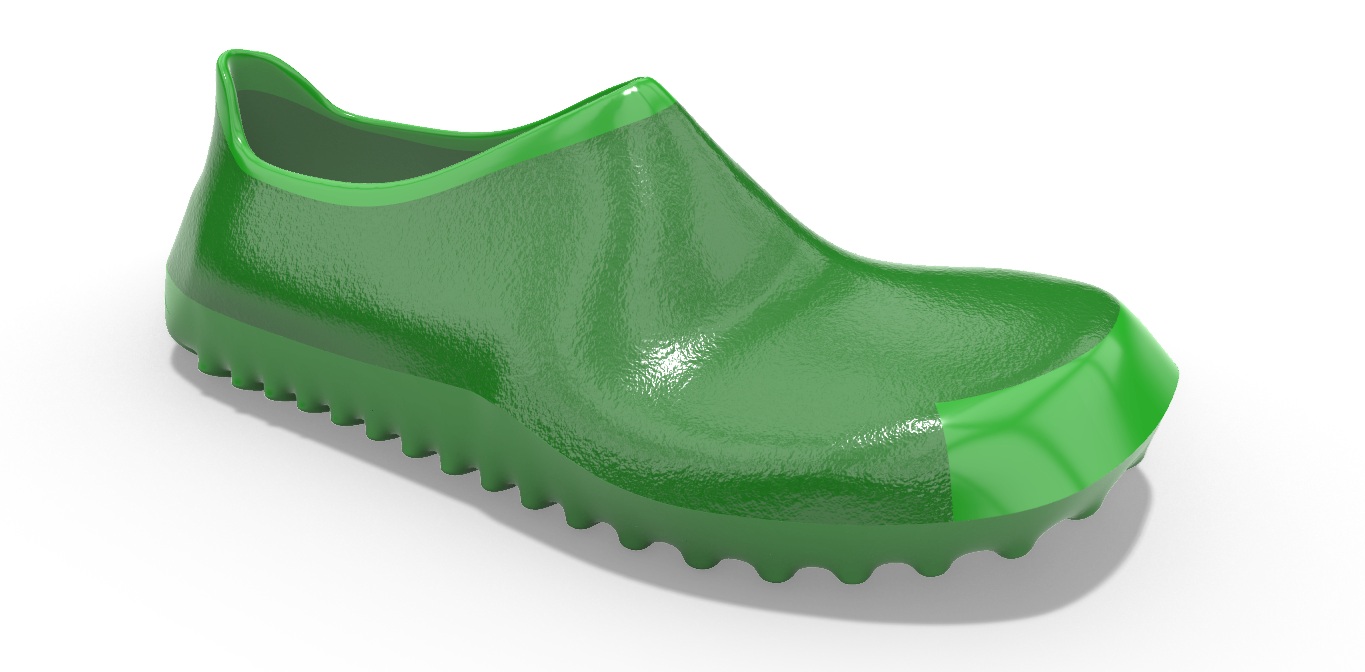
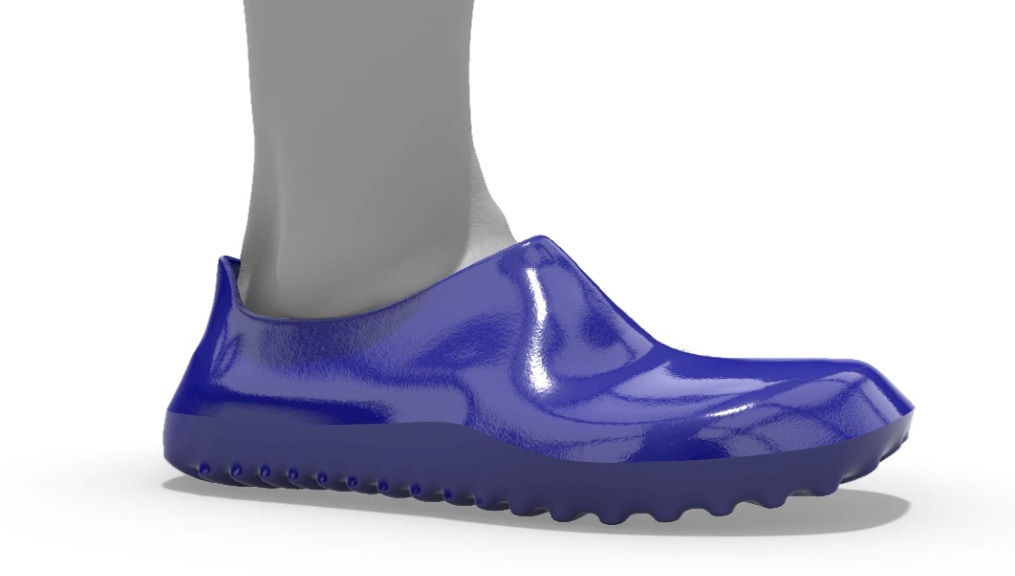
3D Printed Comfort Shoe – 3D Model
Select options This product has multiple variants. The options may be chosen on the product page
Before getting into the details of the design, I’d like to first show how to order the 3D models on 3DShoemaker.com. You’ll find them on the Designs/3D Printed Shoes menu. Once you’ve selected the design, you’ll be taken to the ordering form. From here you can go with a Standard Size with the option to have adjustments done to the fit and design which I’ve explained in previous videos. Alternatively, you can go with the bespoke option and provide foot tracings or 3D models of your feet. Either way, one free round of adjustments is included in the price. I suggest choosing the option to receive the model broken down into various sections, which is necessary for creating specific properties for the various parts of the shoe, such as a breathable upper. This is carried out by importing as a single object with multiple parts and then setting properties independently for each part. Another ordering option is the parametric model, which can be used in the 3DShoemaker plugin for Rhino for more in depth use cases. I’ll talk more about that in my next video.
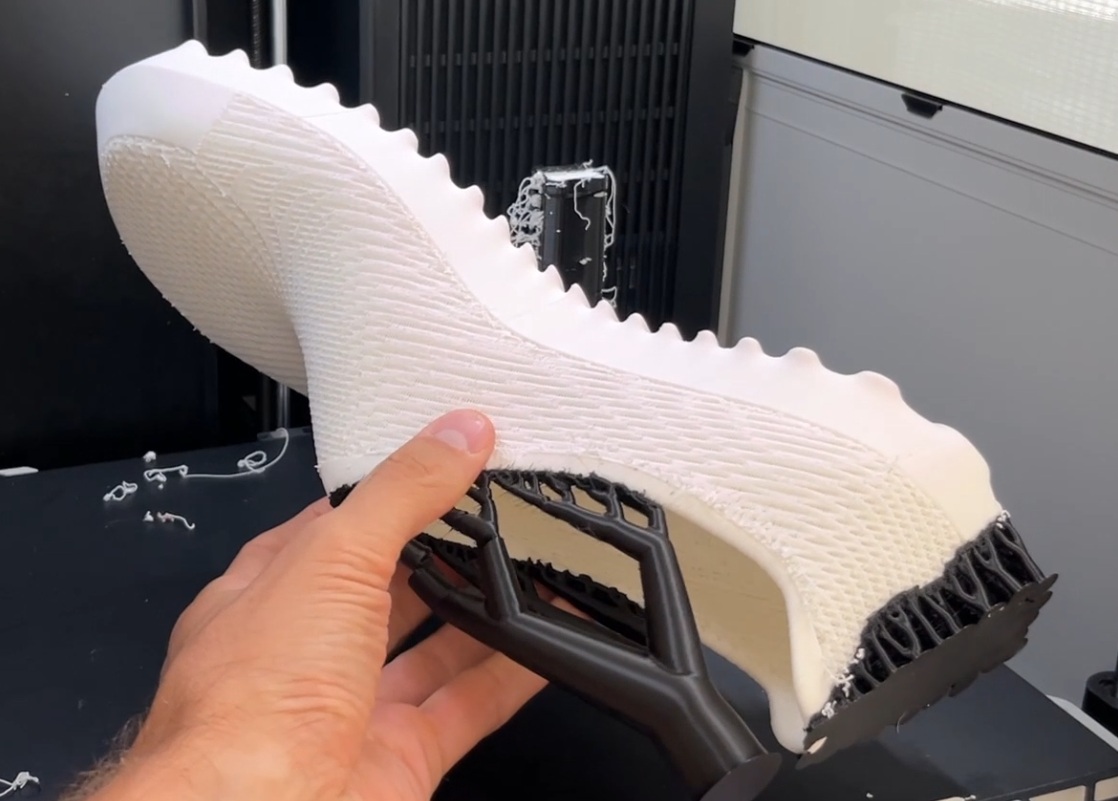
As I mentioned, I like to 3D print shoes with foaming TPU. Foaming TPU only becomes soft after exiting the extruder via foaming. So it is stiff enough to print with at a decent speed and without any workarounds. It prints just fine on my Bambulab H2D. I’ve figured out what I was doing wrong in my previous post where I was getting tangling when trying to support with a different material in the right nozzle. The problem was that the flow ratio was too high given all the pressure from foaming. When I drop that down from 0.75 to 0.51 while keeping a 240° nozzle temp, using a separate support material, namely PLA, works great. As far as the support type, I like to use manual tree supports, highlighting then filling or painting in the regions I want supported.
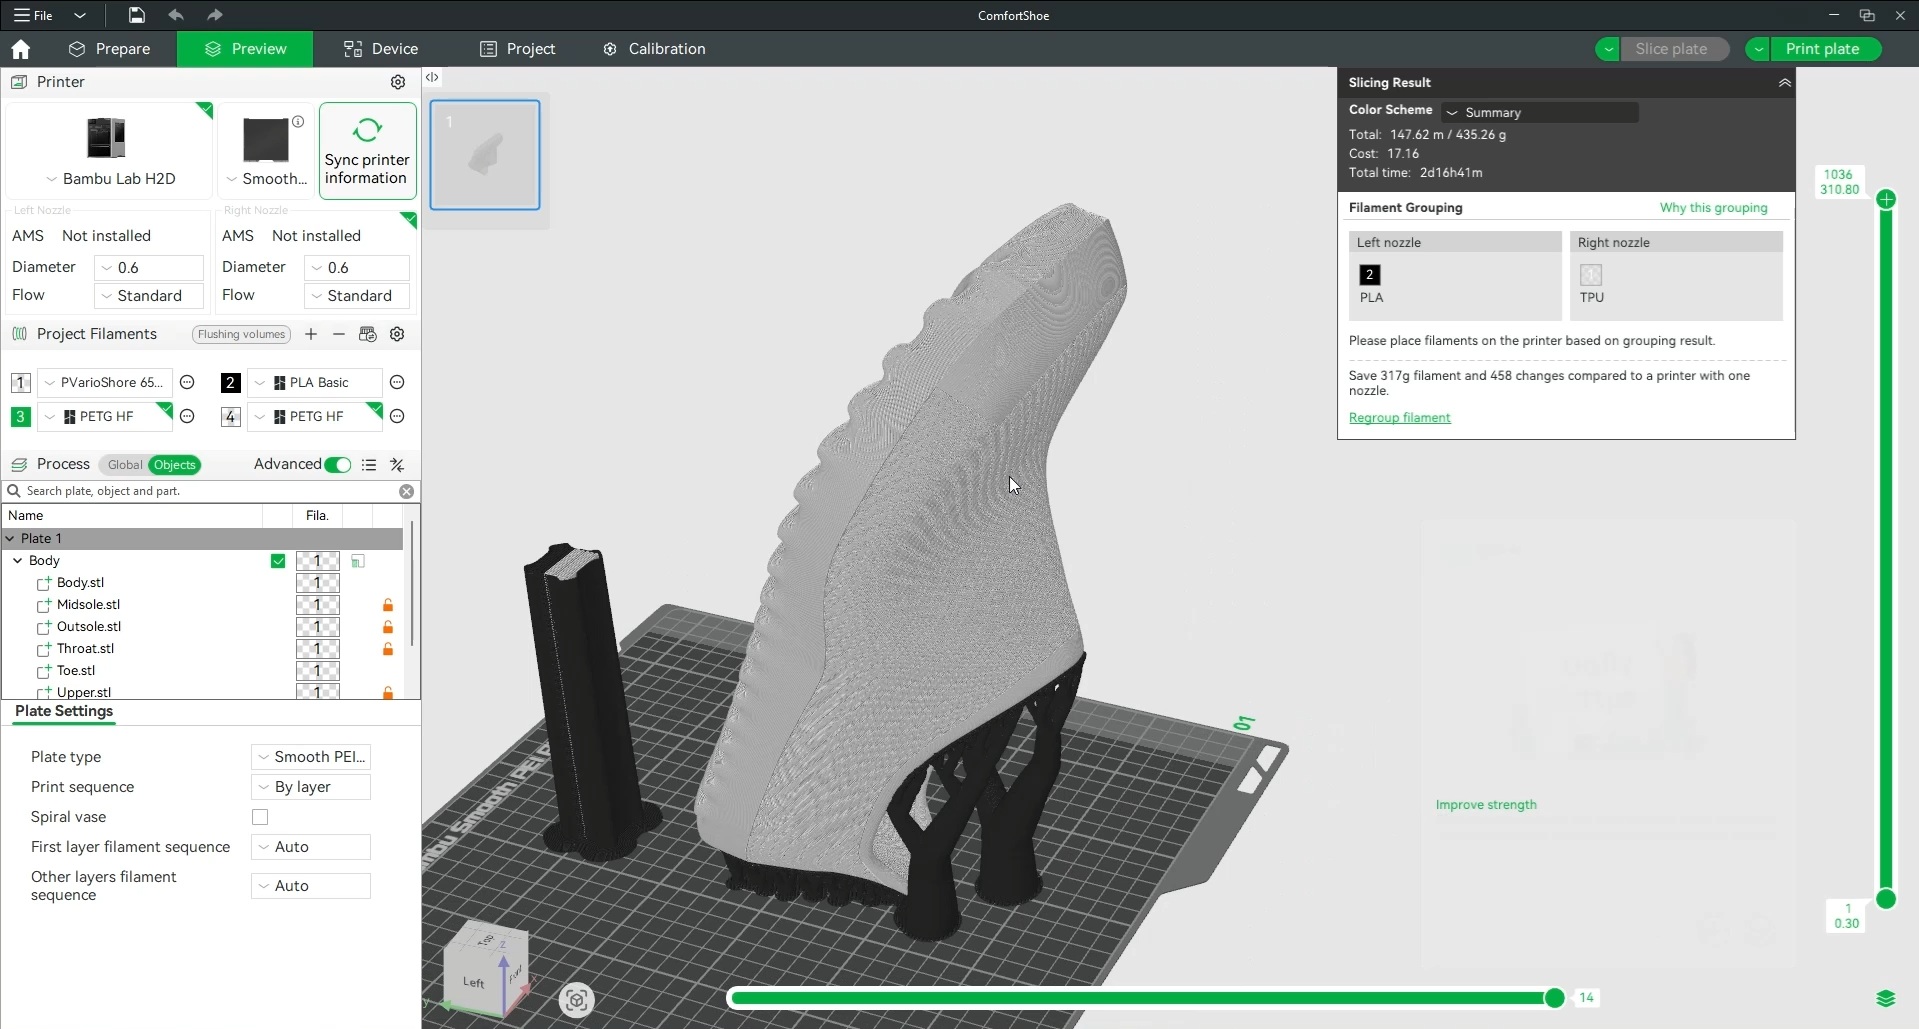
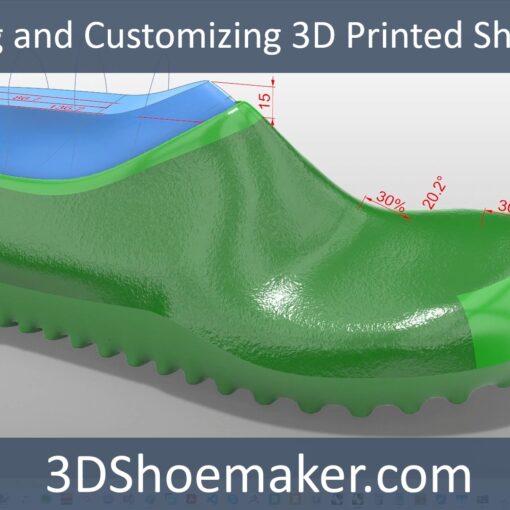
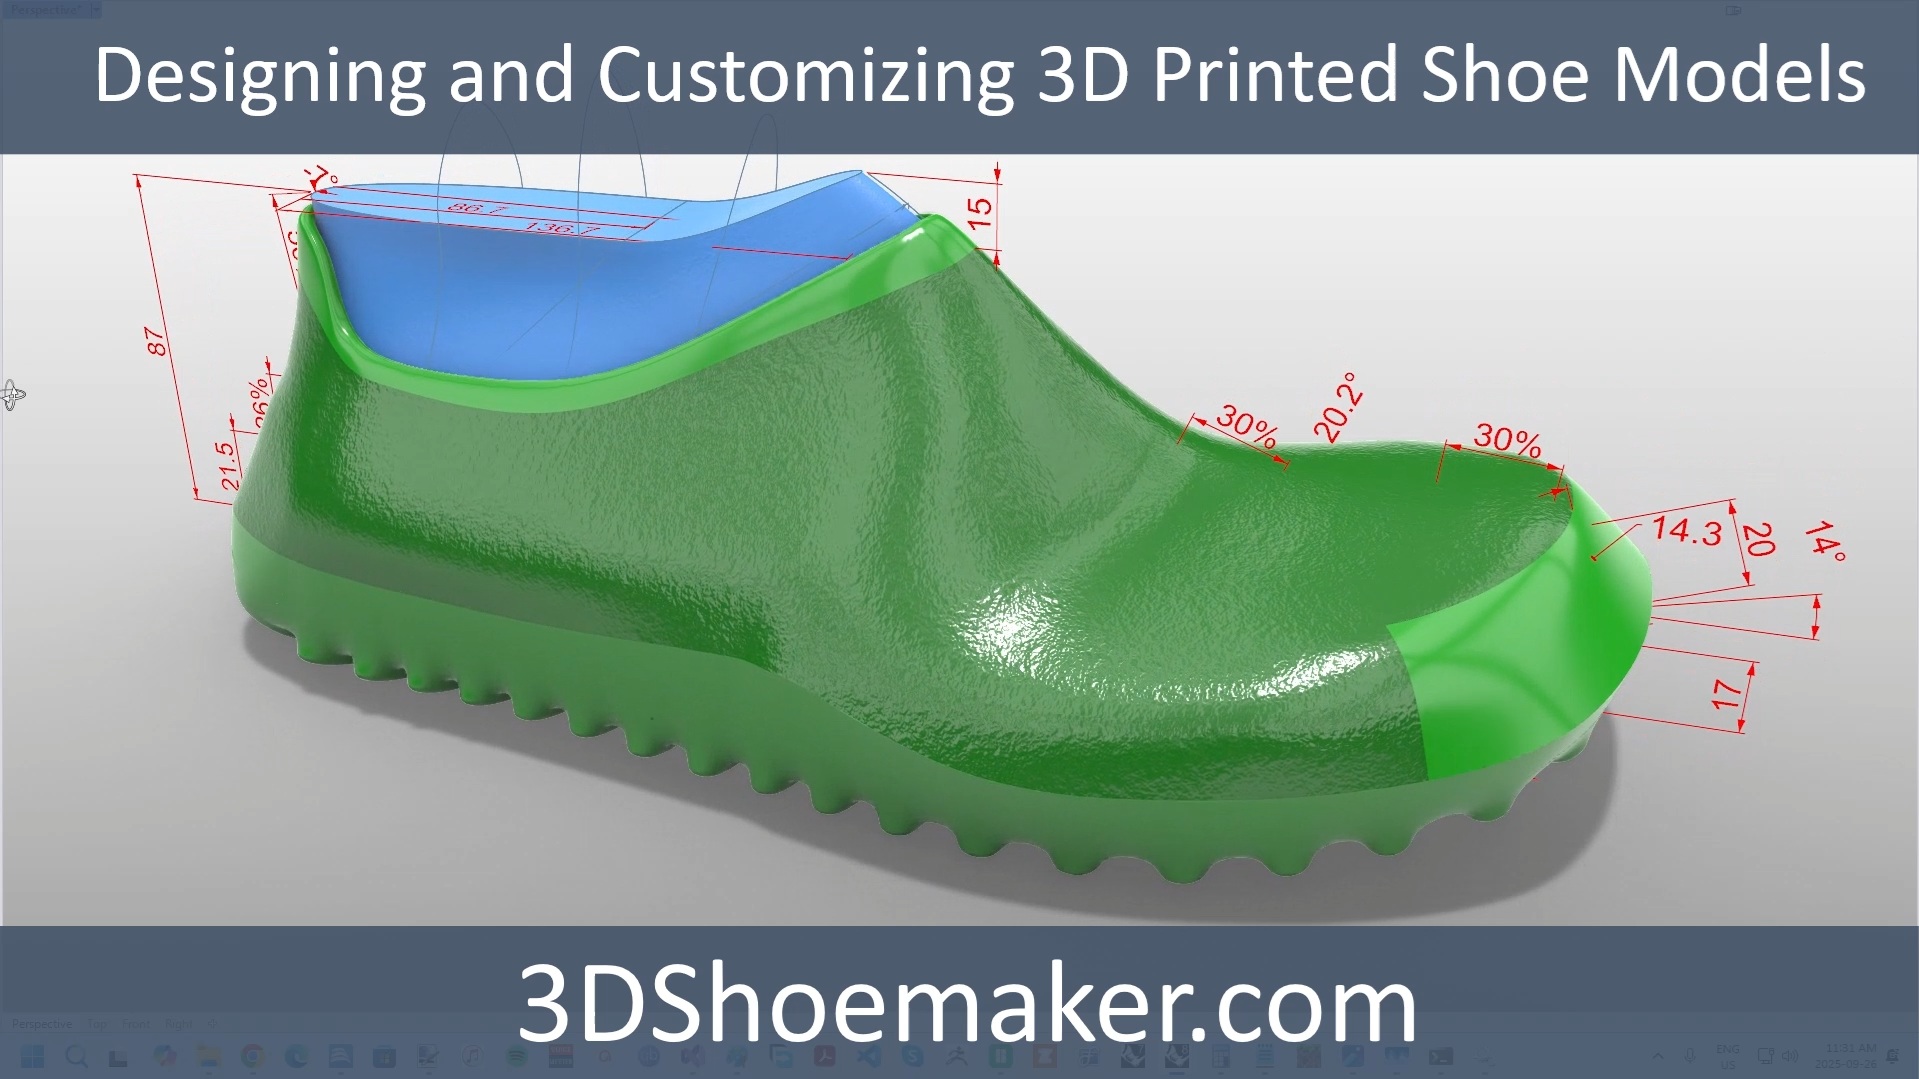
I’ve intended for this 3D printed shoe design to be printed nearly vertically with the heal down and supported at the collar and back of the heel. You could still print in the 45 degree orientation I’ve shown in other posts if you don’t have an H2D or equivalent with sufficient build height and dual nozzles. Note that I did try the approach of giving the shoes a flat back and printing on that to reduce the need for support material and allow printing on a single nozzle printer. But the collar didn’t turn out very well when not supported. You’ll see this shoe on my right foot in the videos. It’s fairly mucked up by this point from modifications I tried to make to it after printing.
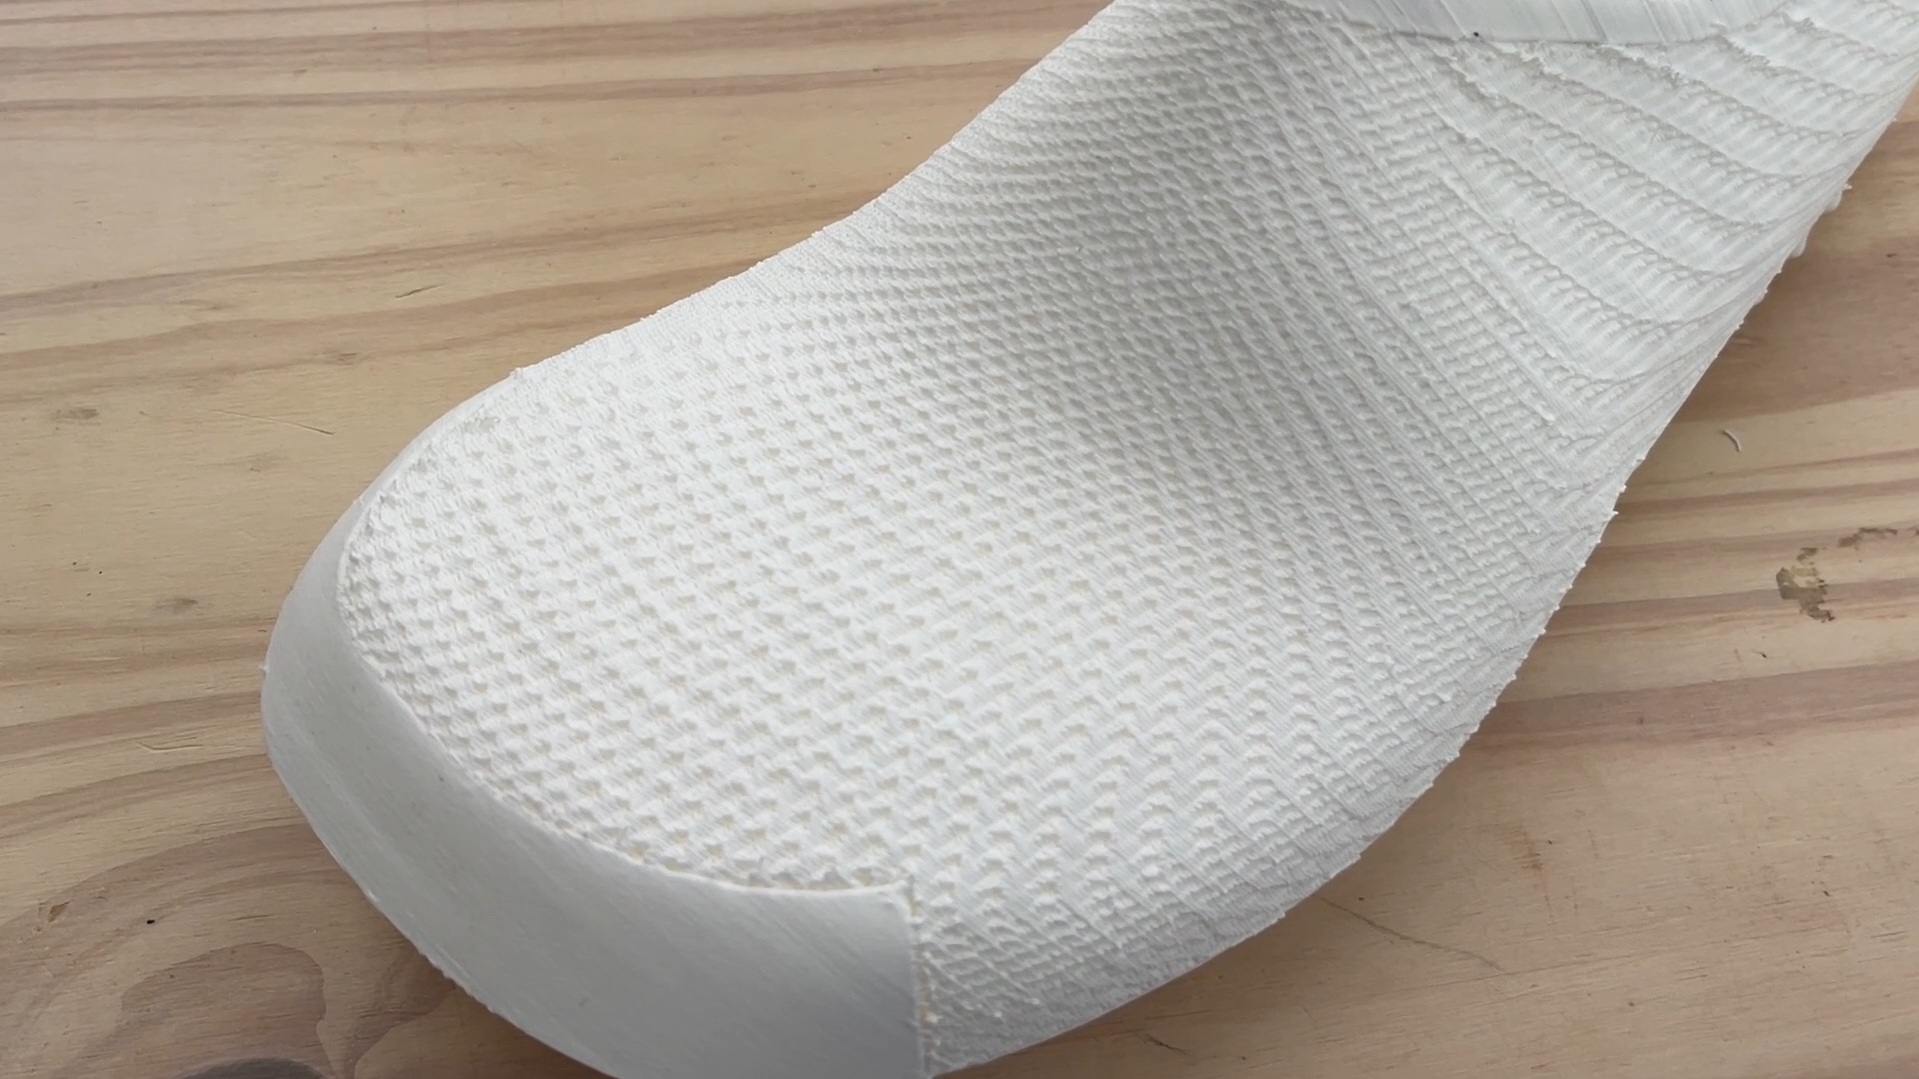
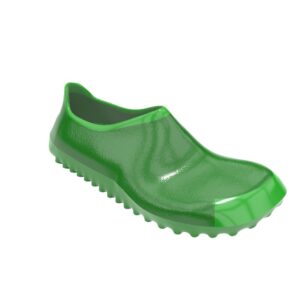
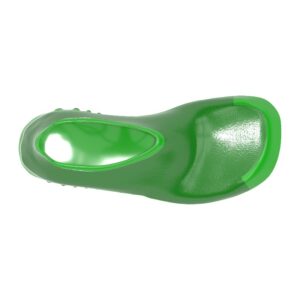
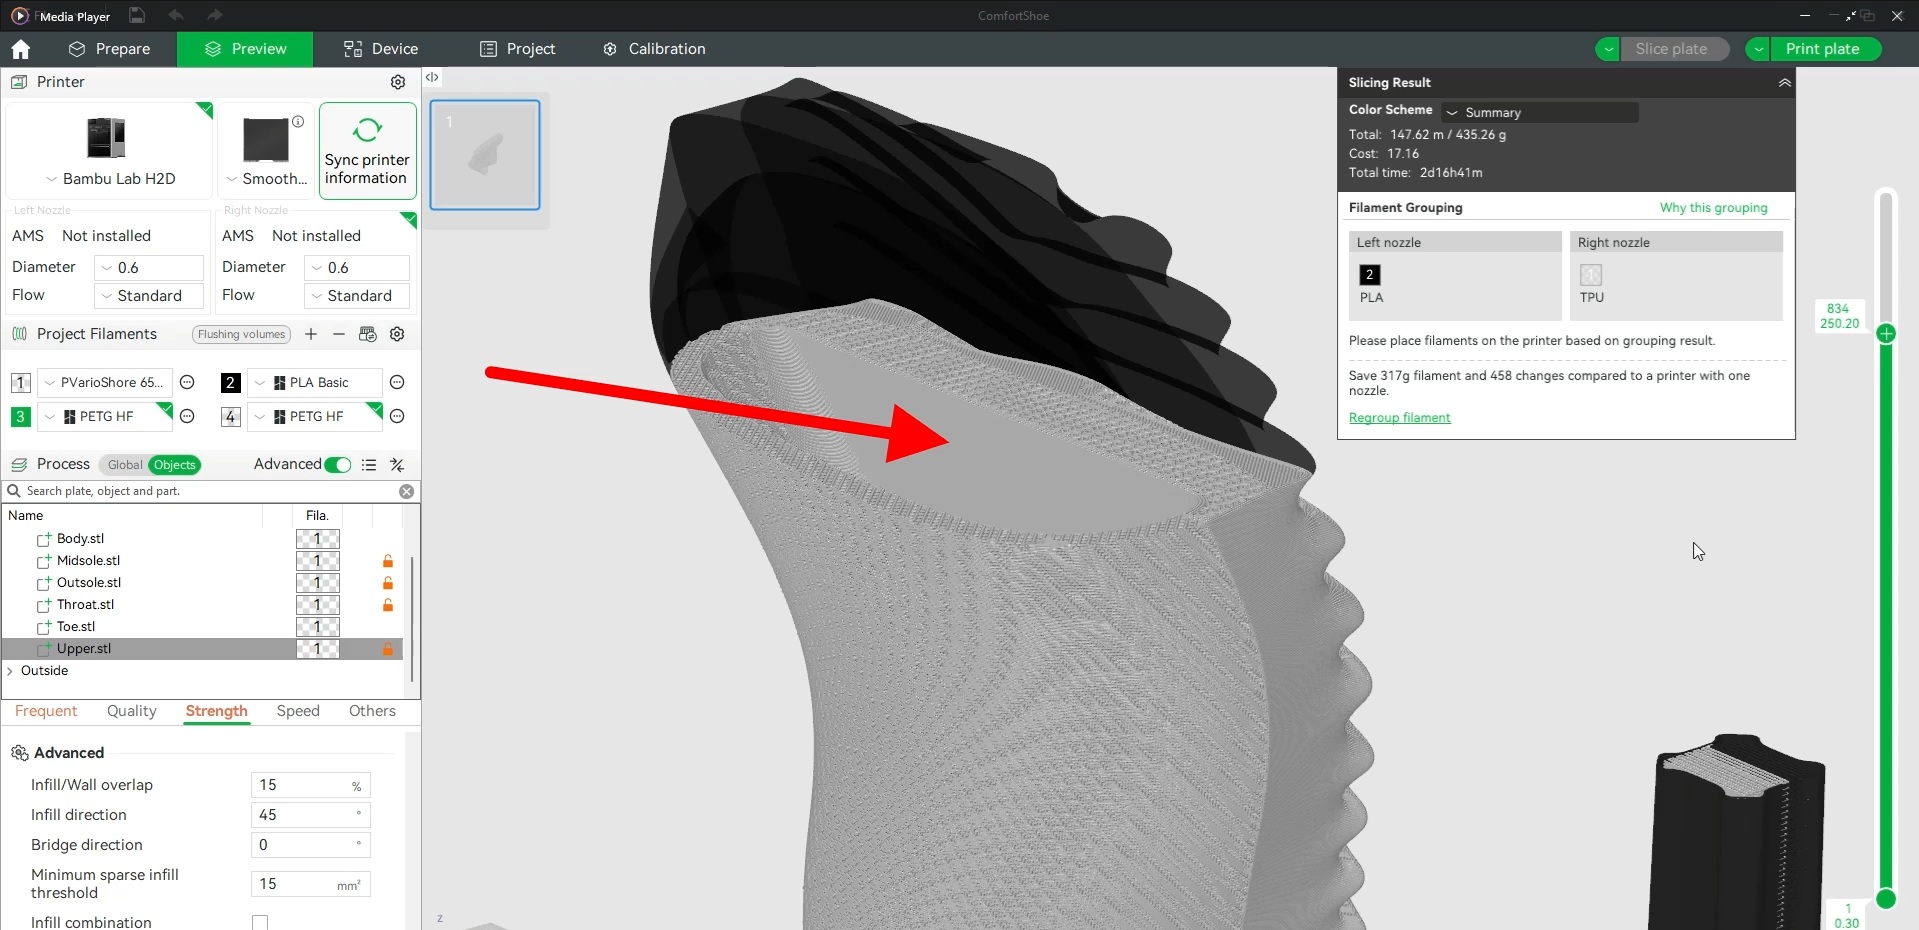
The most noticeable and biggest improvement of these latest 3D printed shoes compared to what I’ve done previously is the breathable upper. This was achieved by splitting the model up into separate sections, including one specifically for the upper. This upper body is set to use the Cross Zag infill pattern with zero perimeters and zero top and bottom layers. With the solid walls eliminated and sparse infill pattern exposed, air is free to pass through the upper. And an added bonus is that the shoe becomes lighter and softer and a unique aesthetic is achieved. This is especially nice when contrasted with the solid wall sections, which helps alleviate the boredom of having just a single color. I considered breaking up the upper into multiple sections and setting the orientation independently with each to get more consistent texture. But I actually find that the gradually changing surface direction combined with the single infill direction makes for a dramatic appearance that actually seems intentional. While the upper is breathable, the footbed, which is the surface that interfaces with the plantar surface off the foot, was left solid. So far I haven’t been bothered by the lack of breathability in this area. I can imagine though that if a 3D printed running shoe were made, it would be desirable to have better breathability in this area.
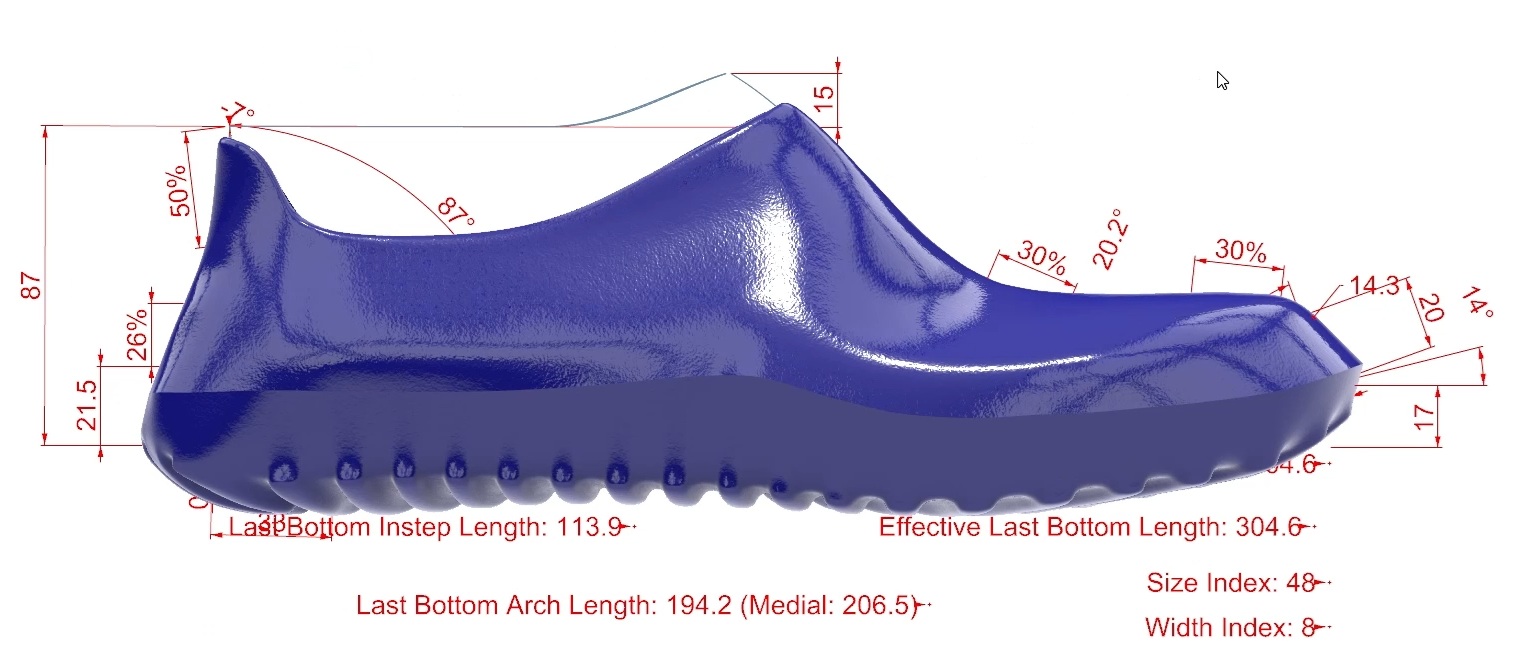
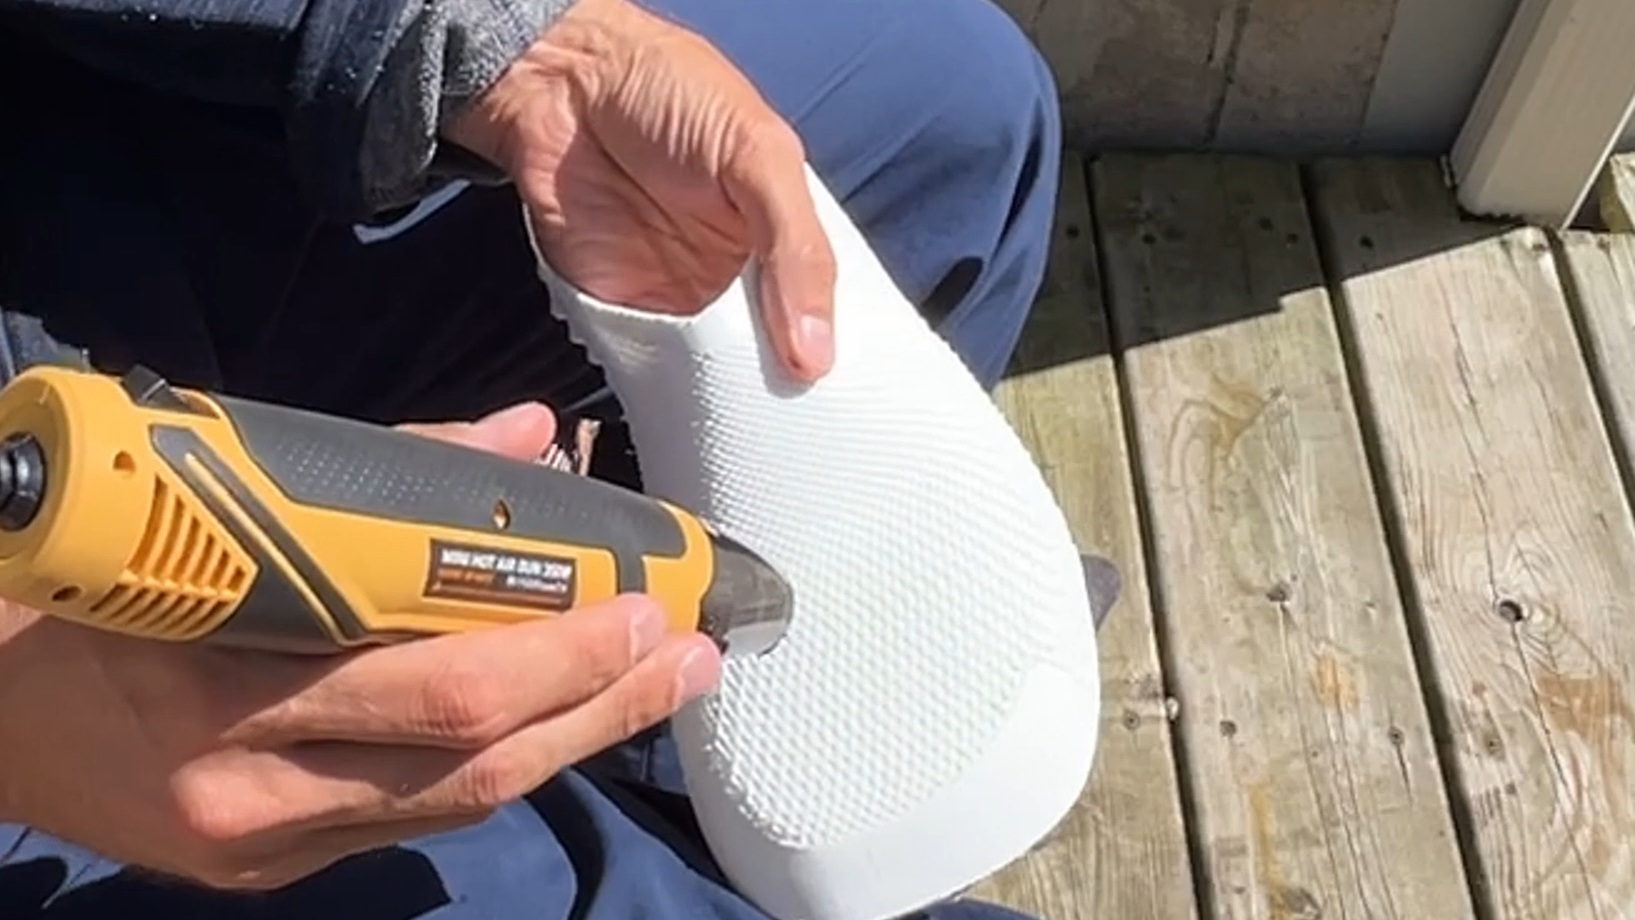
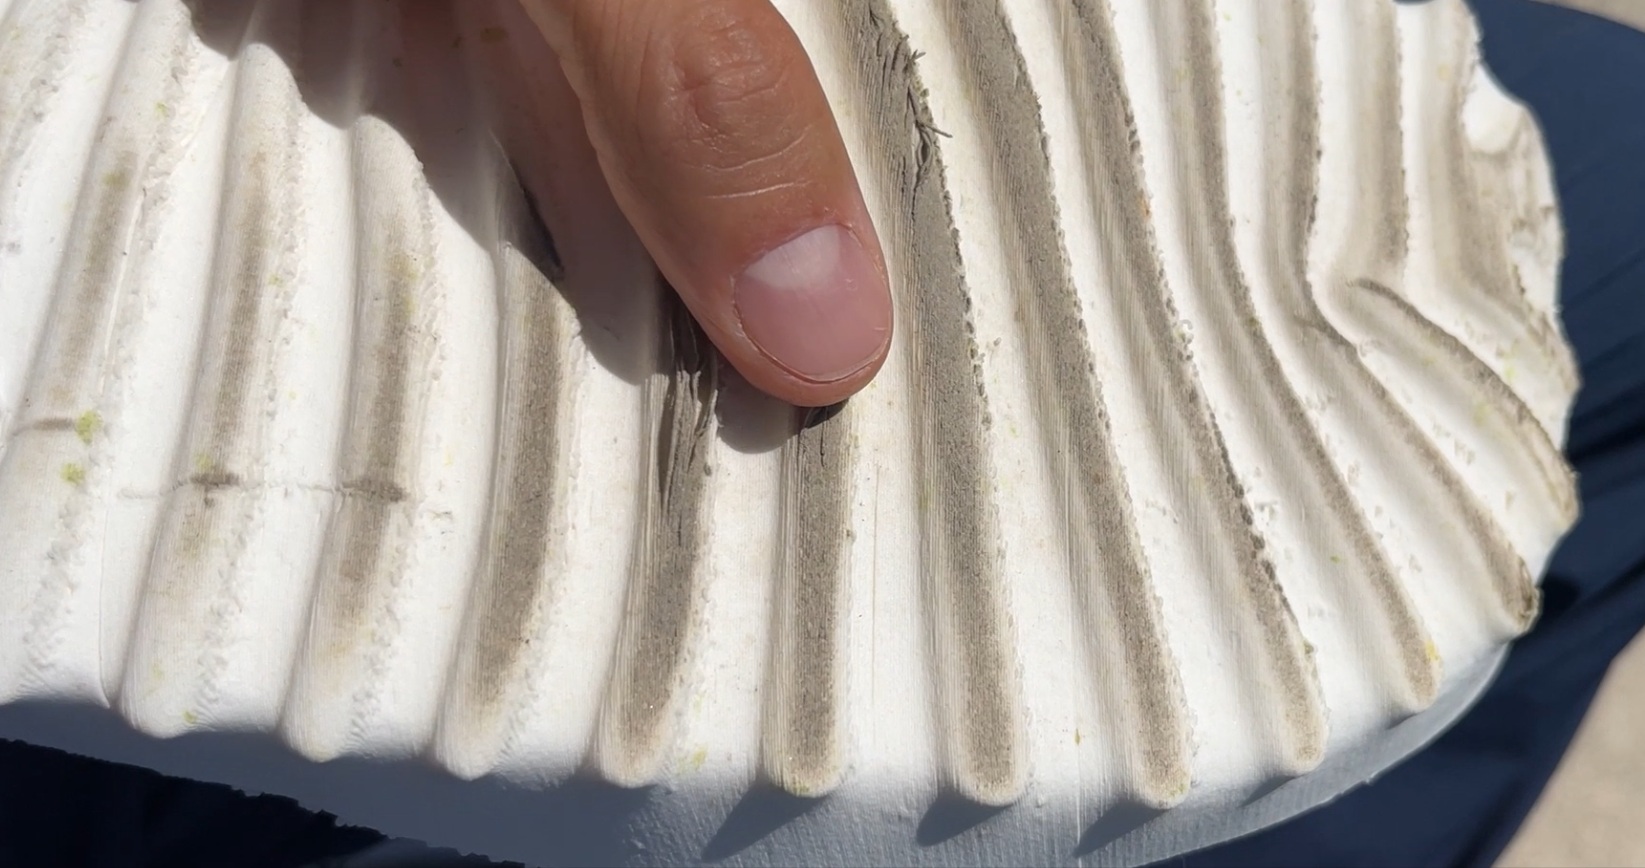
When using using an infill pattern like this to achieve a textured and breathable upper, it is critical to dry the foaming TPU before hand. I’ve never been one to bother too much with drying filaments in the past, but in this case not drying results in extremely poor bridging as the material sags, meaning the upper is no longer breathable. On the other side of things, for post processing I’ve found it helpful to re-melt, AKA anneal, the TPU to improve inter-layer adhesion. Otherwise, the shoe is prone to tearing. I used a heat gun, though perhaps a carefully controlled convection oven could do it. By blowing hot air in amongst the fine threads of the infilled upper, they melt very easily and bond together, allowing them to act more like an actual woven fabric. The collar also benefitted from re-melting, as this area is subject to quite a bit of stretching as the shoe is pulled onto the foot. And some parts of the sole, particularly the ball area, undergoes quite a bit of flexing, and so improving bonding between layers can help prevent cracking. The problem in this area though is that, given it’s not porous, it’s difficult to get the heat to penetrate enough to improve bonding multiple layers deep. And too much heat can make the sole slick, reducing traction. And so pealing and cracking in this are is the biggest durability issue. I’ve tried to reduce the amount of flex this area experiences by designing in substantial toe spring and rocker into the underlying shoe last geometry, and this did help to some degree. But I’m still experiencing cracking and some delamination. The proper solution is to improve the layer adhesion. Bringing the flow ratio back up somewhat will be one way to improve this. If anyone out there has any other suggestions, please let us all know in the comments below.
Another problem I faced is stringing or blobbing on the inside of the 3D printed shoe. This is caused by the toolhead crossing back and forth as it switches to printing different parts of the shoe. There is a setting called ‘Avoid Crossing Wall’ which is supposed to prevent this while forcing the nozzle to transition instead along the part. And it does reduce this issue. But it still occurs to a large degree, and the results are particularly bad for foaming TPU, where material oozes out constantly from the nozzle. Some of the blobs can be removed manually after printing, but it is time consuming and hard to get all of them. The negative impact is more than just aesthetics, as the sock can get a bit roughed up as it rubs against the blobs. Perhaps if enough of us mention this to Bambulab or other slicer developers, this problem could be solved with an improved ‘Avoid Crossing Wall’ feature. The stringiness of the foaming TPU is particularly noticeable on the purge tower. I think this is what was causing a lot of the AI error detection false alarms I kept getting during the print. I ended up just turning off multiple error detections entirely.
There are a few other smaller issues I should mention. First, I find that the soles squeak more on some surfaces and are less grippy than conventional shoes, though way better than common 95A TPU. They are also harder to clean than I expected, with the dirt really getting embedded in. for this reason, I would prefer a darker colour next time. And while using the infill resulted in a very breathable upper, it’s not remotely water resistant. The real challenge will be to figure out how to make a 3D printed shoe upper that is breathable, water resistant, and insulated.
Stiffness is also something that could be improved. I went with a high infill for the midsole and an entirely solid infill for the outsole, but these weren’t enough to match even the notably compliant soles of the somewhat minimalist shoes I typically wear. Perhaps this could be a use case for the variable durometer capability of foaming TPU, where the nozzle temperature could be dropped in the midsole to increase stiffness. All that being said, some people might appreciate a softer shoe like this as a general purpose comfort shoe, hence my calling it that.
Another characteristic of the material that surprises me is the stretching and compression with use. After maybe 20 or 30km, I’m finding the shoes to be looser, both because of some stretching of the upper and compression of the sole. I had always thought the TPU and lattice structure would somehow be less subject to plastic deformation than say EVA foam. But this wasn’t the case. That being said, this kind of deformation can be good as the shoe is broken in essentially. You just have to make sure that the fit is a bit snug when fresh off the printer. That being said, one design change I would consider making is increasing the midsole thickness, as the shoes have already lost some of their springiness.

After durability issues, I think the next biggest issue holding 3D printed shoes like these back from mass adoption is the price. The high cost comes both from the time to print and the high cost of material. Per side, my material cost was around $35 with a print time of two and half days. This is for size 13 shoes, which of course are exponentially more material and time to print than average sizes. Certainly the profiles could be tuned to ramp up the printing speed far beyond what I did. And printers like the H2D are designed to work in large print farms tackling multiple jobs simultaneously. Hopefully Bambulab takes note of how ideal foaming TPU is for 3D printed shoes and, given shoes is a primary use case they highlight, perhaps they will release a more affordable foaming TPU of their own. But even if they don’t, there are numerous new players releasing their own foaming TPUs.
I’ve been putting out a lot of criticism for these new 3D printed shoes, more than for previous iterations in earlier posts. I think this is because I’m actually starting to use these on a regular basis as an alternative to my store bought shoes. So I’ve become a lot more discerning with my criticism. But it’s important to step back and really appreciate what these things represent. Being able to 3D print the entirely of a shoe from start to finish with no manual labor and in a recyclable material is potentially game changing.
Of course there will be the naysayers, those that make the very valid point that 3D printed shoes thus far aren’t as good material-wise as conventional shoes. And as things currently stand, I have to agree on that point. But people making these criticisms are often forgetting what I consider the most important advantage of 3D printed shoes, and that is the fit customizability. No matter how customized the shoe is, it takes the same amount of material and time to 3D print. So while the cost of customization of conventionally made footwear can run into the thousands, the increased cost for 3D printed shoe customization is limited to the design work. This will be most advantageous for orthopedic footwear, where customization is essential.
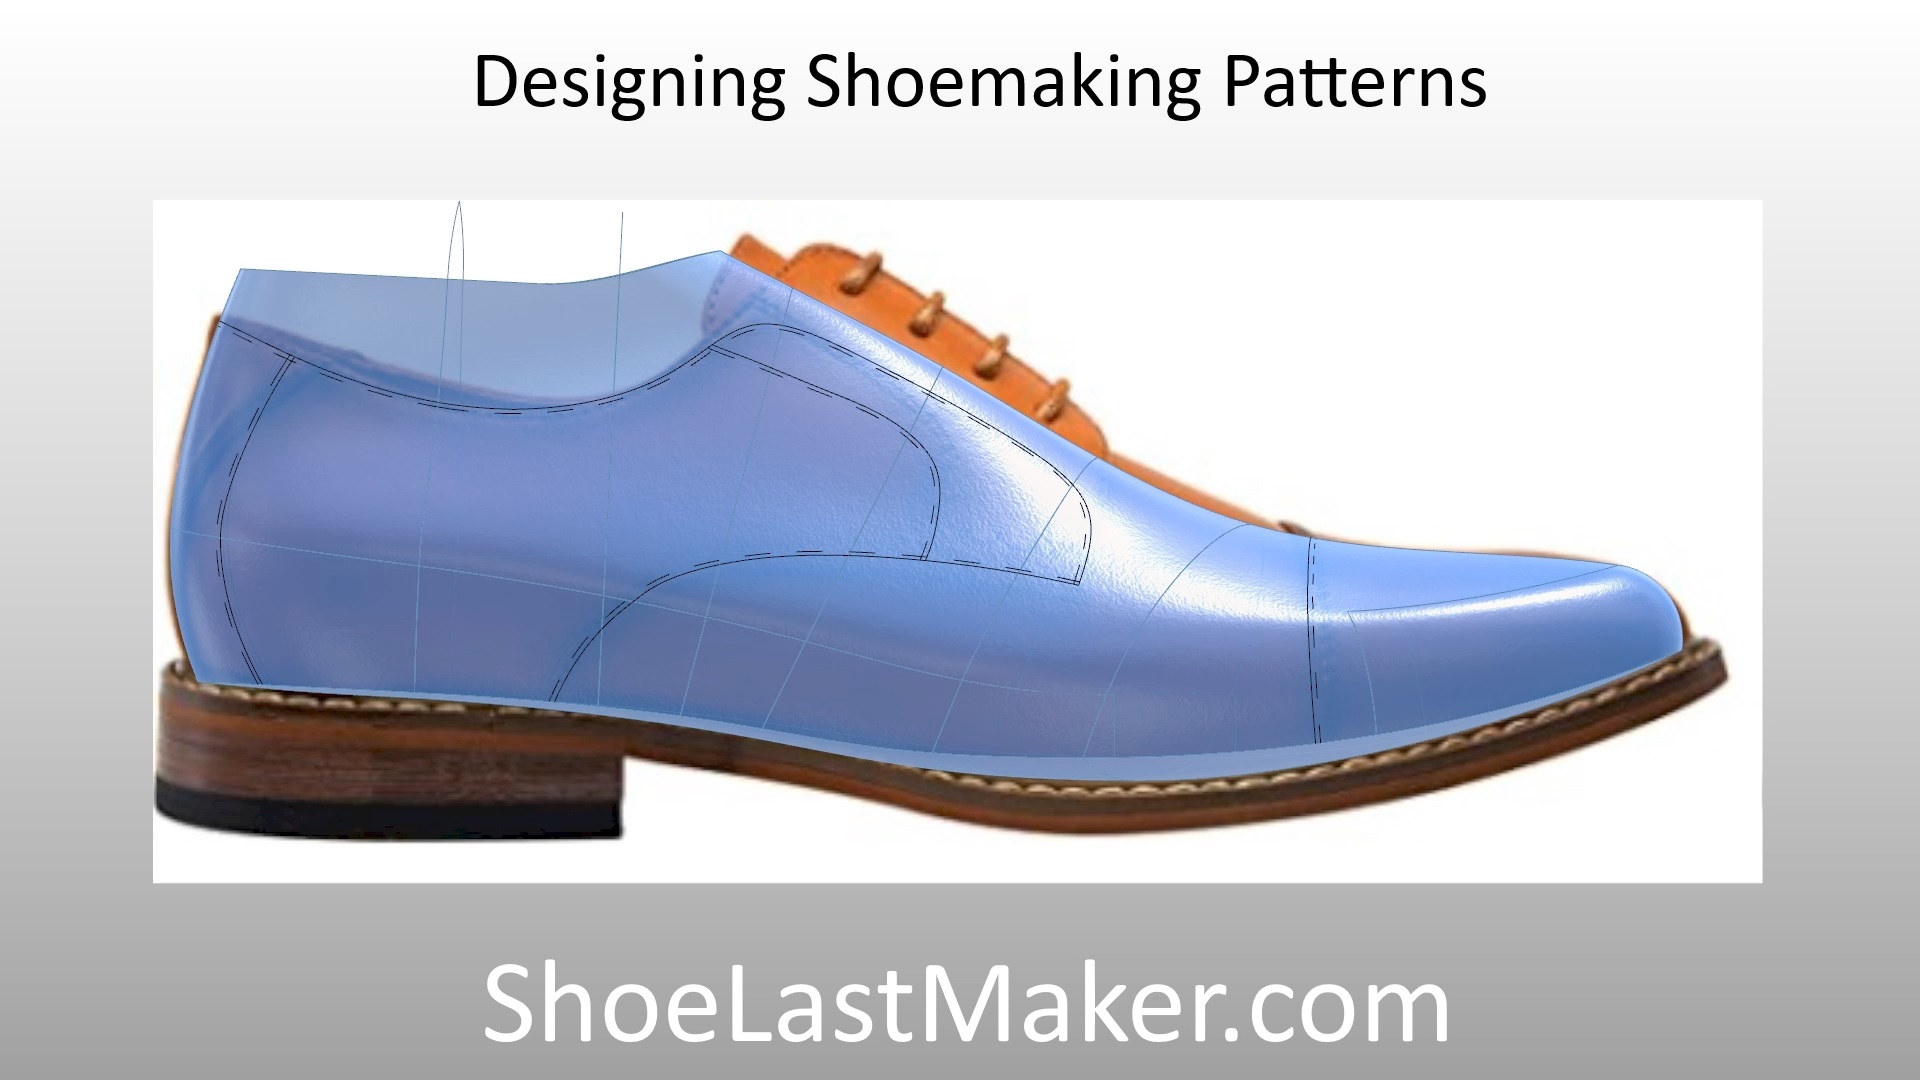
In my next post, I’m going to take a step back into the geometry side of things. I’ll show how the core geometry was designed in the 3DShoemaker plugin for Rhino as well as the SubD workflow for designing the shoes on top of this core geometry. I’ll also show how the shoes can be customized by mapping from a base shoe last to a custom shoe last.

