In this 3DShoemaker post, I’m going to explain how to order fit customizations for shoes and shoe lasts on 3DShoemaker.com. I’ll also cover how such customizations are made in the 3DShoemaker design software for the benefit of those using it.
Prior to the industrial revolution, bespoke footwear was fairly common. But both the adoption of the assembly line and the transition to overseas cheap manual labour changed made the cost of bespoke items prohibitively expensive for most. Later came the rise of digital methods which seemed to promise a return to bespoke footwear by way of automation. But a digital bespoke revolution has just never materialized to any substantial degree. A lack of widely available and standardized foot scanning is one thing that has held us back. The closest instance currently available is perhaps Volumental scanners, which are popping up in a variety of shoe stores wherein customers are given free access to their shoe size and other various useful parameters. But personally, I think the idea of a entirely digital bespoke solution will never be fully realized. This is because finding the optimum fit has to do with a lot more than just measurements. Rather, it also has to do with the properties of the foot and the fit preferences of the individual. Mockup fitting models are a huge help with this, which is what led me to come up with the idea of a 3D printed mockup that can be made before a shoe last even exists, greatly reducing the cost of bespoke footwear. But when the fit of a mockup is off, where do you go from there? Given it’s the customer that is saying the fit is off, they need to have a simple way to communicate how the fit needs to change, and ideally one that can be conveyed over the internet. Such a system of communicating fit customization is particularly useful in conjunction with the growing trend of consumers 3D printing their own shoes at home. Regardless of how and where the footwear is made, the system of fit customization I’ve come up with should be effective.
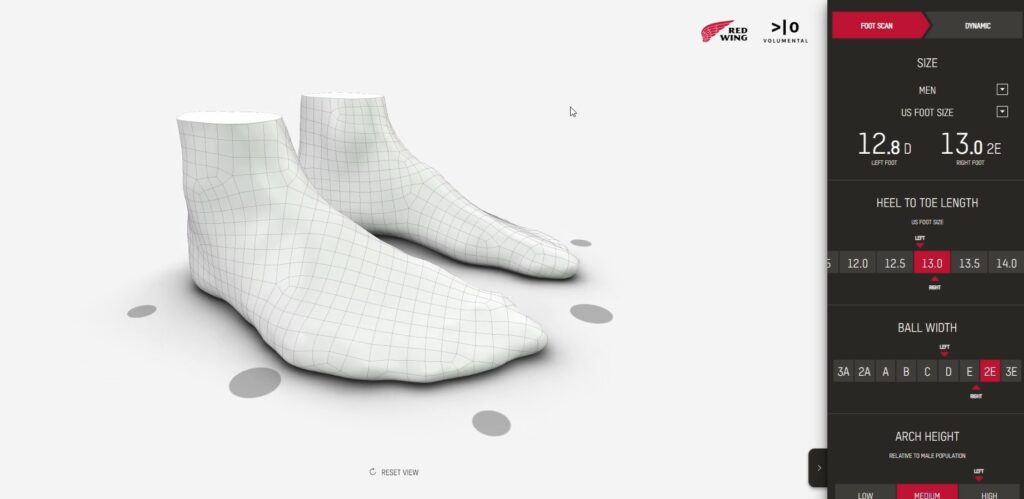
The 3DShoemaker system of fit customization has four basic parameters, as well as some more advanced ones. These are of course in addition to the standard shoe size and width parameters, like 10-D for instance. These should be sufficient for all but the most challenging orthopedic cases where the full bespoke process is required. The fit customizations can be included in an initial order, or applied on a follow-up order. In the case of the latter, it’s a good idea to start with a mockup fitting model. If uncertain of what shoe size to begin with in the first place, a Brannock device or similar can provide a good starting size. Alternatively, the more comprehensive set of parameters from Volumental foot scanners can be used. Volumental scanners are now available at a variety of shoe stores, including Red Wing Shoes. And of course there are also the shoe last outlines I introduced recently which can help take into account the shape of the foot for specific shoe lasts. The following are the four basic parameters in the 3DShoemaker fit customization system:
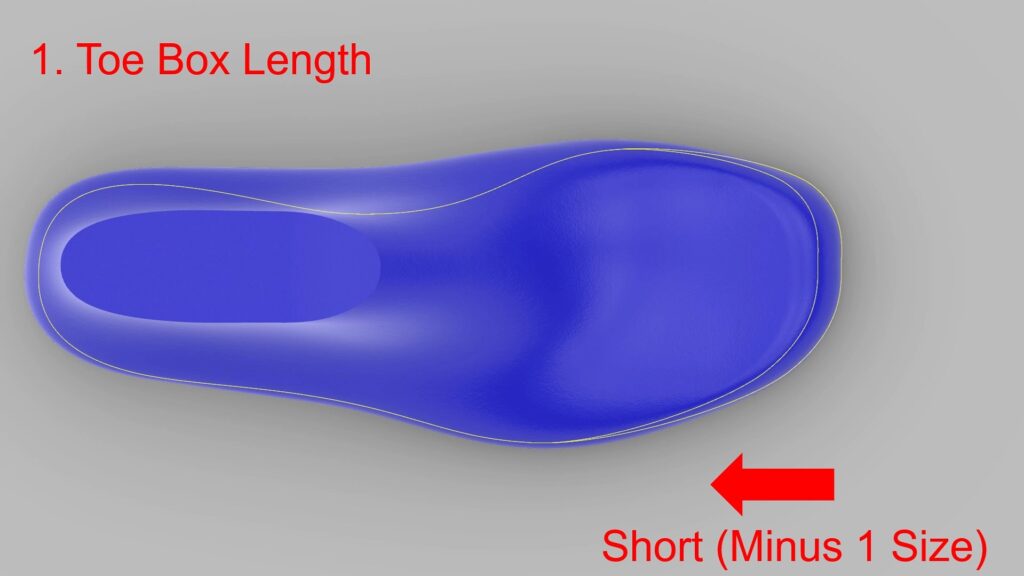
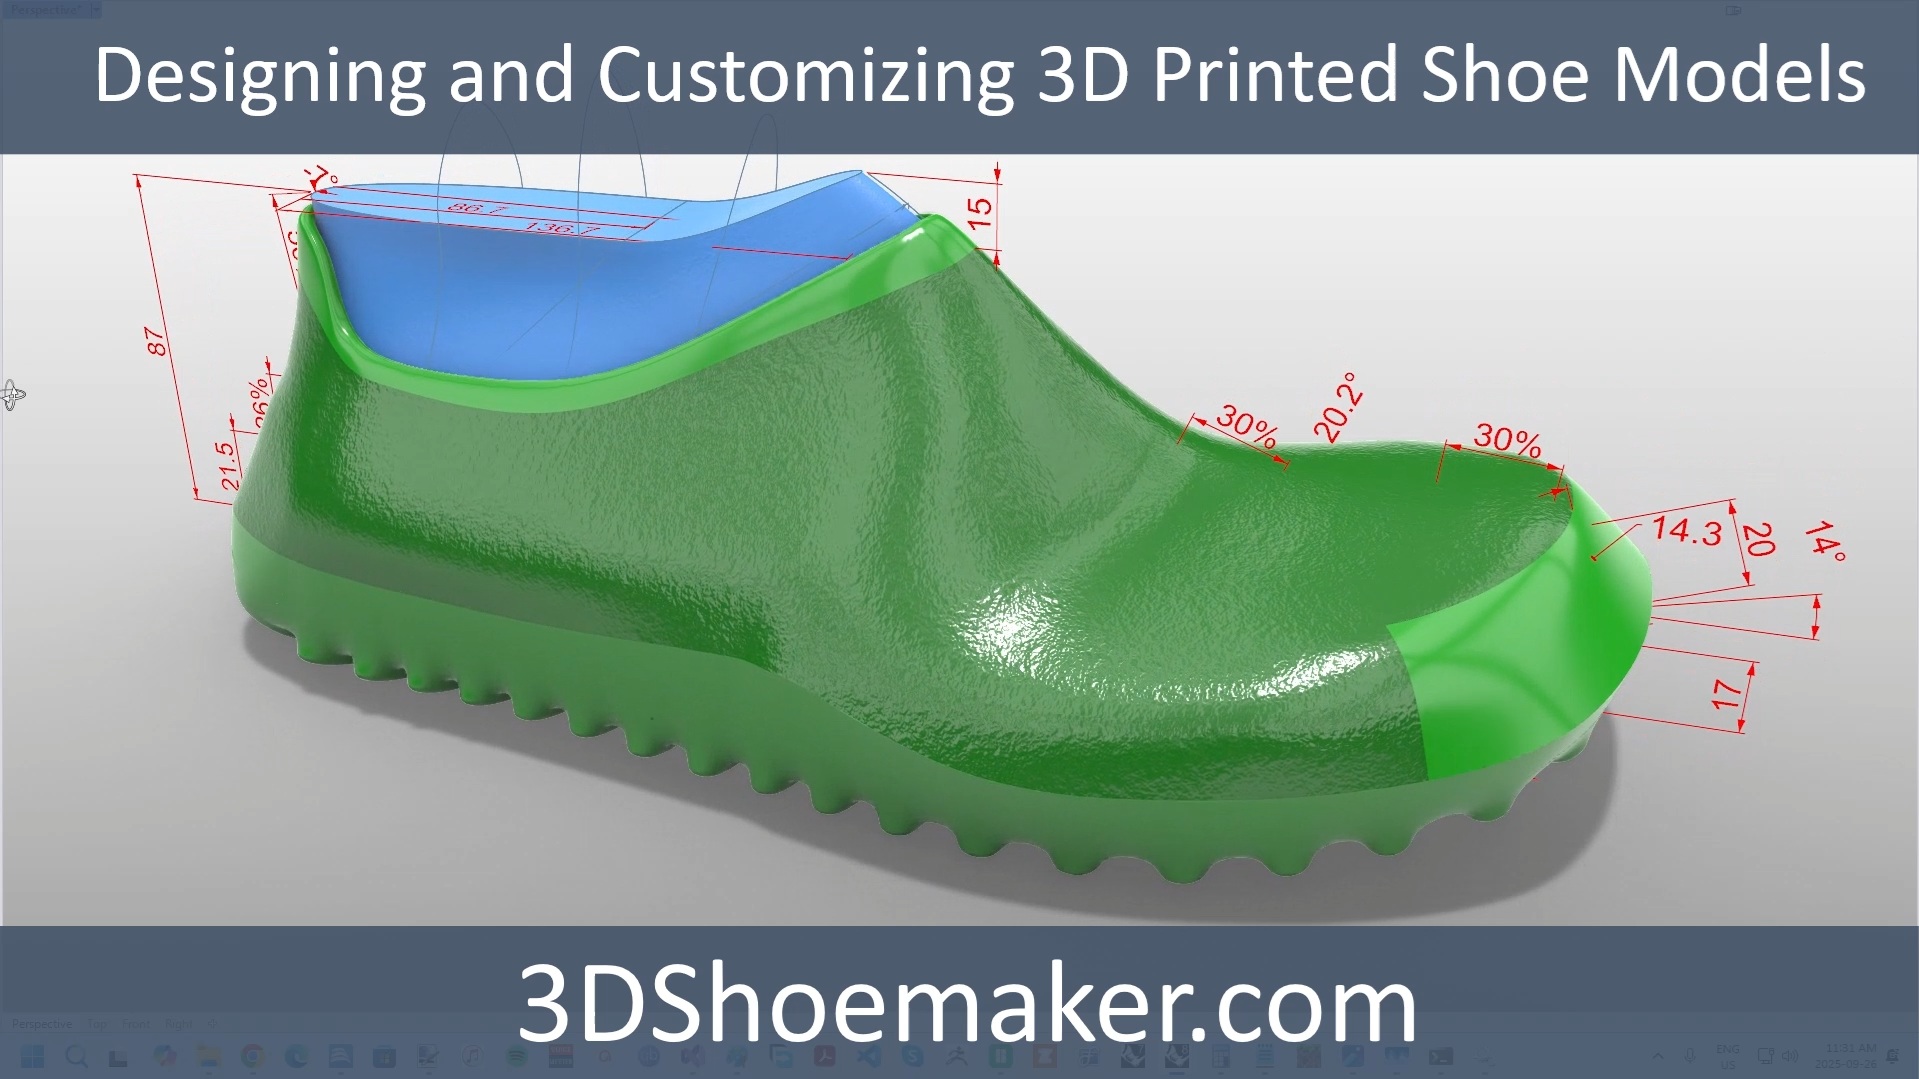
1. Toe Box Length: Some people have shorter or longer toes relative to the rest of their foot. This customization will add or subtract to the overall length of the shoe last. The basic options are Short, Default, and Long. With short, the toe box length is reduced such that the entire length of the shoe last decreases by one size while retaining the original arch length etc. For Long, the overall length increases one size.
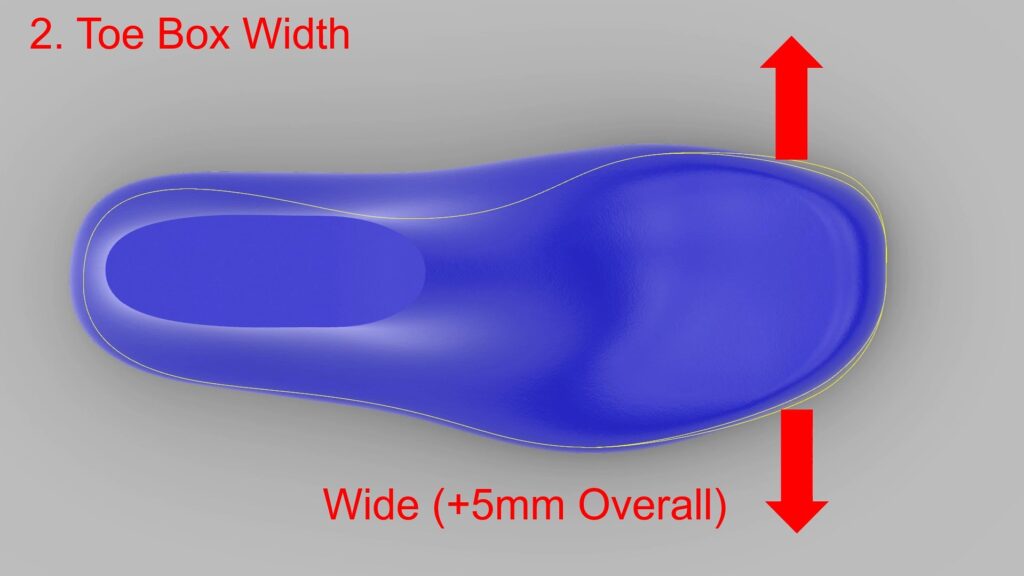
2. Toe Box Width: The width of the toe box can be made Narrow, or, the more useful customization, Wide. The customization increment is 5mm which occurs at approximately 3/4 of the toe box length.
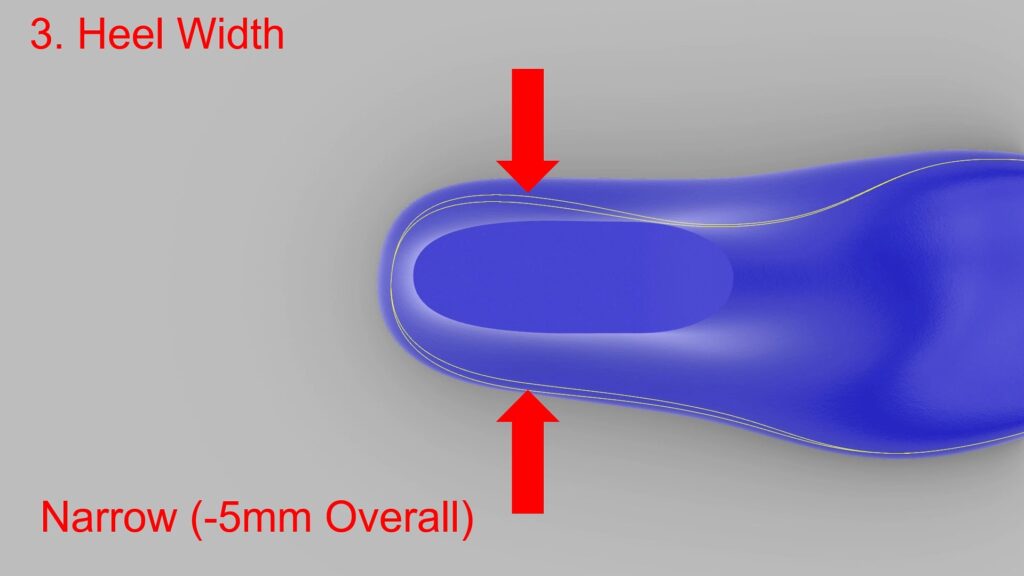
3. Heel Width: While the overall width of the foot is addressed via the shoe width, it’s often necessary to further refine the fit by adjusting the heel width. The Narrow option will subtract 5mm. Conversely, it can be increased by 5mm to be Wide.
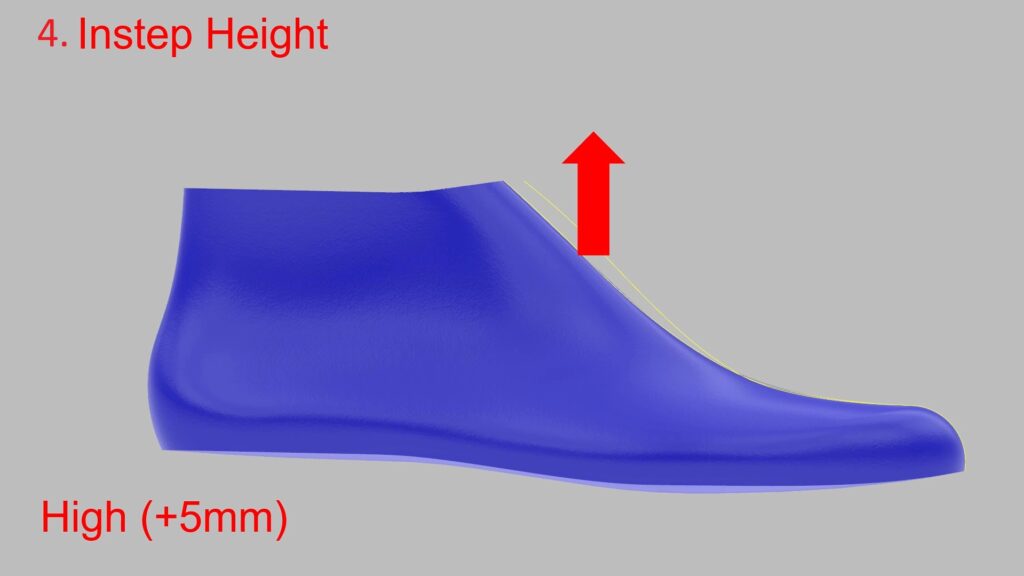
4. Instep Height: This is essentially the room at the top of the foot just in front of the ankle. It is particularly important for closed footwear without a tongue. If the shoe is too tight here, then the High option can be selected, which adds 5mm. Conversely, low means 5mm is subtracted. In general, there is somewhat of a correlation between arch height and instep height. So for a foot with a high arch, it makes sense to initially guess that a high instep customization is required. Arch height can be gauged by the mark left behind after stepping on a paper towel with a wet foot.
The Advanced option allows for increased range and granularity of fit customization. And additional customizations are made available such as Ball Girth. On top of that, there are customizations being added for specific conditions, including bunions and hammer toes.
My own foot makes a good case study for this fit customization system. When you look at my right foot, the first thing you will clearly notice is that I have an exceptionally long first toe. This is a curious genetic trait that skipped a generation, going straight from my grandfather down to me. What it means as far as footwear is that I have to wear a larger shoe size than my arch length would necessitate. For instance, both the device similar to Brannock that I 3D printed and the Volumental scanner results show that I should be in a US Men’s 13, yet the measuring device shows my arch length best suits me to a size 12. So what I do in the 3DShoemaker fit customization system is choose a size 12 shoe or shoe last but opt for the Long Toe Box customization, which adds an extra size to the overall length while retaining the arch length for a size 12 shoe. Then I also choose the option for a wide toe box as my first toe swings off to medial. With store bought shoes, I usually have to go up to a size 14 because of this. So I’m wearing a shoe size that is two sizes longer than what my arch length would dictate! Inadvertently, this at least helps with adding width to suit my wide right foot. Another characteristic feature of my foot is the high instep. This could be anticipated given I have a high arch. And yet another abnormality of my foot is the relatively narrow heel. Given this, it makes sense for me to choose the Narrow heel Fit customization option. My left foot is similar to my right except that it isn’t quite as wide. Left and right differences can easily be accommodated in the fit customization system. When I make all of these fit customizations, I end up with footwear that fits like a glove, as they say.

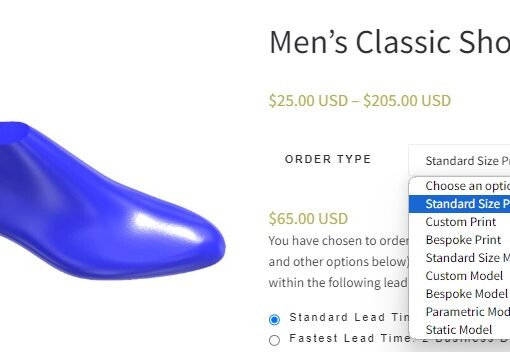
Next I want to explain a bit about the pricing for customizations and revisions. On top of the base price for models, there is a small extra fee for making basic fit customizations, and slightly more for advanced customizations. If these customizations are being made based off of a previous order, then the base price will be refunded. More specifically, the lesser price of the two orders minus any extras, such as any designs customizations, gets refunded. For this reason, it may make sense to only order a mockup fitting model in a first order where customizations are anticipated. If more than one round of revisions is required, then a small processing fee may be applied. In the case of physical 3D printed samples, customizations are done at the base physical price.
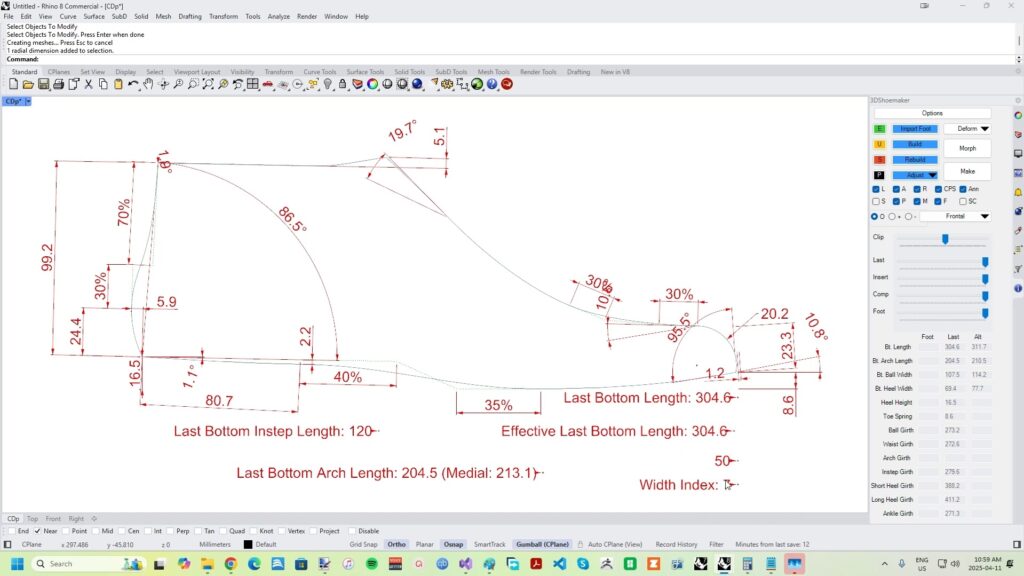
Lastly, I’ll show what these fit customizations look like in the 3DShoemaker plugin for Rhino3D in case anyone using it wants to put this same fit customization system into place for their own shoe business. The size and width of the shoe or shoe last are of course originally set on the Build form. Then to make customizations, the various parametric curves are edited. To increase the length of the toe box, edit the Dorsal Profile curve and adjust the size index and press update. Note that size indices are something I explained in a previous tutorial on measurements in 3DShoemaker. The effective last bottom length gets automatically updated when the size index changes, but the actual last bottom length needs to be manually adjusted. When satisfied, press the End Edit button and move on to the next parametric curve. This will be the Last Bottom Edge when viewed from above. Here the Heel Width can be adjusted, which should usually be accompanied with blended adjustments to the Instep Width. Also on the same view the Toe Box Width can be adjusted by moving out the corner points joining the posterior and anterior parts of the toe curve. It will also be necessary to update the toe wall curve. Finally, the Instep Height is adjusted by editing the Instep Girth Curve and changing the Instep Girth parameter. Similar to the basic fit customizations, the advanced fit customizations can be made with the various parameters in 3DShoemaker. Eventually there will be a single form for controlling such fit adjustments and additional automation to simplify the process. For those designing non-parametric shoes and shoe components in Rhino3D, the next step is to morph them from the base shoe last they were designed on to the Fit Adjusted shoe last, which I covered in a previous tutorial.

That’s about it for how fit customizations work in the 3DShoemaker ecosystem. One thing you might have noticed I left out entirely was the shape of footbeds, particularly arch height. While this could be considered part of footwear fit, I like to keep it in a category of its own. As such, I’ll save footbed customization for another post.

So I’ll end here for now. If you found this post helpful, please subscribe to the 3DShoemaker newsletter. Thanks for reading.
