In this 3DShoemaker post, I’m going to show you how you can 3D print just about any shoe last model you have access to, which includes shoe lasts outside the 3DShoemaker ecosystem. I’ll even show how to include a joint for de-lasting in the print.
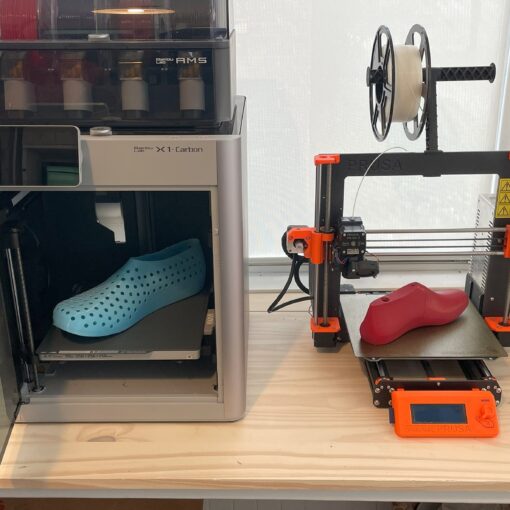
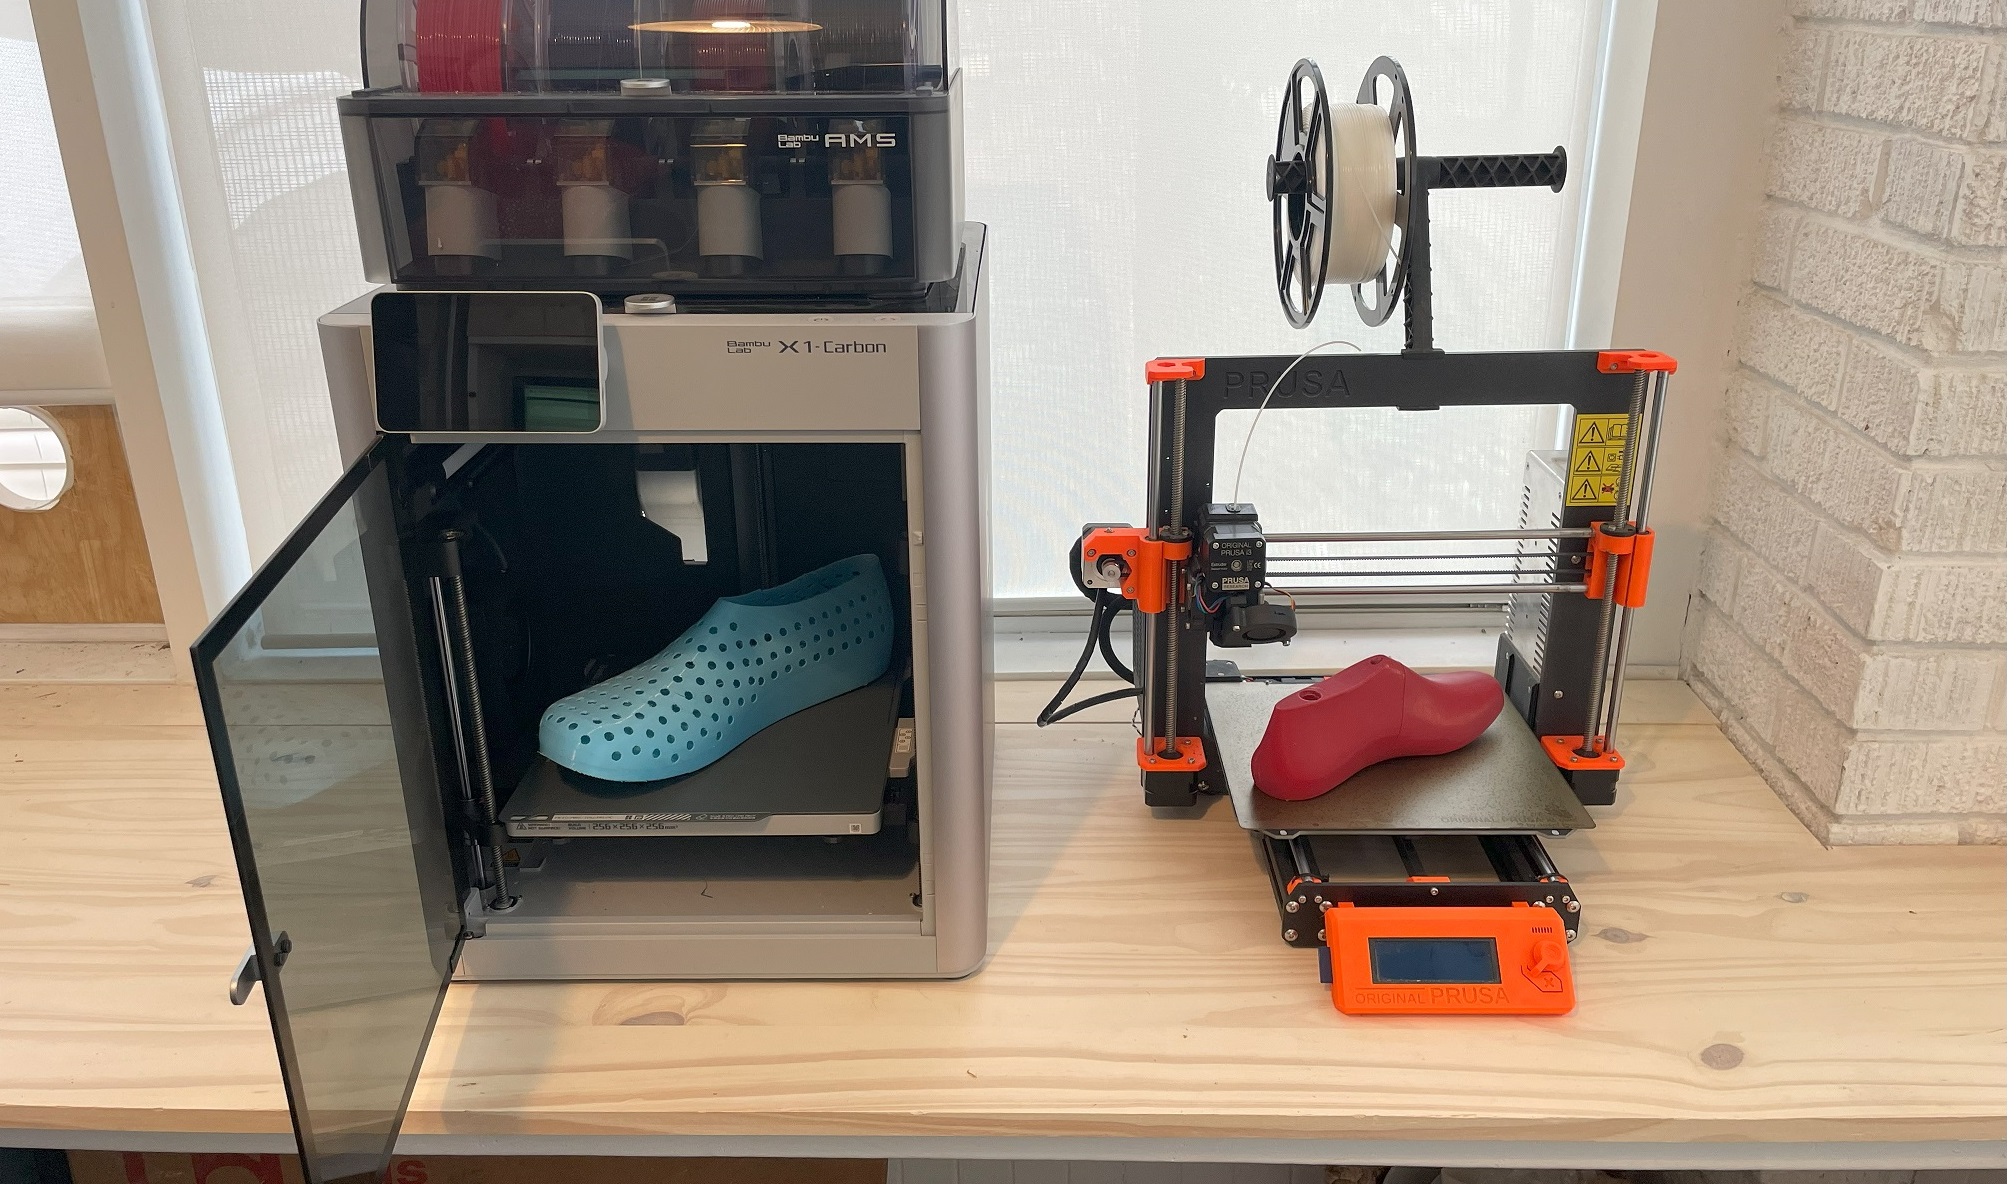
When I first started getting into 3D printing shoe lasts, it was a bit of a gamble. I didn’t know for certain whether shoemakers would like 3D printed shoe lasts as much as conventional wood or HDPE shoe lasts. But after being at it for nearly a decade, I can safely say that it is absolutely a viable alternative. The main gripe seems to be that the PETG material I’ve settled on is a bit harder to nail into. But with sharp nails, it’s really not so much of an issue. And the benefits of being able to get the job done on even a low cost desktop 3D printer make it totally worth it. As such, shoemakers everywhere have been getting into 3D printing their own shoe lasts.
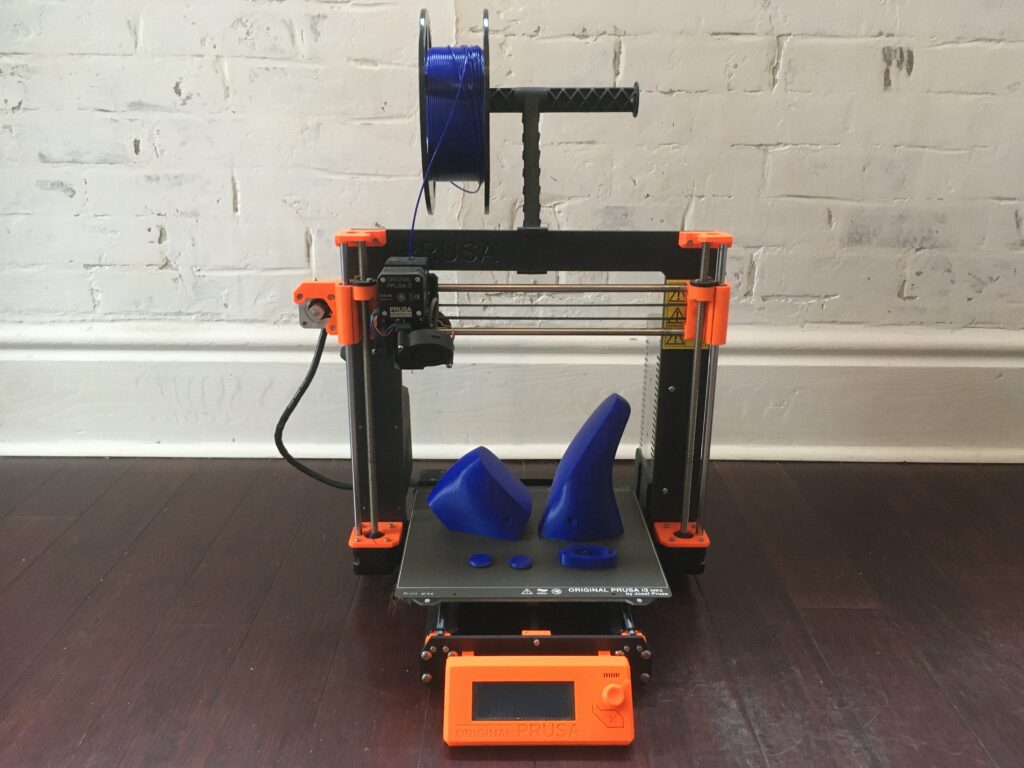
The challenging part then isn’t so much the 3D printing, but rather sourcing a shoe last design and figuring out how to handle de-lasting, which is the removal of the shoe last from the finished shoe. The way I’ve approached this on 3DShoemaker.com is to have a base set of common shoe lasts, provide extensive customization possibilities, and add in the option to have a joint designed in for de-lasting. But what if you already have a shoe last and you just want to get a joint designed into it so it can be 3D printed with a working hinge? Well, that’s now possible too. There’s two ways to go with this.
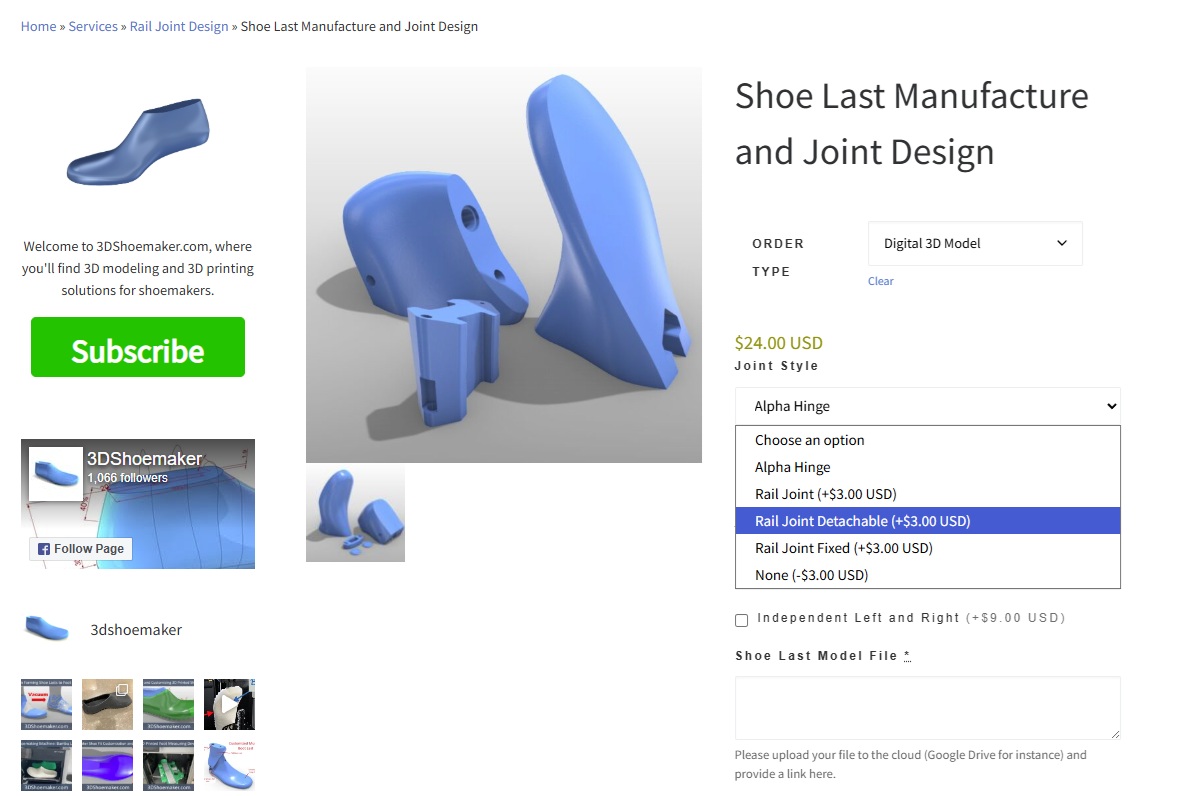
First, you can simply visit this service page on 3DShoemaker.com and submit your model for joint design. You can select whether you want an alpha hinge or a rail joint and you’ll receive back all the model parts oriented and ready for 3D printing. And you can also of course order the necessary hardware on 3DShoemaker.com or source it locally.
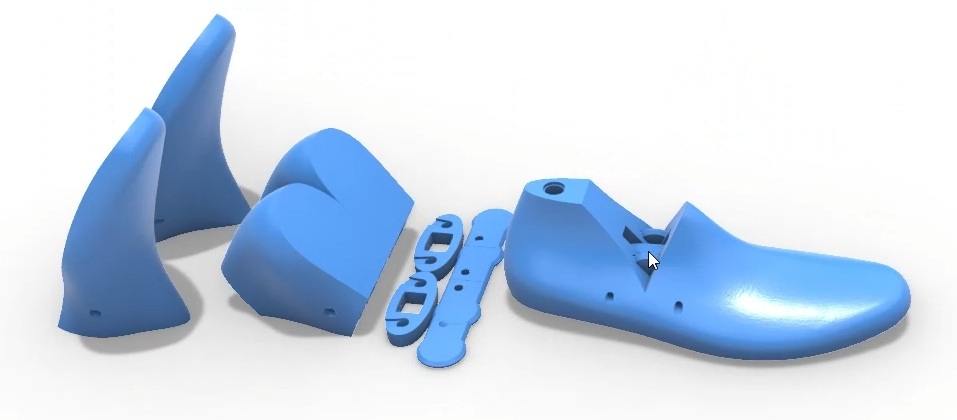
Second, you can use the 3DShoemaker plugin for the commercial CAD software Rhino 3D to design the joint yourself. To do this, you import the file into Rhino, press the Establish button and select the shoe last, press the Make button, select your options and press Go. The only difference from the usual process is that you will now be asked to select the top and bottom positions for the joint face as well as the thimble location if you’ve chosen to include one.
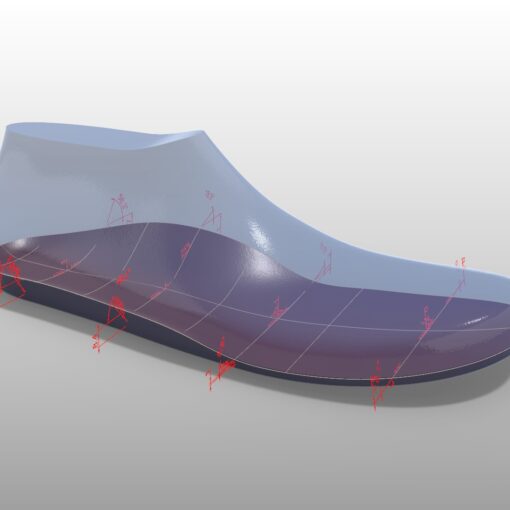
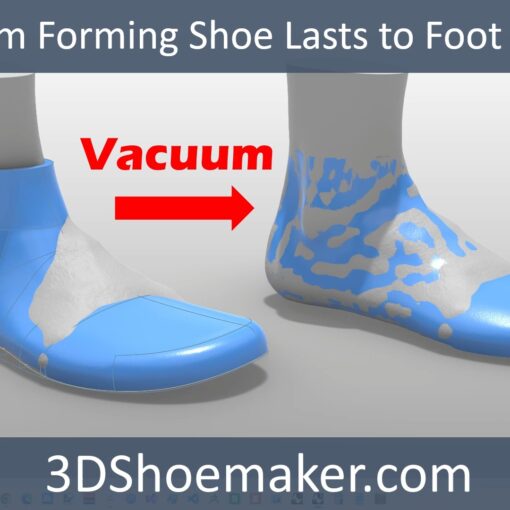
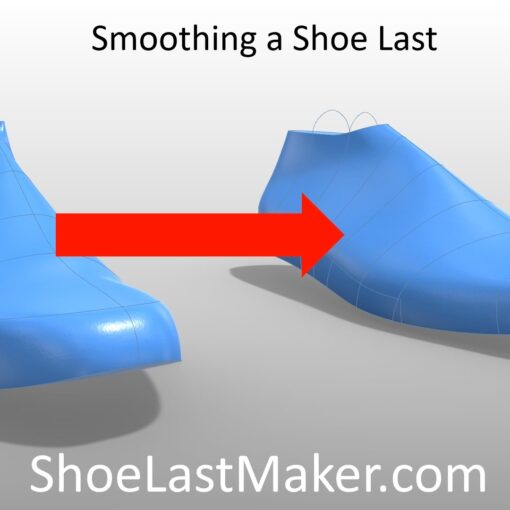
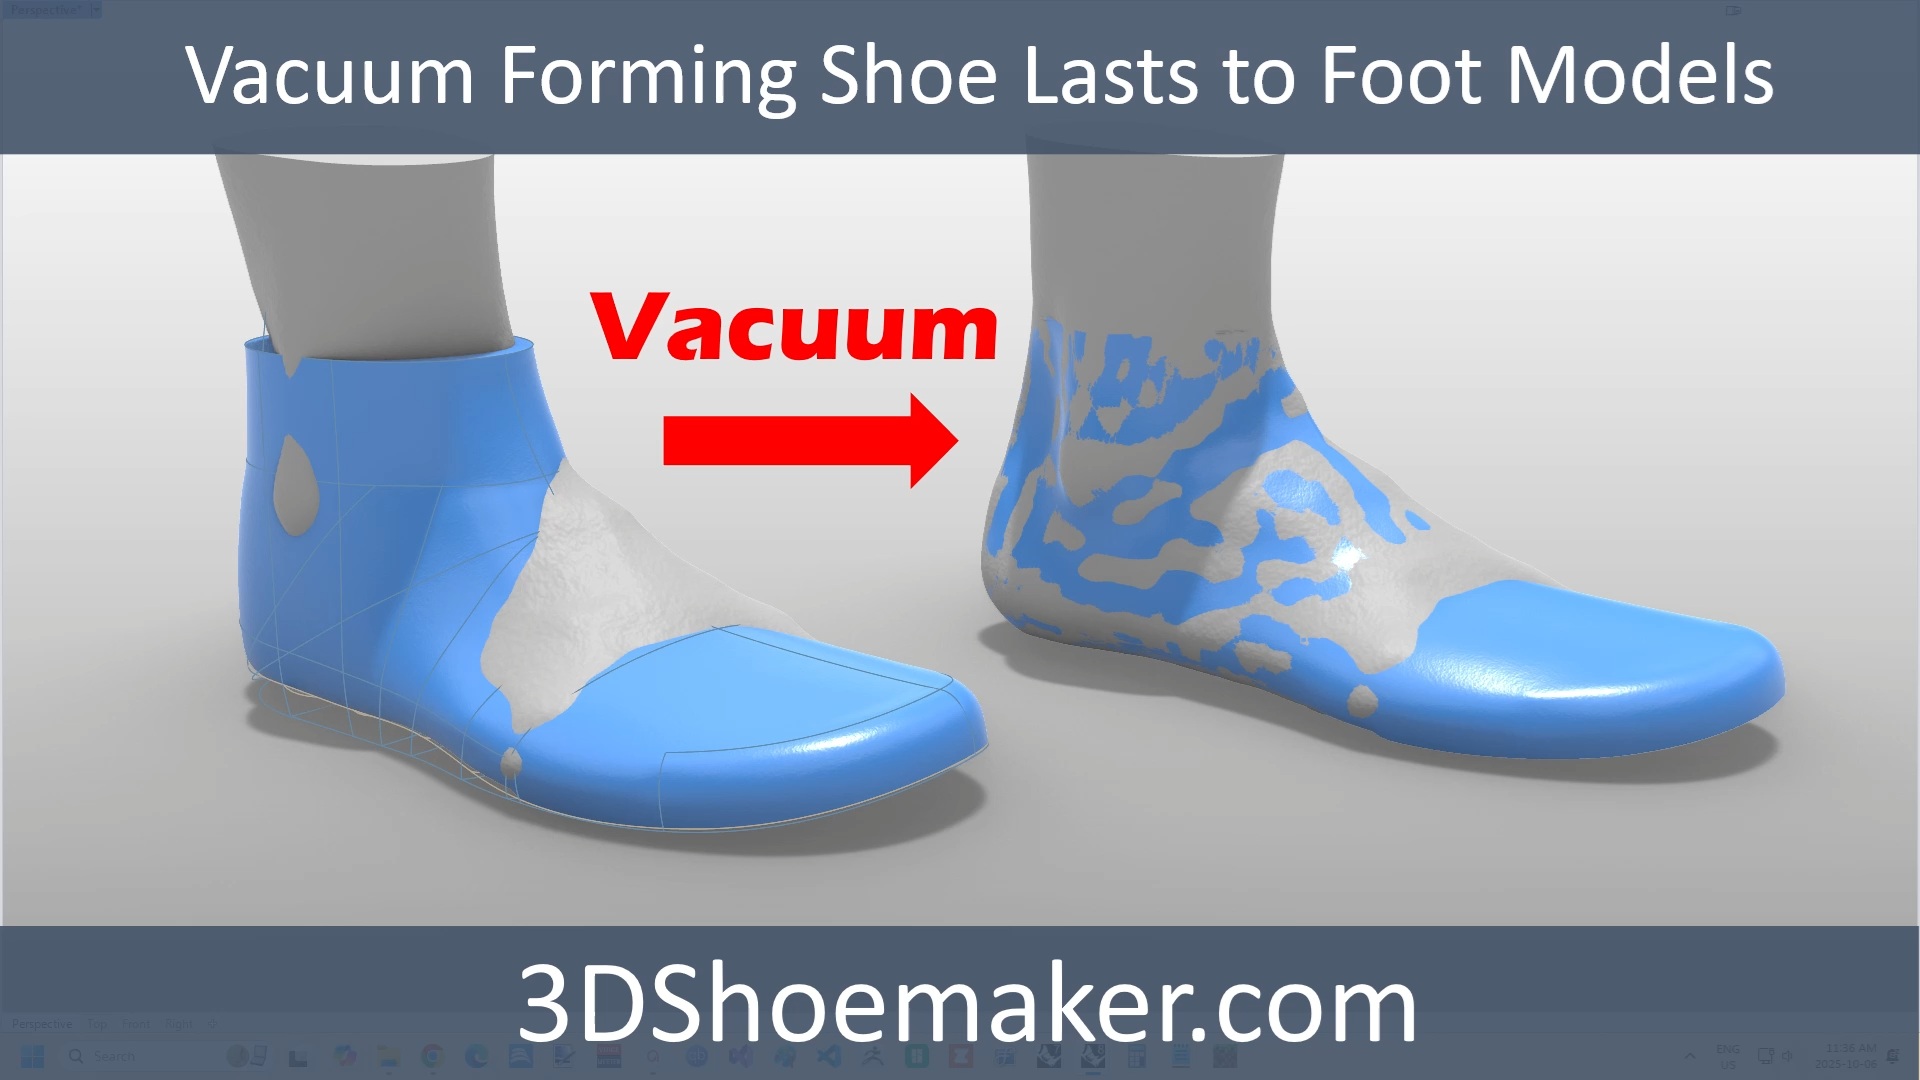
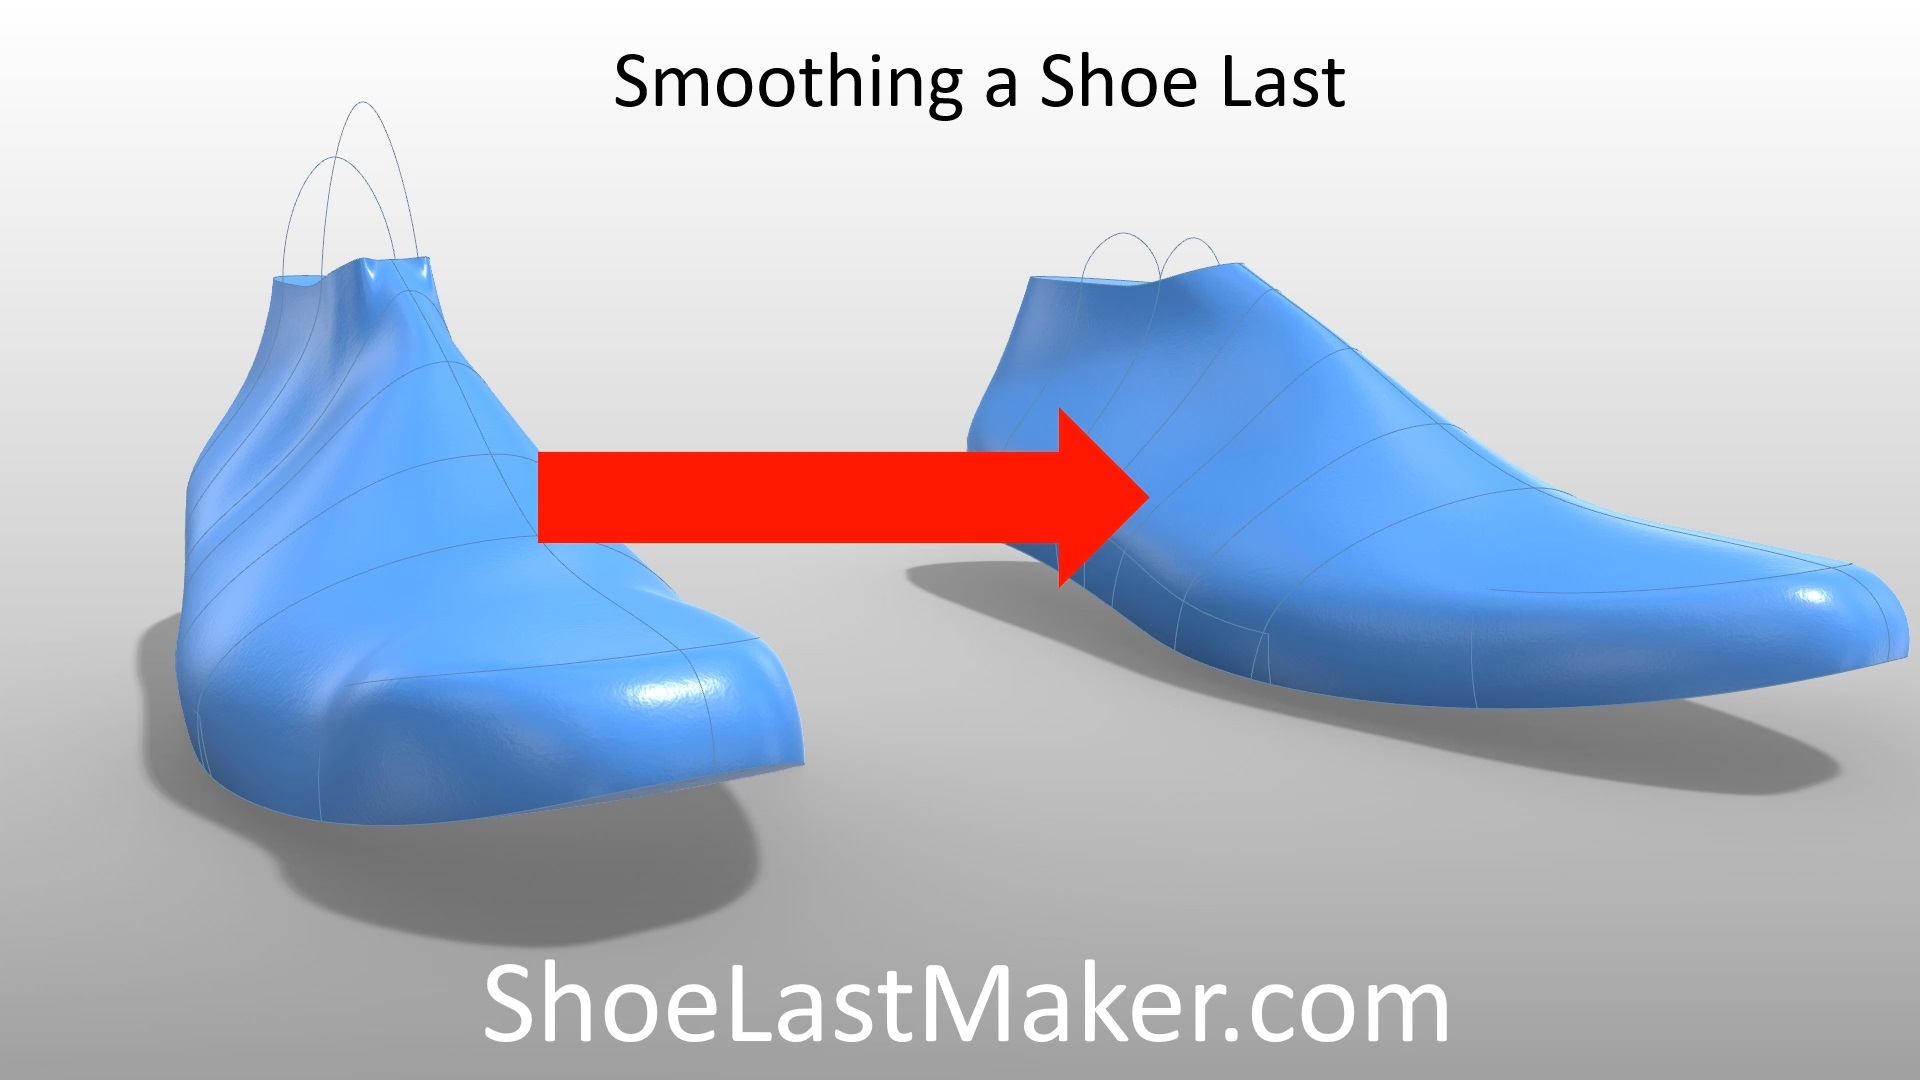
Note that the Establish feature is also used for some 3DShoemaker shoe lasts that have undergone substantial Sculpting or Vacuum Forming as I pointed out in a recent post. They are different enough from the parametric definition that they benefit from the manual selection of the joint position. The long term plan for the Establish feature is to be able to bring in third party shoe lasts and automatically parameterize them more easily than via the manual parameterization approach I previously explained.
In summary, 3DShoemaker can now assist towards the 3D printing of jointed shoe lasts, regardless of whether it’s a 3DShoemaker shoe last or a 3rd party shoe last.
2 thoughts on “3D Printing 3rd Party Shoe Lasts with Working Joints for De-Lasting”
I have shoes made by orthopaedic shoe makers through my local hospital. My feet are not grossly deformed, they are small and broad, the right is about a size 2, the left a size 1 with a slight curvature which need not to be obvious in the shoe; I need arch support and I have a slight leg length descrepancy on the right. The shoemakers never get them right, they never fit properly and are often ugly when they don’t need to be; the previous shoemaker made my shoes aesthetically pleasing every time. The hospital got ric of the lrevious shoemaker because only made shoes and not oghef applusnces but it was false econkmy and very bad for the patients. I’ve had enough and I don’t know where to go. In this technological age it should be easy with the use of 3D printing to get the lasts and therefore the shoes right. Also, I don’t know why orthopaedic shoemakers aren’t can’t or won’t make trainers which would be beneficial for many. Having cushioned shock absorbent comfort beneath your feet instead of pounding hard pavements would give people a much better walking experience. There’s no comeback on these companies the NHS employ, patients are never asked for feedback so they get away with it and years, not months are wasted because there’s shch s gap between appointments. I may not be telling the ghe right people here but I don’t know where to go. Private, bespoke shoemakers charge upwards of two thousand pounds, obviously wigh no gaurantee kc success, it’s not an exact science. Ordinary people can’t afford that sort of money so what are people who really need comfortable footware suppossed to do? Any suggests/ recommendations? Thank yoh so much for reading this. Kind regards, Margot.
A lot of people are just getting into making their own shoes these days. It’s a nice hobby and so satisfying when you make something comfortable. And it gets a lot easier for your second, third pair etc.